V. Automated Testing on Android (Part 2)
1.Preface
By reading this tutorial, you will learn about:
- How to use Poco to test Android native apps?
Poco supports directly identifying the UI hierarchy of any Android native app (non-game engine, non-webview), and its usage is exactly the same as on other platforms.
Note: Webview-based applications are somewhat special (e.g., WeChat mini programs or browsers), see this article: How does Poco support testing on WebView.
2.Examples of Using Poco to Test Android Native Apps
1) View Android native controls in AirtestIDE's Poco window
After you select Android mode in Poco Assistant panel of AirtestIDE, it will start to install Pocoservice.apk and Pocoservice-test.apk to your phone automatically. Some phone models need to a manual click to confirm to proceed the installation.
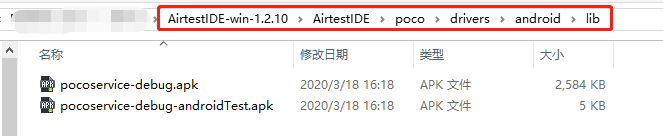
If the automatic installation fails, you can also find these two apk files in the unzipped folder of IDE and install them manually on the test device:
After installation, AirtestIDE will automatically start PocoService, which will regularly grab the hierarchy information of the interface on Android. You can see the UI hierarchy tree of the current interface in AirtestIDE after a while.
Click any node on the UI element tree and you will see all the attributes of the node in the log viewer panel, and a box will appear on the device screen with the corresponding location checked out, making it easier to locate the node.
Additionally, the Poco window provides 3 auxiliary features.
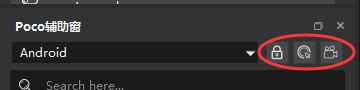 These features are as follows:
- Poco Pause: This for retrieving the controls with the current screen being locked. Click on the control to be retrieved, and you will see the details of the control in the log viewer window.
- Poco Inspector: This is for retrieving the control with the current screen being unlocked. The log viewer window will show the details of which control the mouse moves to. And the device screen will respond in real time when the mouse clicks the control.
- Poco Auto Recording: This is for automatic recording of Poco scripts. As the mouse performs click, swipe and other operations on the control, the corresponding script will be automatically generated in the script editor window.
If Pocoservice fails to start, it will cause repeated reinstallation of Pocoservice.apk. To fix this, you can check the following:
- Is the Android version is too low? Poco supports Android SDK API version greater than or equal to 19, i.e., Android 4.4 and above.
- Please turn off the web proxy connected to your PC or mobile phone, otherwise you may not be able to connect to Poco.
- You can try to uninstall the two Pocoservice-related APKs in your phone and reinstall them manually. You can find the two APKs in this directory: poco\poco\drivers\android\lib. For some vivo and oppo phones, you need to go to phone settings > input method settings and set the Yosemite input method as the default input method as well as the current input method
- In the check if the phone assistant has some restrictions on pocoservice.apk. For example, on a certain version of Huawei phone, you need to enable self-start and background activity, and on some of the OnePlus phones, you need to turn off the battery optimization of pocoservice.apk. For more details, please refer to this article FAQ about Android Connection.
- Pocoservice cannot be started at the same time as uiautomator, as they will conflict with each other.
- You can try restarting the phone to see if the problem is solved by itself.
2) An example using a calculator
Here is an example of writing code for a calculator application using Poco. Click here to download the sample app (calculator) and install it on your phone beforehand.
As mentioned earlier, after selecting Android in the dropdown menu of the Poco window, AirtestIDE will automatically launch Pocoservice, displaying the current UI control hierarchy tree. After that, you can write and record Poco statements in AirtestIDE.
3) Code example
The following code example will demonstrate a simple function: click the calculator interface to implements an arithmetic verification of 1+1=2.
# -*- encoding=utf8 -*-
__author__ = "AirtestProject"

from airtest.core.api import *

auto_setup(__file__)

from poco.drivers.android.uiautomation import AndroidUiautomationPoco
poco = AndroidUiautomationPoco()

poco('com.google.android.calculator:id/digit_1').click()
poco('com.google.android.calculator:id/op_add').click()
poco('com.google.android.calculator:id/digit_1').click()
poco('com.google.android.calculator:id/eq').click()

result = poco('com.google.android.calculator:id/formula').get_text()
assert_equal(result, '2', '1+1=2 ^^')
In this code, we initialize a poco object using poco = AndroidUiautomationPoco(). Then after clicking the 1 + 1 buttons separately, we easily get the value 2 of the result control using the get_text API and verify the result using Airtest's assertion statement.
This is a simple example. For more usage and examples of Poco, please see the poco tutorial.
3.Connecting Multiple Phones Simultaneously to Use Poco
In the multi-device collaboration section of the previous tutorial (IV. How to Perform Automated Testing on Android Phones-Part 1), we have showed you how to connect multiple Android phones in one script and switch between them using the set_current API:
from airtest.core.api import connect_device
dev1 = connect_device("Android://127.0.0.1:5037/serialno1") # Connect to the first phone
dev2 = connect_device("Android://127.0.0.1:5037/serialno2") # Connect to the second phone
set_current(1) # Switch to the second phone
If we want to use the Poco to obtain and click the controls on different phones after connecting to them, we need to initialize the two Poco separately, like this:
from airtest.core.api import connect_device
from poco.drivers.android.uiautomation import AndroidUiautomationPoco

dev1 = connect_device("Android://127.0.0.1:5037/serialno1") # Connect to the first phone
poco1 = AndroidUiautomationPoco(dev1)
dev2 = connect_device("Android://127.0.0.1:5037/serialno2") # Connect to the second phone
poco2 = AndroidUiautomationPoco(dev2)

set_current(1) # Switch to the second phone
poco2('com.google.android.calculator:id/digit_1').click()
Similarly, if you pass --device directly into the command line to connect to the phone instead of using the connect_device API, you do not need to execute connect_device in the code. In this case, you only need to obtain the device objects separately and use the device objects to initialize Poco:
from airtest.core.api import G
from poco.drivers.android.uiautomation import AndroidUiautomationPoco
print(G.DEVICE_LIST) # Suppose that there are currently 2 phones connected
poco1 = AndroidUiautomationPoco(G.DEVICE_LIST[0])
poco2 = AndroidUiautomationPoco(G.DEVICE_LIST[1])