Writing Scripts in AirtestIDE
I. Writing Scripts in AirtestIDE
1.Preparation
1) Install AirtestIDE on your computer
This article mainly explains how to write automation test scripts in the script editor window of AirtstIDE. Before that, we need to install AirtestIDE on the computer in advance and make sure that it can be opened and used normally. If there are any problems during the installation process, you can refer to the solutions in the "Crash and Error" section.
2) Learn some Python basics
AirtestIDE has two build-in automated testing frameworks, Airtest and Poco, both of which are third-party Python libraries. Therefore, writing scripts with AirtestIDE requires some basic knowledge of Python. If you are unfamiliar with Python syntax, there are many excellent Python tutorials available online, such as Liao Xuefeng's Python Tutorial for Beginners.
During script writing, Airtest and Poco can be used in combination according to your needs. You can also add other Python third-party libraries for even more powerful functionality.
But please note that a combined use of Airtest and Poco code does not mean that you can mix an Airtest image and a Poco statement in the same line of code. Please pay attention the different APIs and syntax of each library when writing your scripts. Before starting your script writing, you can read the tutorials on our official website to help you get started faster.
2.Create a New Script in AirtestIDE
1) Create an .air script
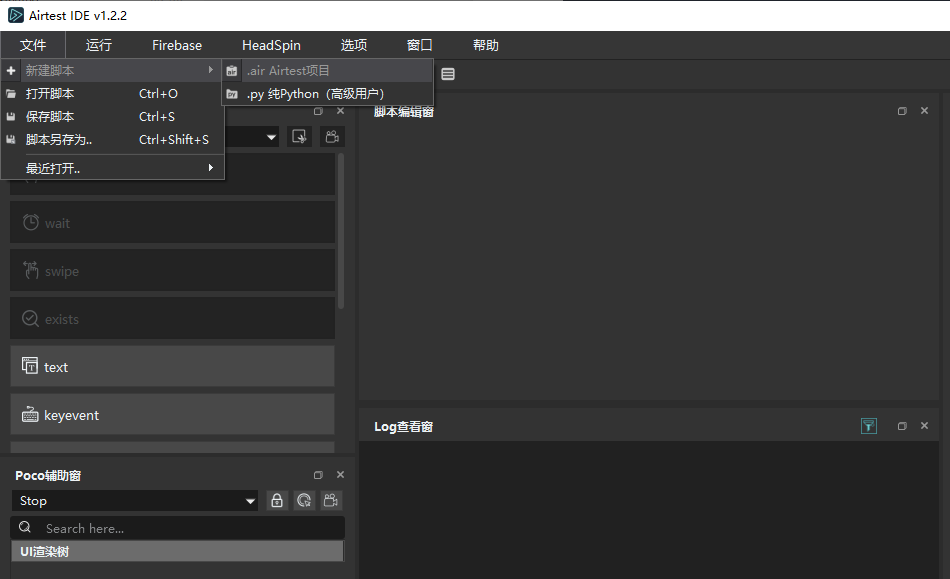
Start your IDE, click on the File button at the top left corner, select New Script, and choose .air Airtest Project to create a new .air script.
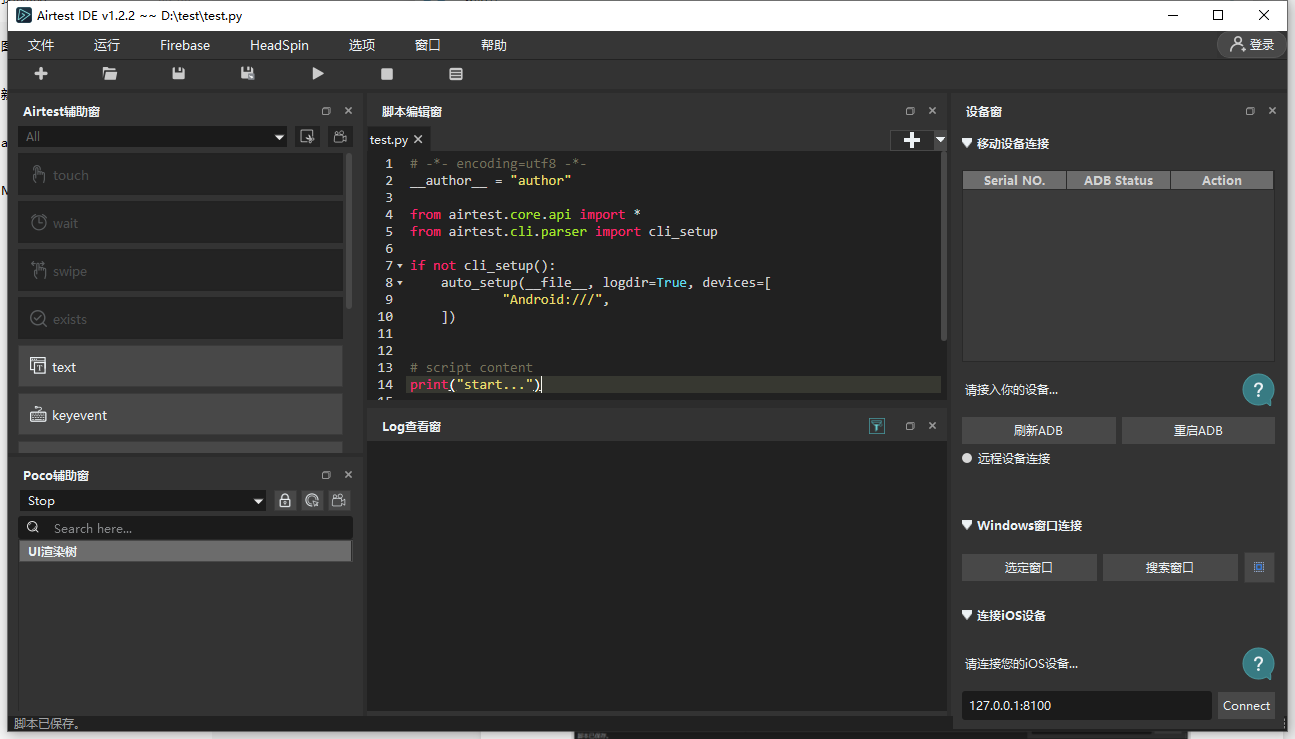
When a new .air script is successfully created, you can see the default initialization code.
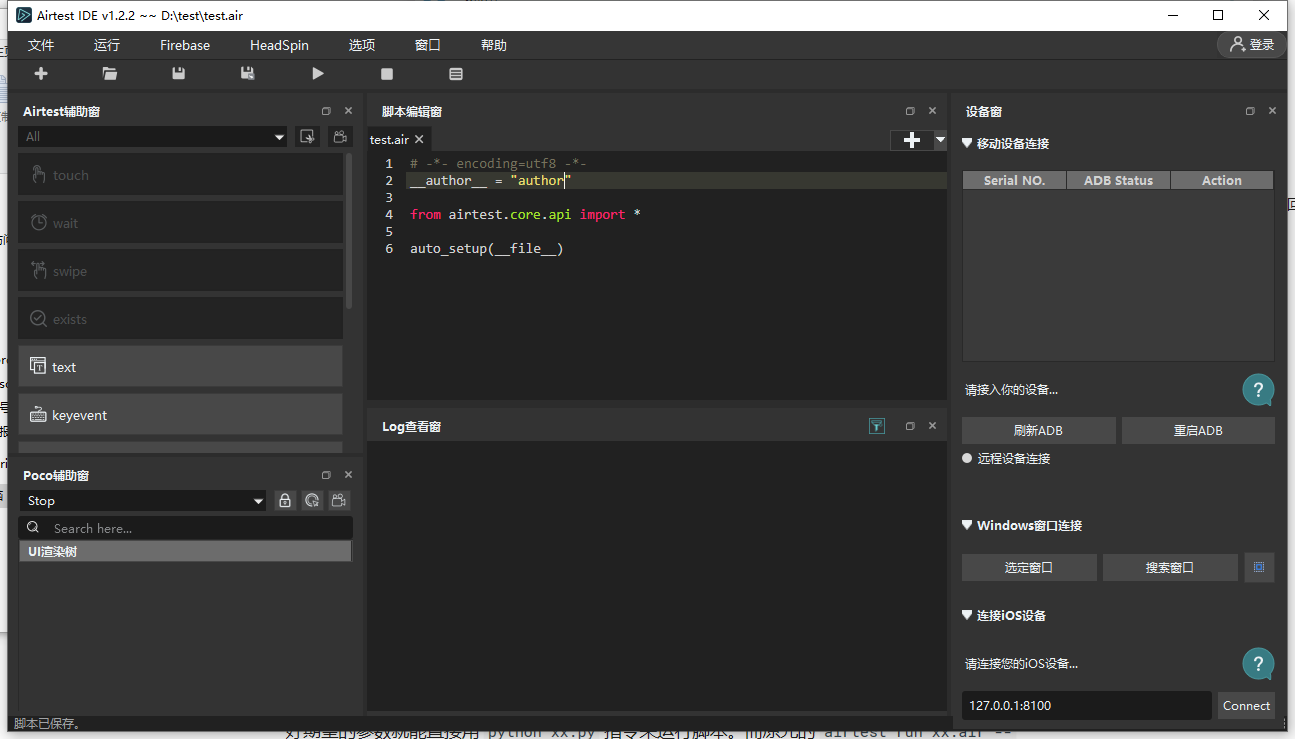
We highly recommend beginners to create .air scripts instead of .py, the pure Python script, because when running .air scripts in an IDE, it will automatically detect the device connected to the device screen panel, and automatically save log content, making it convenient for us to generate visual test reports with one click later. However, a newly created .py script will not automatically handle these for us. We need to configure them one by one when creating the pure Python script, or manually write them in the script, so that the script will run as expected and generate a test report. The initialization code of .air script helps us import various APIs of Airtest and automatically initialize the device. In fact, the .air script is a folder that contains a .py file with the same name as the .air file, as well as related image files. When running the script, Python is still used to call the .py file inside, because Airtest is essentially a third-party library of Python.
2) Create a .py Python script
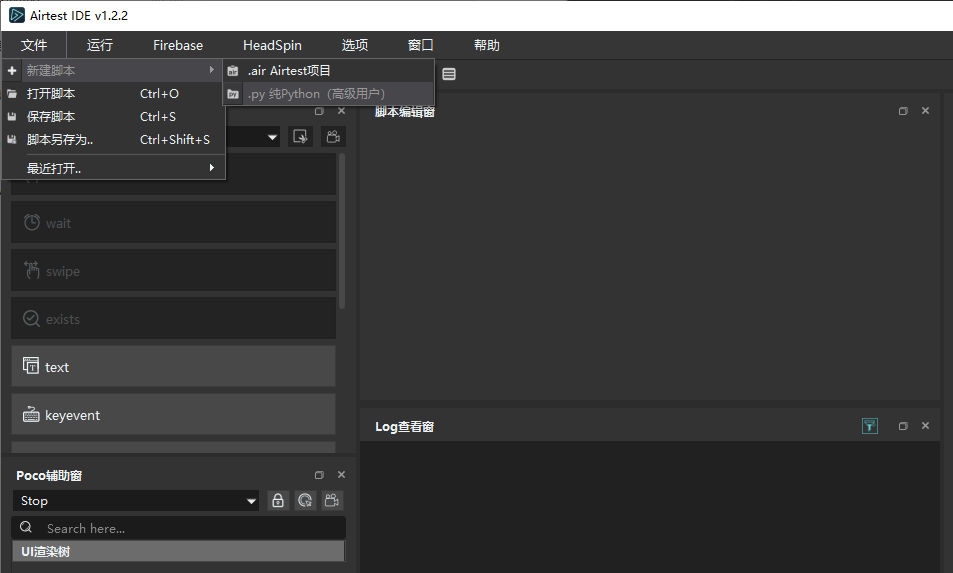
Click on "File" at the upper-left corner, then select "New Script" and choose ".py Pure Python (for advanced users)".
A settings window for the Python file will pop up afterwards.
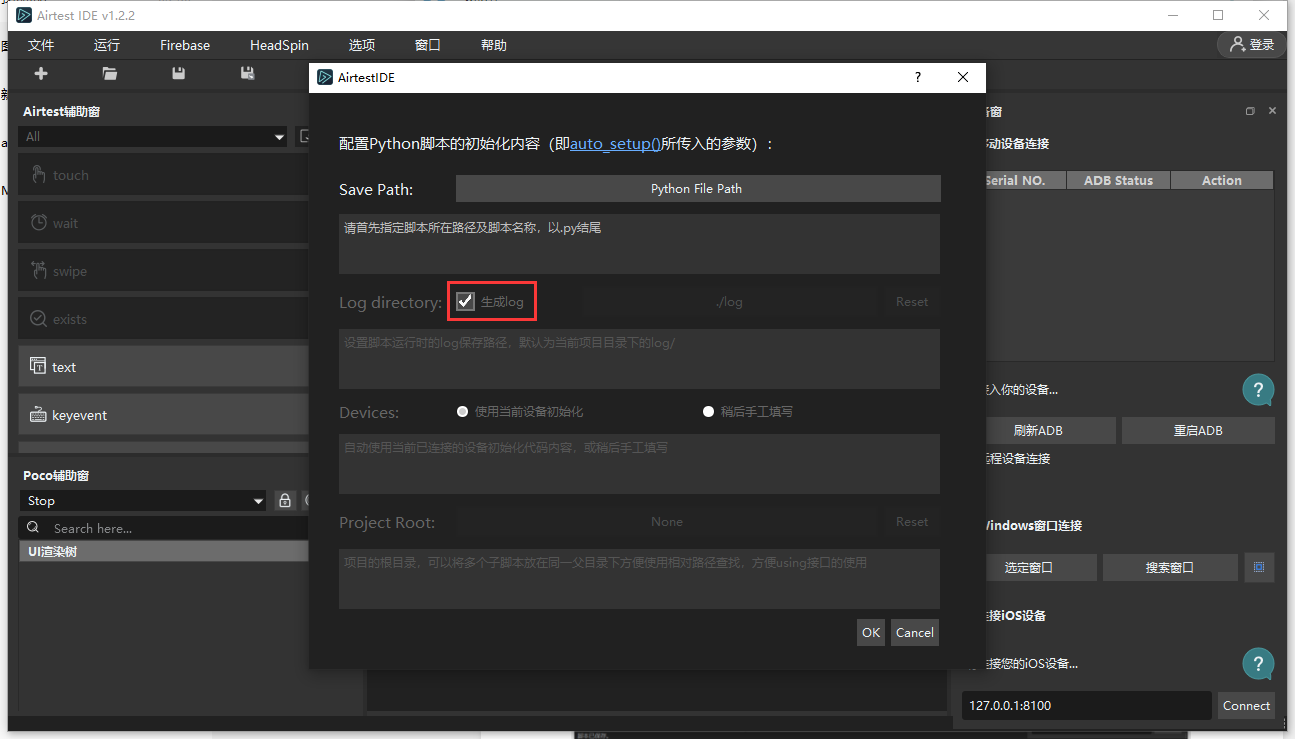
The configuration options include:
- Save Path: The path where files will be saved. This is a required field. You must choose a path before you can continue configuring other options.
- Log Directory: The path where logs are saved during script execution, defaulting to the log/ directory located in the same path as the .py file.
- Devices: You can choose to automatically initialize its parameter using the currently connected mobile device or fill it in later.
- Project Root: The parent directory of the project, for the future use of the using statement to import other subfolders under the same parent directory.
After configuring the necessary options, click on the OK button to automatically create a new template python file with the configuration you just set up. From there, you can write the script just like writing a normal .py file. Once your .py script is successfully created, you will also see some initialization code for the configuration.
The initialization code shown above says that when using python xxx.py to run this file without any command line arguments, the auto_setup API will automatically initialize the Airtest-related parameters. This allows for the direct execution of the script with the python xx.py command after you fill in the desired parameters when writing the py script. The original "airtest run xx.air --devices xx" is unaffected. As long as the script detects the presence of command line arguments, it will still prioritize using the command line parameters to initialize Airtest .
3.Write Scripts in AirtestIDE
Here we will demonstrate how to write automation scripts for the following frameworks by creating a new .air script in AirtestIDE. It is assumed that the device under test has been connected by default.
1) Write an Airtest script
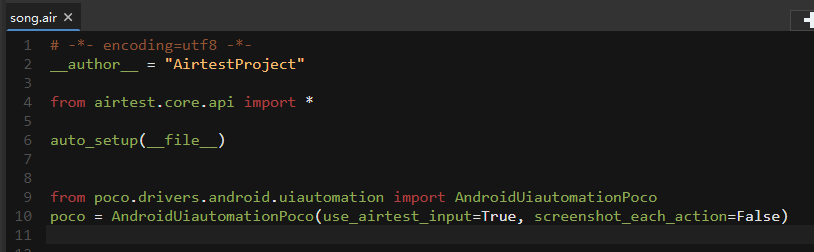
① Initialization of Airtest scripts
As mentioned earlier, when we create a new .air script in the IDE, it will automatically insert initialization code for us.
__author__ = "AirtestProject"

from airtest.core.api import *
auto_setup(__file__)
This code has already introduced the core API of Airtest, and auto_setup will help us handle some script initialization and connect to the device currently connected to the device screen panel, so we can start writing some commonly used Airtest APIs directly.
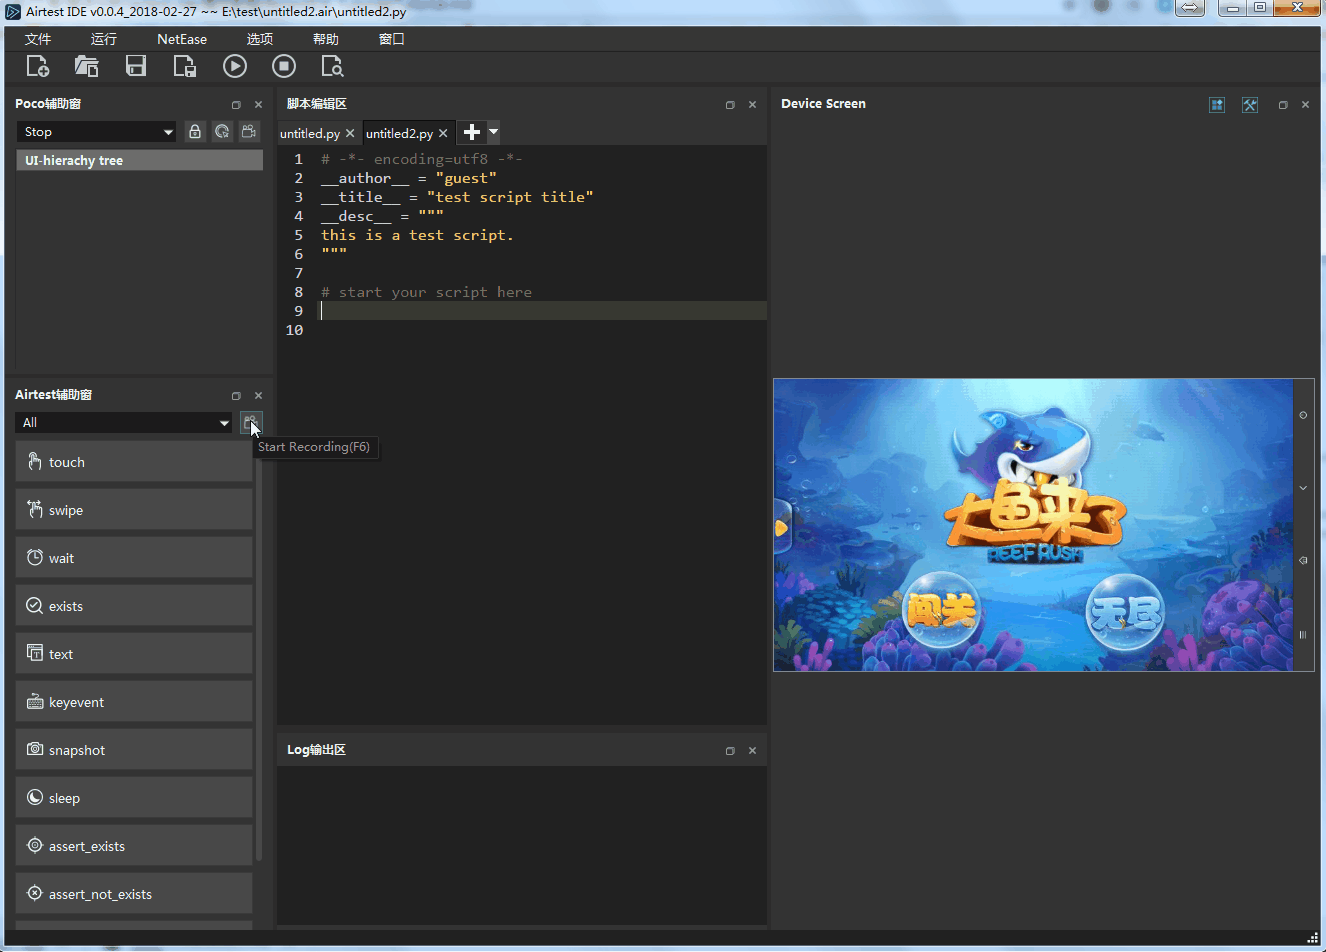
② Airtest's script recording feature
For those of you who have no idea of script writing, you can utilize the recording script function of the Airtest window to record the desired operations.
③ Other features of Airtest window
The recorded script is not always the correct/optimal script. Sometimes, the snapshots generated during script recording may not accurately playback the operations we want. In such cases, we can use other shortcut keys in the Airtest window to help us achieve more accurate and richer scripts.
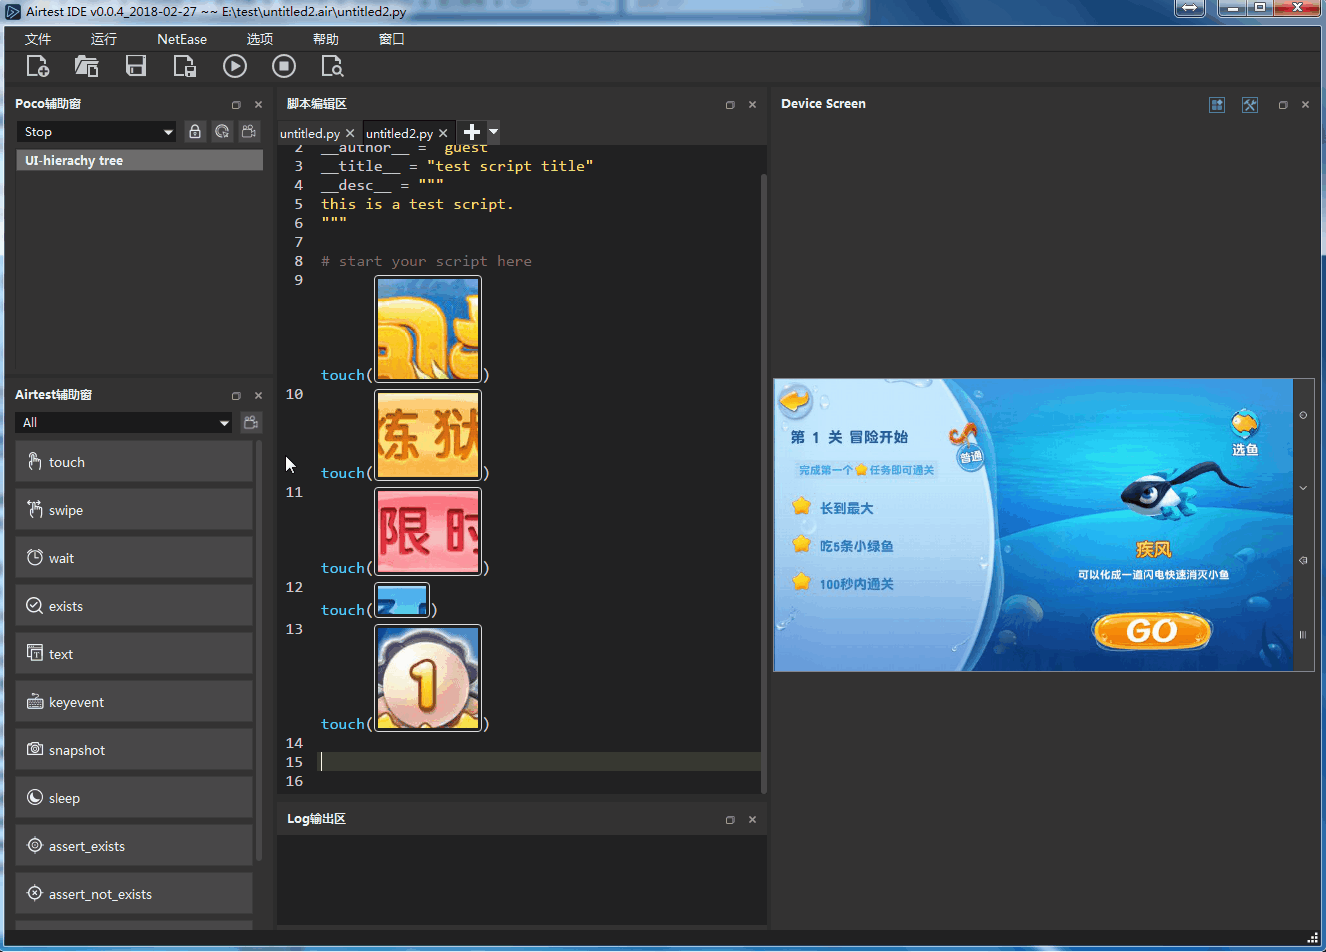
Note that the API shortcuts in the Airtest window are only available when the device screen panel in the IDE is connected to the device. Otherwise, they will be grayed out and unavailable. (For instructions on how to connect the device to AirtestIDE, please refer to the "Device Connection" section.) Here are some of the core API shortcuts: - Click: touch - Swipe: swipe - Wait for the snapshot to appear: sleep - A certain snapshot exists: exists - Input text: text - Keyword operation: keyevent. - Capture the screen: snapshot - Wait: sleep - Assertion: assert_exists, assert_not_exists, assert_equal, assert_not_equal
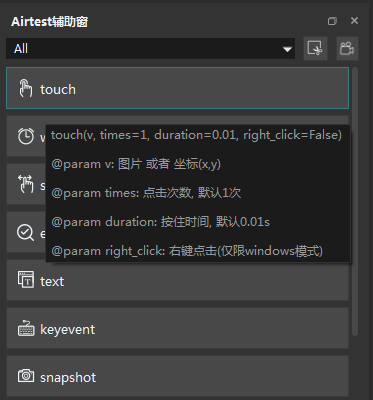
Before using the API shortcut button provided by the Airtest window, you can get more information by moving the mouse over the buttons to view the common parameters and return value for each API.
④ Official Airtest API documentation
When you need to implement more features and write more complex Airtest scripts, you can refer to the official documentation of Airtest APIs to find the API you need.
2) Write a Poco script
① Initialization of Poco scripts
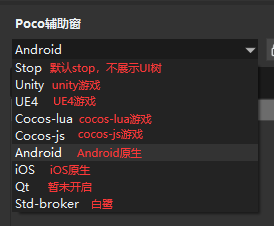
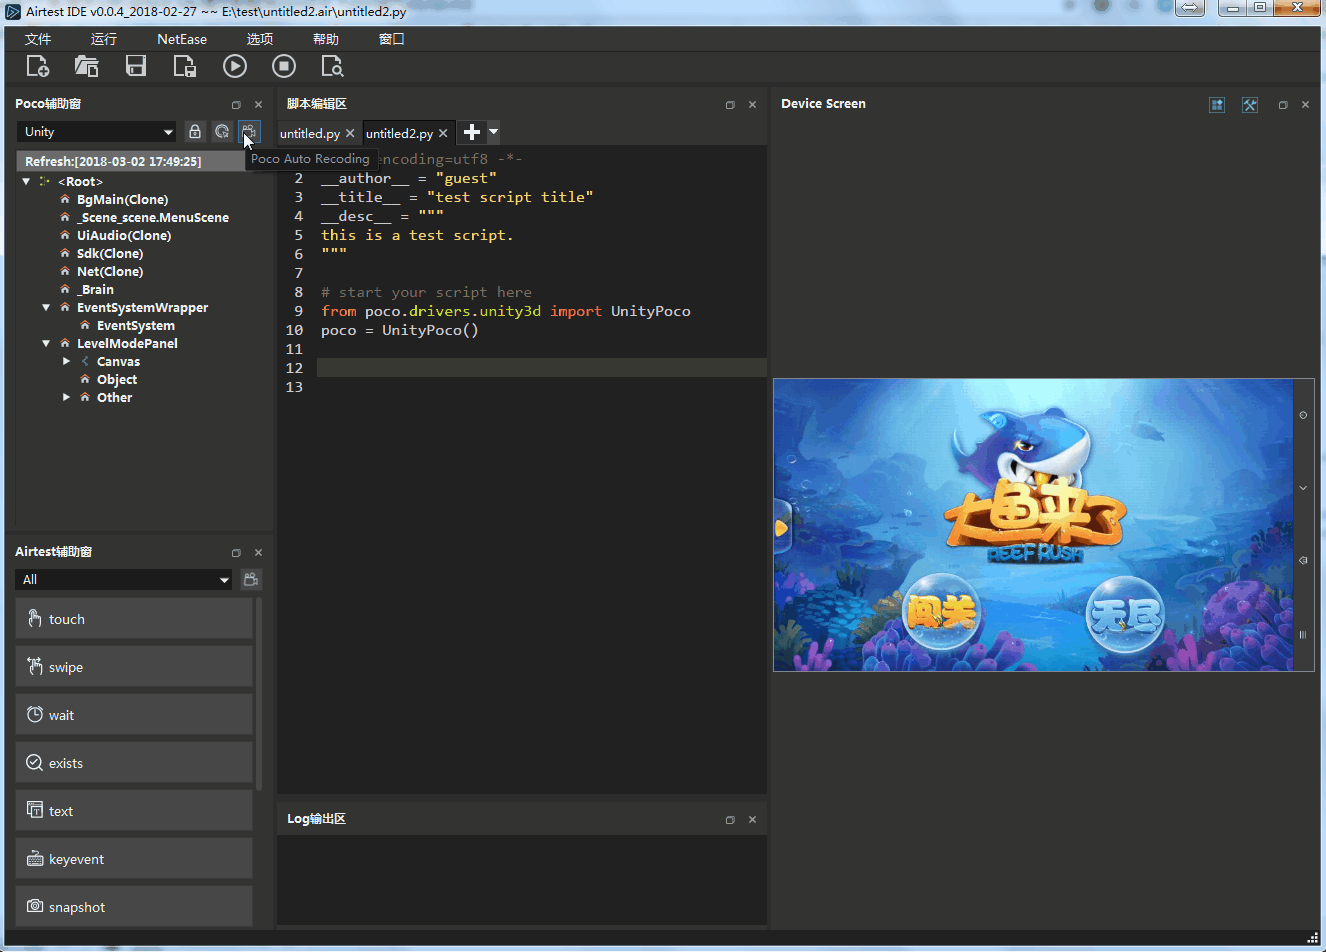
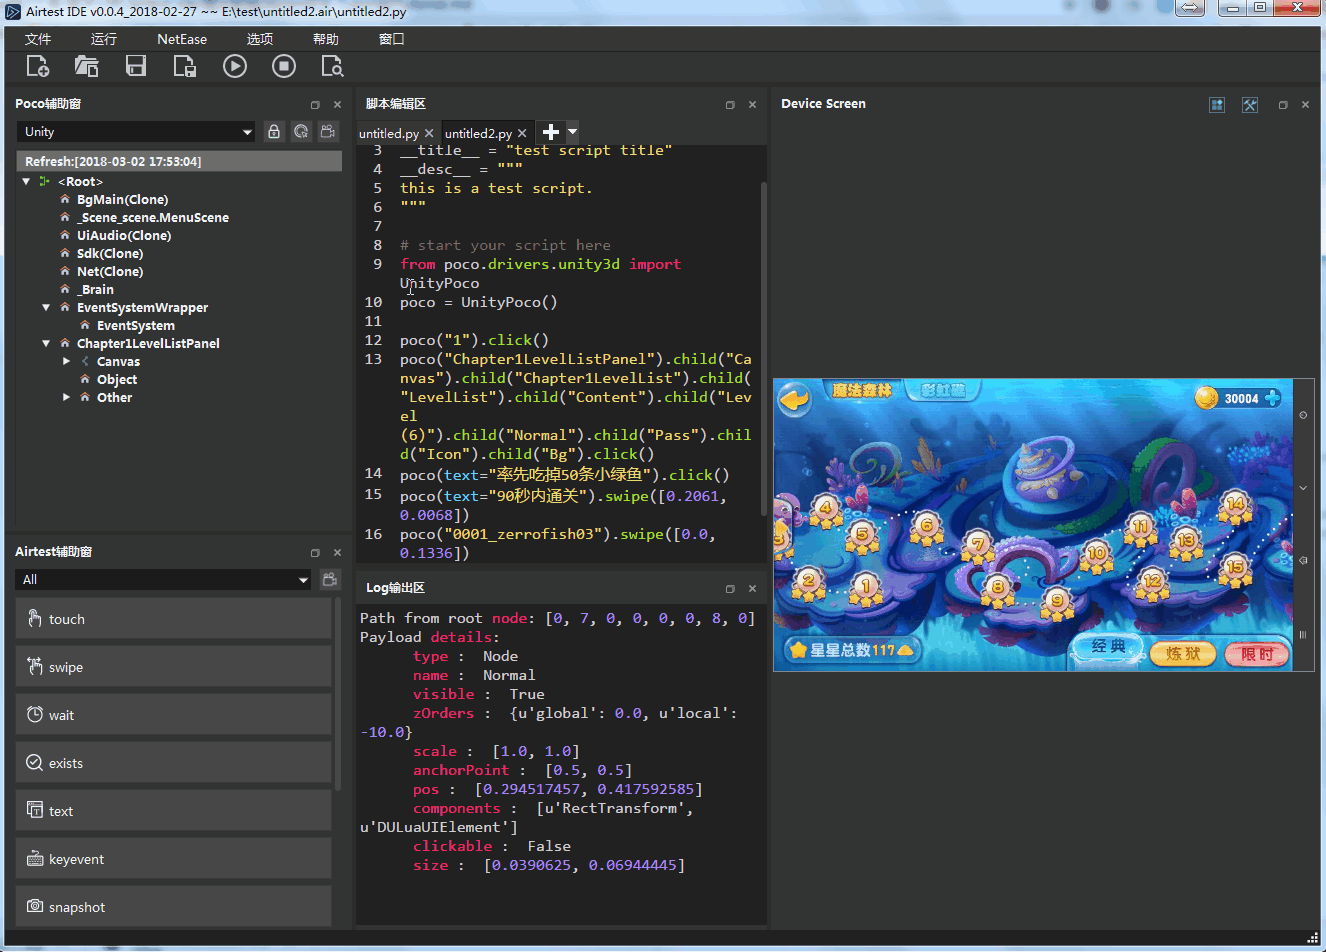
To write a poco script on the IDE, we first need to select the corresponding poco mode in the IDE's Poco window, wait to refresh the control tree of the device/application to be tested, and then find the target control in the tree structure, and locate and operate it.
After selecting the corresponding Poco mode in the Poco window, a bright yellow prompt will appear above the script editor window in the IDE, asking us whether to insert Poco's initialization script. If you select Yes, it will automatically insert Poco's initialization statement:

Selecting the Android mode here indicates that we want to view the tree structure of the native Android controls or of native Android apps. Other modes correspond to different Poco modes for different projects.
② Solutions to failed UI element tree loading
If the UI tree still fail to be loaded after a few seconds of selecting the corresponding mode in the Poco window, here are some solutions: Identify if the application to be tested is a native Android/iOS app. For non-native apps, Poco-SDK must be integrated to view the UI element tree. For example, game projects using various engine rendering need to be integrated with Poco-SDK. Check if the two APKs related to Poco initialization (pocoservice-debug.apk and pocoservice-debug-androidTest.apk) have been automatically installed on the phone. If not, install them manually. Install Yosemite input method and set it as the default. Additional settings are required for some phone brands. Please refer to the Device Connection section for details. !!! Warning "Note" For version 1.2.12 of the IDE, only one pocoservice.apk (version pocoui1.0.84) needs to be installed. After installing this pocoservice.apk, pocoui in the operating environment also needs to be updated to the latest version 1.0.84.
③ Poco's script recording feature
After refreshing the control tree, we can manually write scripts with the aid of the control tree or record automation scripts with one click using the recording function of the auxiliary window. (This demonstration shows the script recording of Unity game applications that have already integrated Poco-SDK.)
④ Poco's control searching feature
Similar to the script recording function of Airtest, this function of Poco may not produce optimal scripts. We can also make use of the control search function of the Poco window to accurately locate and view the detailed properties of each control, so that we can write scripts for locating and operating controls.
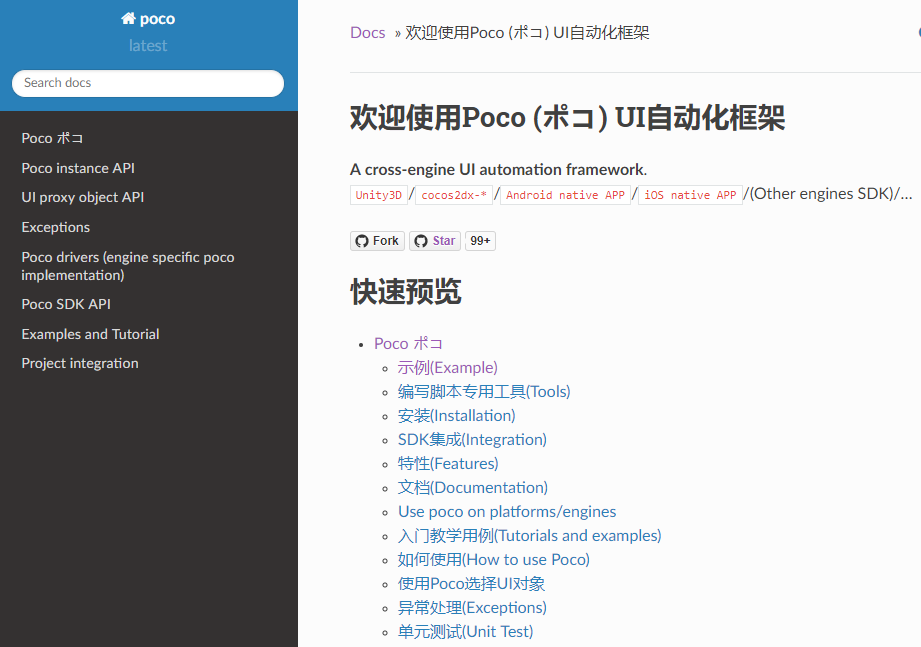
⑤ Official Poco API documentation
In the official Poco API documentation, we can search for more Poco APIs and learn more about integrating Poco-SDK for various platforms.
3) Write an Airtest-Selenium script
① Initialization of Airtest-Selenium
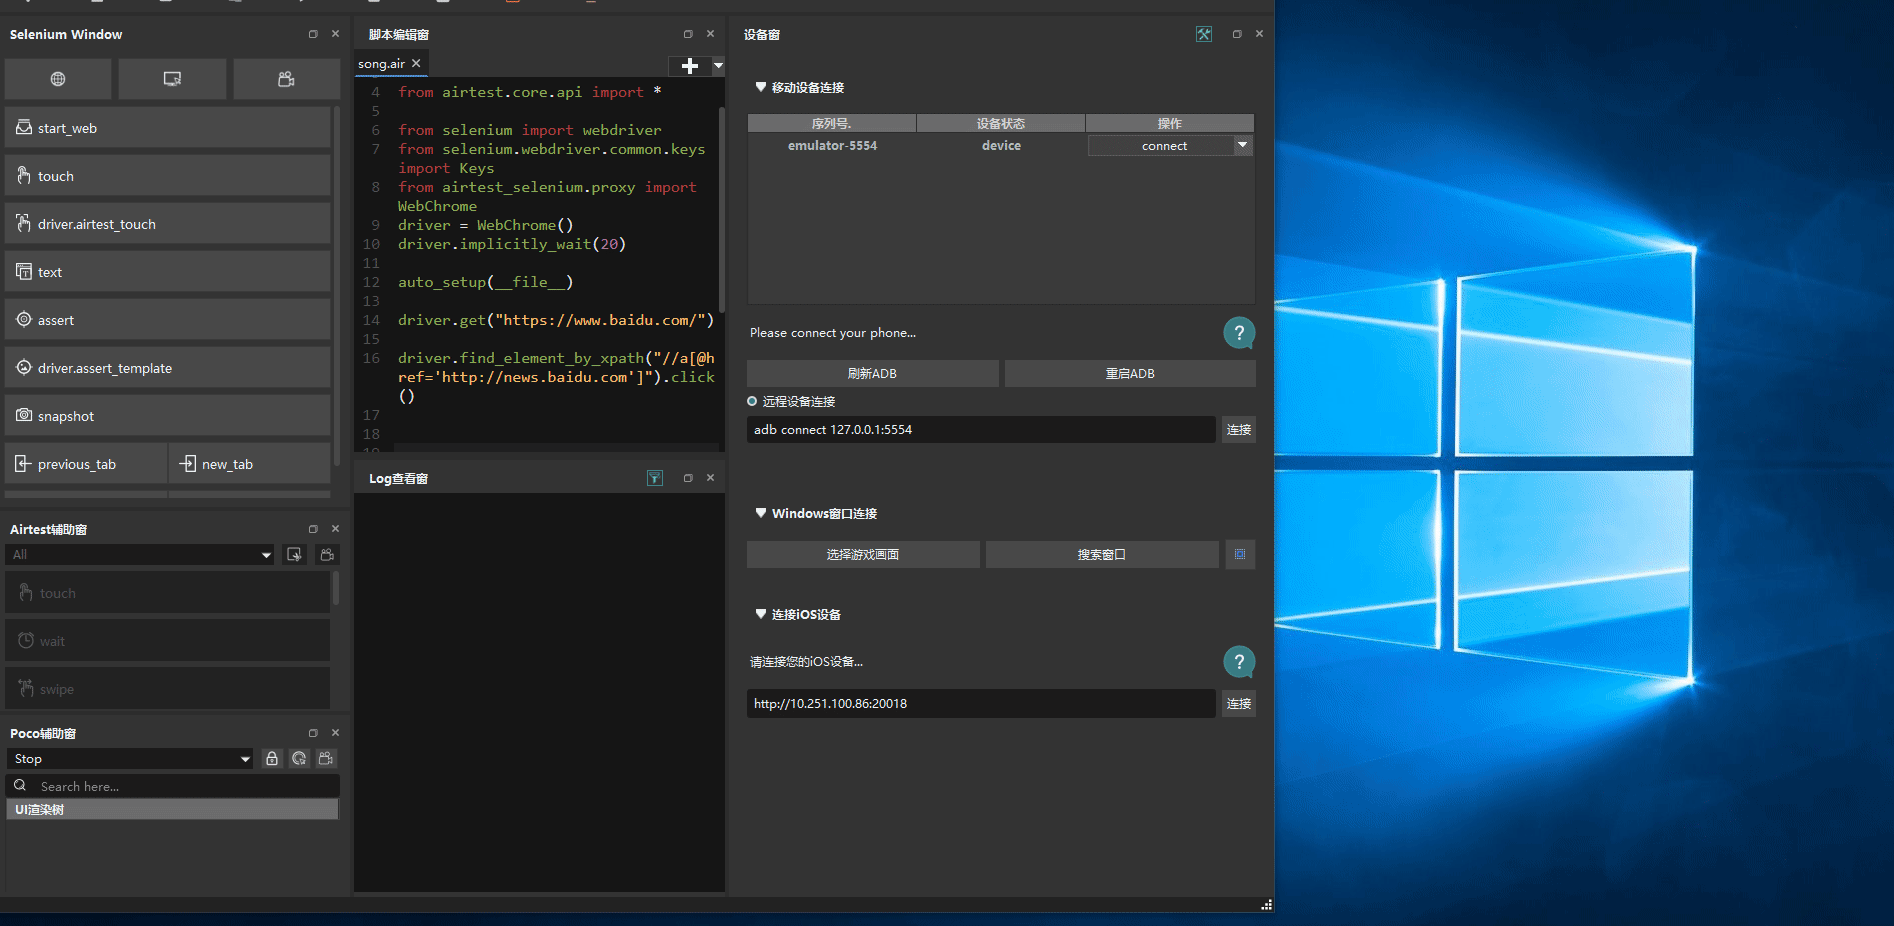
In the section on device connection, we have detailed in the article "Connecting via Browser" how to connect Chrome browser in AirtestIDE. We also introduced a button in the selenium window that helps us quickly insert initialization code and open one Chrome browser.

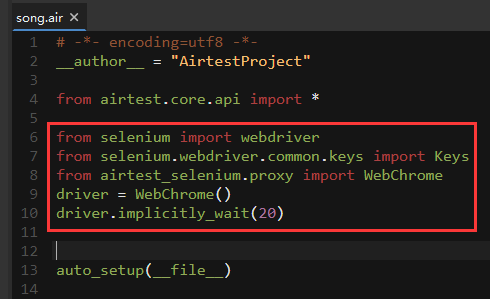
This code creates a WebChrome instance of Airtest-Selenium. After running this initialization code, a Chrome browser will be opened.
② Record Airtest-Selenium scripts
After opening a Chrome browser using the initialization button in Selenium window, we can use the recording function to help generate a selenium script.
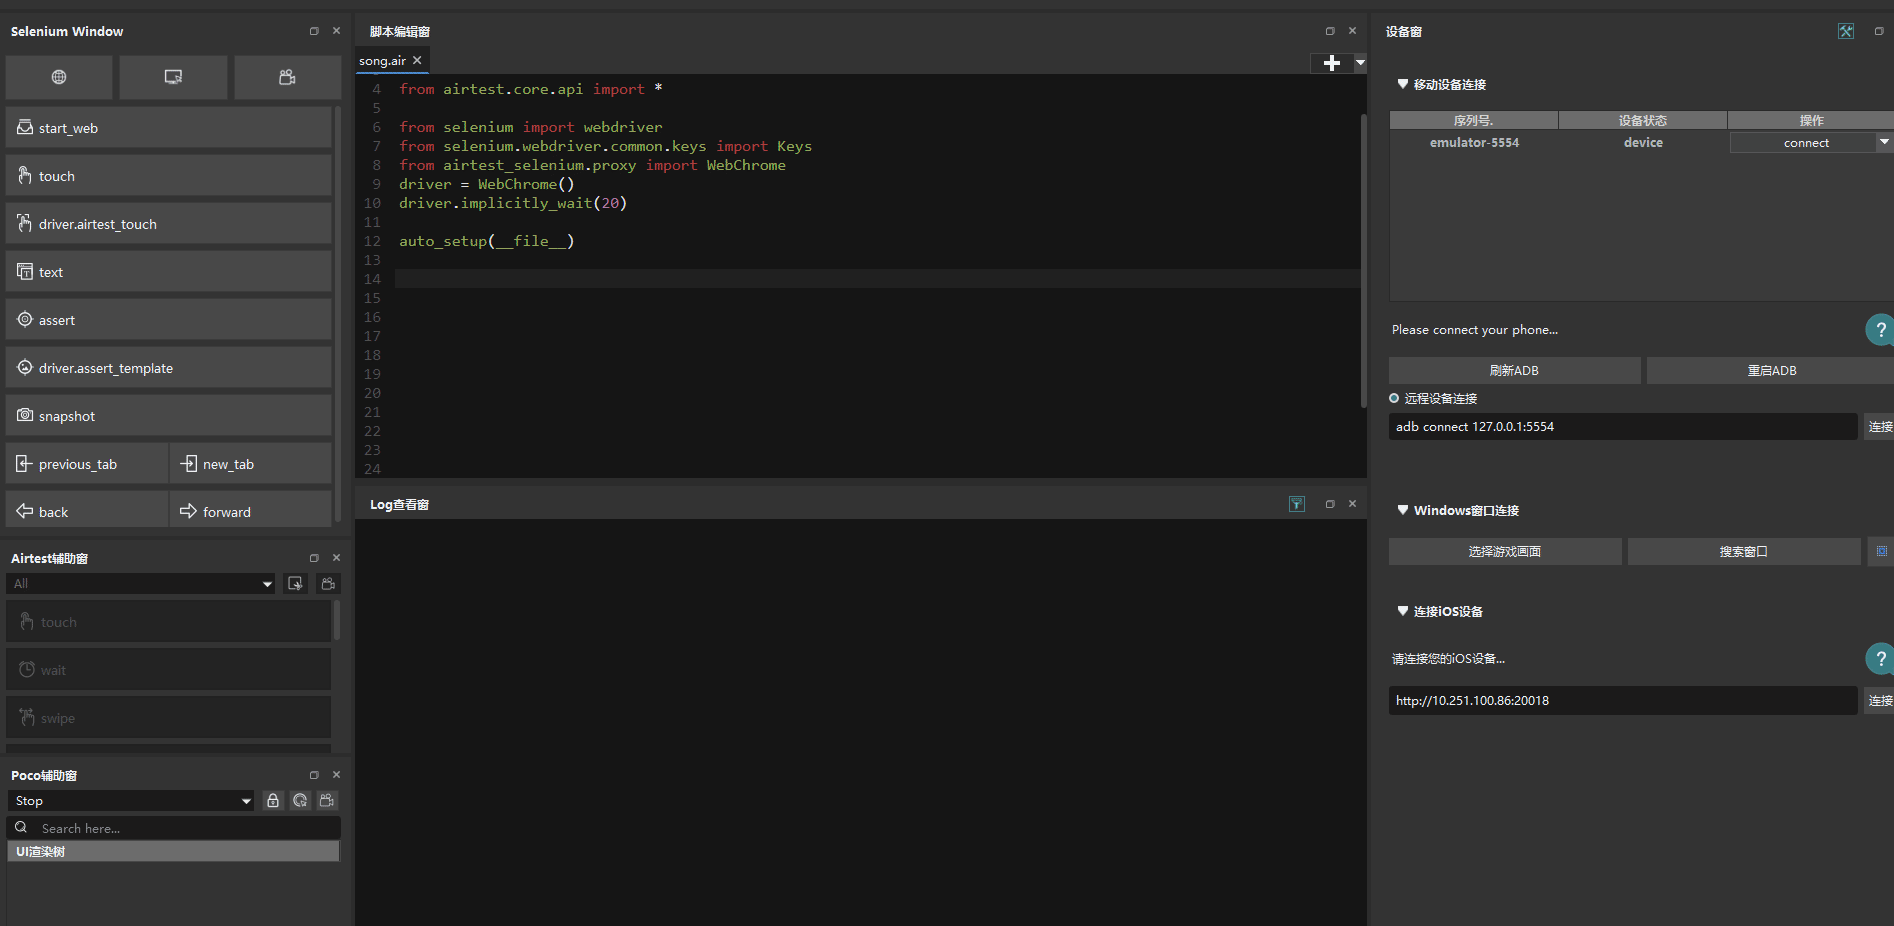
③ Auxiliary features of the Selenium window
Alternatively, we can use the shortcut key of the auxiliary window to help us write Airtest-Selenium/Selenium scripts.
4.Common Issues with Writing Scripts in AirtestIDE
1) File exception recovery
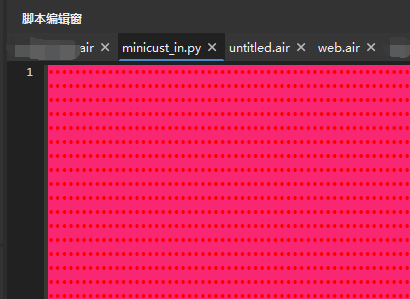
If one day you open the scripts and find that all of them have turned into red dots (script exception caused by unknown errors):
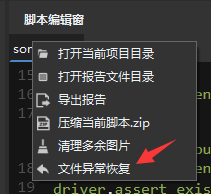
You can try to turn to scripts back to its normal state by right-clicking on the script name in the script editor window and selecting "File Exception Recovery".
2) Remove redundant images
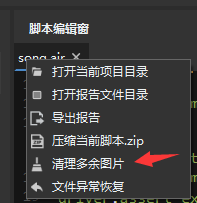
When writing Airtest image scripts in the IDE, we may repeatedly capture a certain target until we meet the requirements of our script. However, when repeatedly taking snapshots and deleting them in the script editor window, the snapshot files are saved to the.air script folder every time. We can right-click on the script name and select "Remove Redundant Images" to help us delete the snapshots that are no longer needed in the script with just a keystroke.
In this way, we don't need to go through each snapshot in the folder to identify those no longer needed and delete them.
3) Quick comment and uncomment
In the IDE script editor window, select one or multiple lines of script, then press the Ctrl+/ key to quickly comment the script. Similarly, select one or multiple lines of commented script, and press the ctrl+/ key again to quickly uncomment it.
4) Quick indentation and unindentation
In the script editor window of the IDE, select one or multiple lines of script, and press the Tab key to quickly indent. Press Tab multiple times to indent multiple times. Select one or multiple lines of script and press the Shift+Tab keys to quickly remove indentation. To remove multiple indentations, press the Shift+Tab keys multiple times.
5) Indentation abnormality/failure to indent code
Sometimes when writing scripts in the IDE, you may find the indentation of the scripts in the editor window messy and hard to read. Or when using the Tab key for indentation, you may encounter wrong indentation. This is actually caused by the small size of the script editor window, where the script is too long for one line and is broken into two lines, but the formatting is not standardized. In this case, you can copy the code to editors such as PyCharm or Note++, modify the indentation, and then copy it back to the IDE. Later, we will try to improve the indentation in the editing window.
6) Automatic script saving and cache file recovery
When writing scripts, we highly recommend utilizing version control software to manage your scripts, as this can help prevent script loss and issues with collaboration among multiple people. When writing scripts in AirtestIDE, the scripts in the editor window will be automatically saved every 30 seconds in case you forget to save them. In extreme cases such as computer blue screen or crash, the script editor window may display incorrectly, causing the loss of the scripts. To solve it, we have added a script cache recovery function. Whenever you manually select to save or run the script, the current file is considered a complete script file, so a pure text copy of the script will be automatically saved in the system cache directory. If you need to retrieve a previously saved script due to an abnormal situation, you can right-click on the script title:
Then a box will pop up with 3 options to choose from:
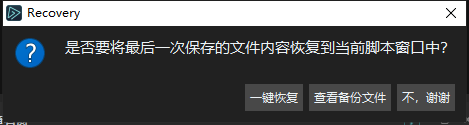
The leftmost button is for one-click automatic recovery, which can restore the content of the most recent cache file to the script editor window. The middle button is for opening the cache folder where you can find some text files with naming rules that replace symbols such as: \/ in the script file path with % and end with a timestamp. You can find the corresponding cache file name of the file being edited and open it with a text editor to see the automatically saved content.
7) Script loss in MacOS
When you use AirtestIDE for the first time, it will automatically create an empty script in the system temp directory to help you familiarize yourself with the software and get started with writing scripts. Please try not to save your scripts in system directories or directories without read or write permissions. If you are using MacOS, do not save your scripts in the AirtestIDE.app directory (e.g., /Applications/AirtestIDE.app/Contents/MacOS), as this directory will be overwritten, causing your scripts to be lost when you reinstall the application.
Please make sure to choose a suitable directory with access permissions to store your scripts.