IV. Core APIs of Poco Controls
1.Preface
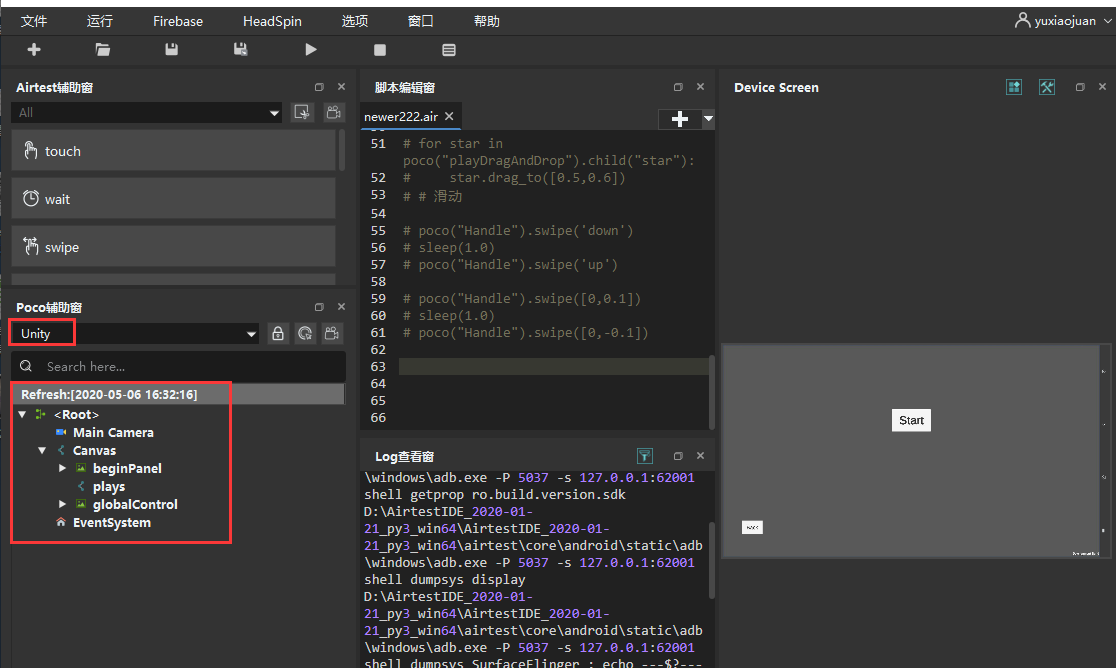
This article will use the Android game demo on the official website as an example. Here is the download link. After downloading the "demo game android", install it on the Android device to be tested and launch the game. Then, connect the device to the IDE and select the Unity mode in the Poco window. Once the UI element tree is displayed, you can start the testing.
By reading this article, you will learn about the following core API functions for Poco controls:
- Click operation
- Swipe operation
- Read and set control properties
- Check if an element exists
- Drag operation
- Internal offset and external offset (focus)
- Waiting event
2.Click Operation of Controls
Currently, the supported click operations for Poco controls include single click and long click, while double-click and right-click are not supported yet.
# Single click on the control
poco("star_single").click()

# Long click on the control
poco('star_single').long_click()
For details on click() and long_click(), please refer to this link: https://poco.readthedocs.io/zh_CN/latest/source/poco.drivers.std.inputs.html?highlight=click#poco.drivers.std.inputs.StdInput.click.
!!! Warning "Double-click and right-click on Poco controls" Currently, both the double_click() and rclick() methods of Poco controls are not implemented. When they are used, you will receive an error prompt: NotImplementedError.
3.Swipe Operation of Controls
Poco supports swiping on controls. To do this, we need to first locate the control and then specify the direction for the swipe:
# -*- encoding=utf8 -*-
__author__ = "AirtestProject"
from airtest.core.api import *
auto_setup(__file__)
from poco.drivers.unity3d import UnityPoco
poco = UnityPoco()
# Swipe down 0.2 unit of distance
poco("Handle").swipe([0,0.2])
sleep(1.0)
# Swipe up 0.2 unit of distance
poco("Handle").swipe([0,-0.2])
sleep(1.0)
# Swipe down 0.1 unit of distance
poco("Handle").swipe("down")
sleep(1.0)
# Swipe up 0.1 unit of distance
poco("Handle").swipe("up")
sleep(1.0)
For details on the API for swiping controls (swipe), please refer to this link: https://poco.readthedocs.io/zh_CN/latest/source/poco.proxy.html#poco.proxy.UIObjectProxy.swipe.
4.Reading and Setting Control Attributes
1) Reading control attributes
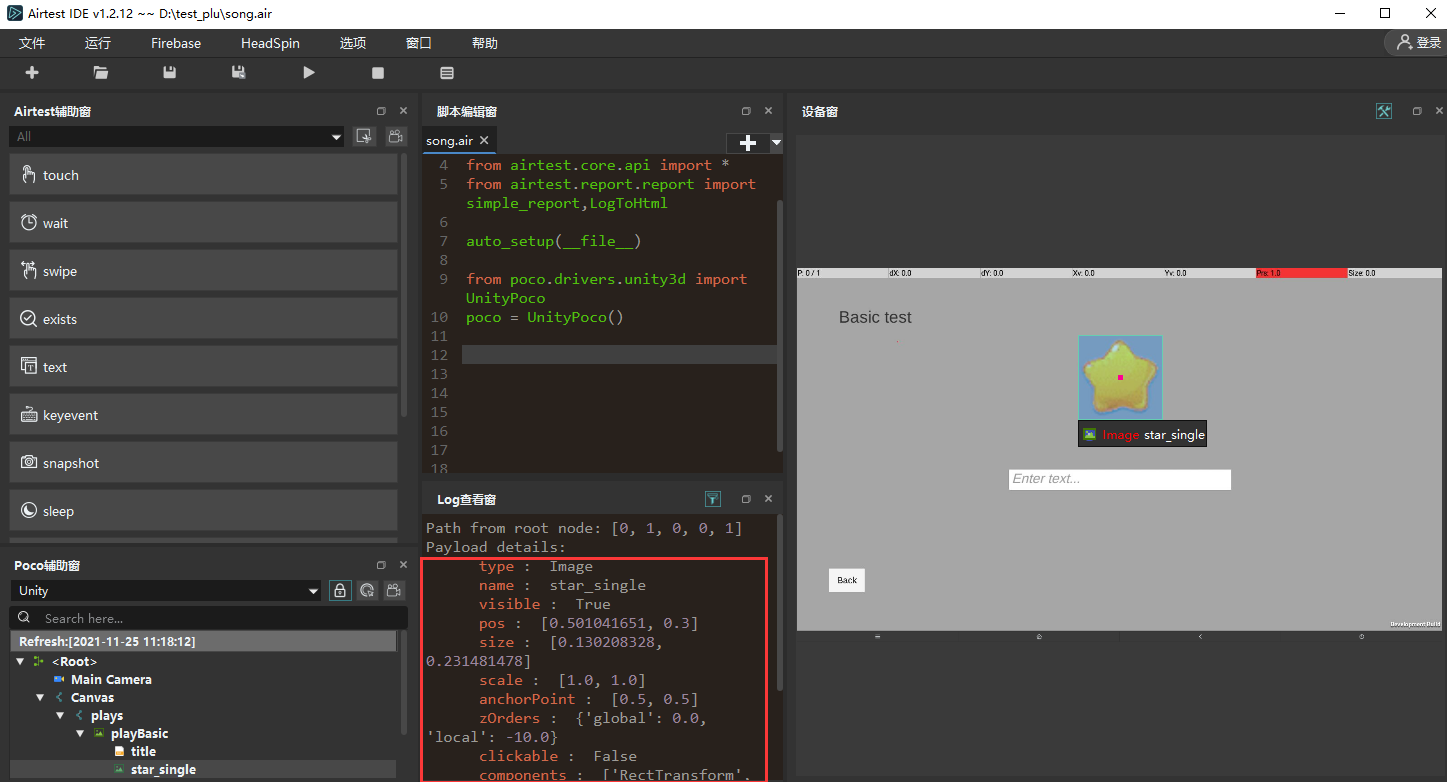
The control attributes retrieved in the Poco window in IDE can be read through the attr API:
#-*- encoding=utf8 -*-
__author__ = "AirtestProject"
from airtest.core.api import *
auto_setup(__file__)
from poco.drivers.unity3d import UnityPoco
poco = UnityPoco()
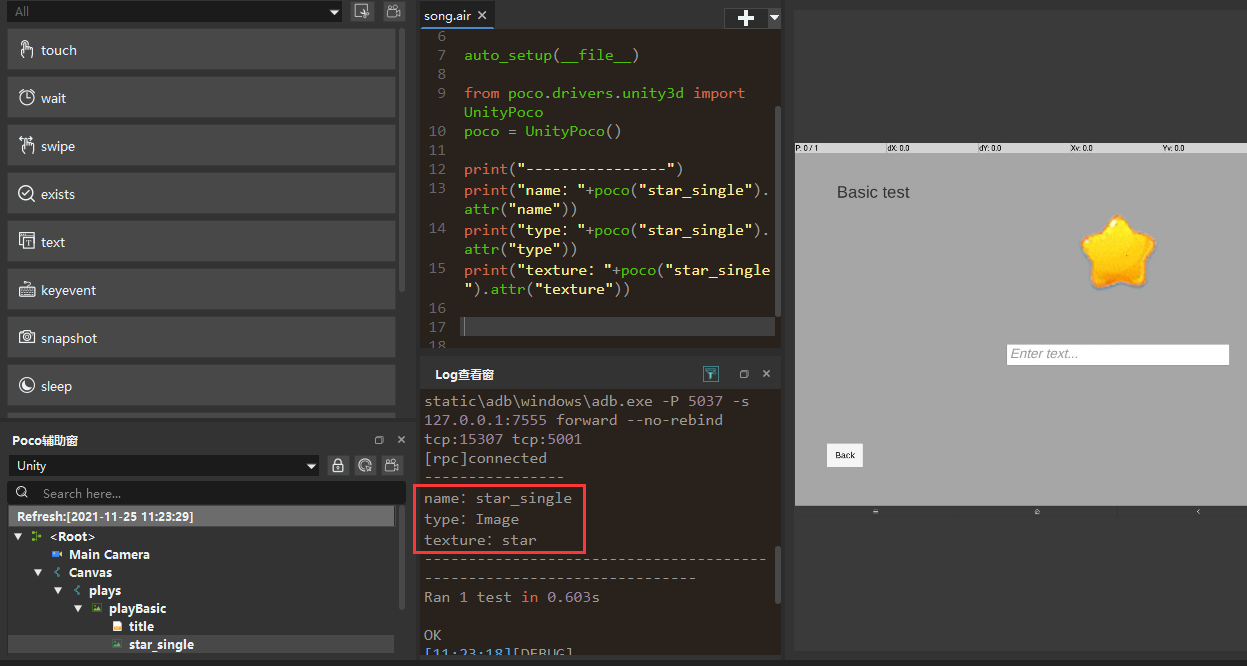
print("----------------")
print("name:"+poco("star_single").attr("name"))
print("type:"+poco("star_single").attr("type"))
print("texture:"+poco("star_single").attr("texture"))
For more details on attr, please refer to this link: https://poco.readthedocs.io/en/latest/source/poco.proxy.html#poco.proxy.UIObjectProxy.attr. In addition, Poco also supports using specific APIs to obtain the value of a certain attribute of a control:
- Get the name attribute of a control:
get_name. - Get the text attribute of a control:
get_text. - Get the position attribute of a control:
get_position. - Get the size attribute of a control:
get_size - ...
# -*- encoding=utf8 -*-
__author__ = "AirtestProject"
from airtest.core.api import *
auto_setup(__file__)
from poco.drivers.unity3d import UnityPoco
poco = UnityPoco()
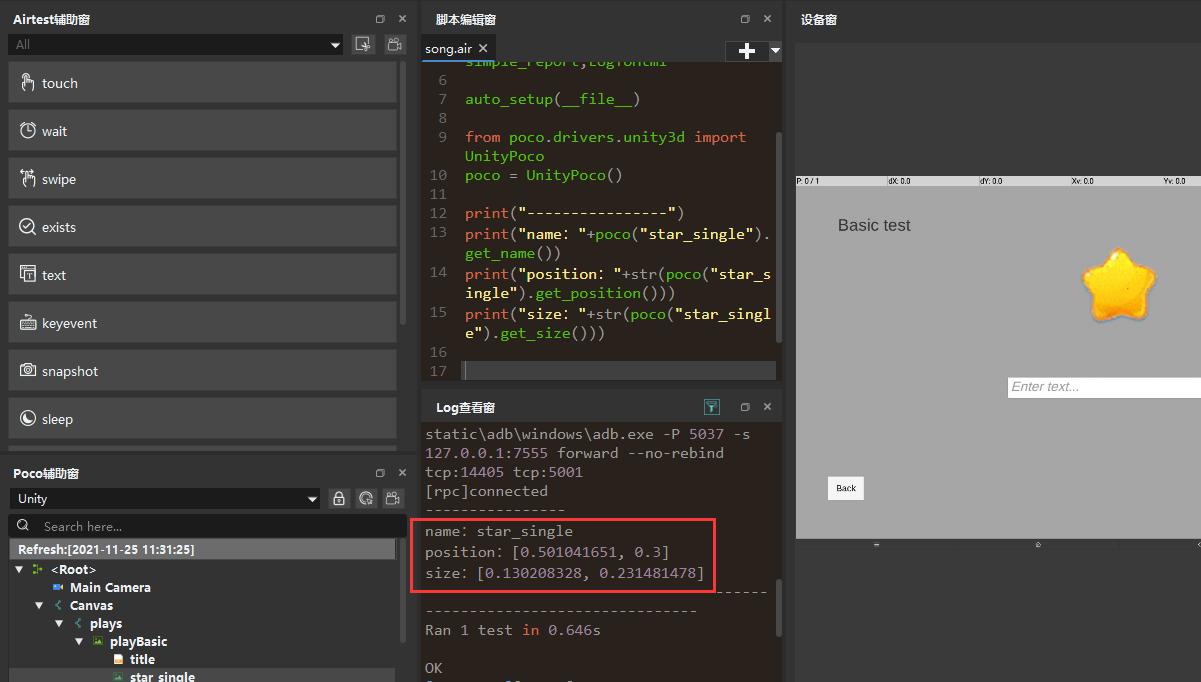
print("----------------")
print("name:"+poco("star_single").get_name())
print("position:"+str(poco("star_single").get_position()))
print("size:"+str(poco("star_single").get_size()))
For details about this type of API, please refer to the following link: https://poco.readthedocs.io/zh_CN/latest/source/poco.proxy.html?highlight=get_#poco.proxy.UIObjectProxy.get_name.
2) Setting control attributes
In most cases where we need to set element attributes, such as setting the text attribute of a rectangle (text box), we can use either the set_text() method or the setattr() method:
# -*- encoding=utf8 -*-
__author__ = "AirtestProject"
from airtest.core.api import *
auto_setup(__file__)
from poco.drivers.unity3d import UnityPoco
poco = UnityPoco()
# First activate the input cursor
poco("pos_input").click()
# Then perform the input operation
poco("pos_input").set_text("123")
sleep(1.0)
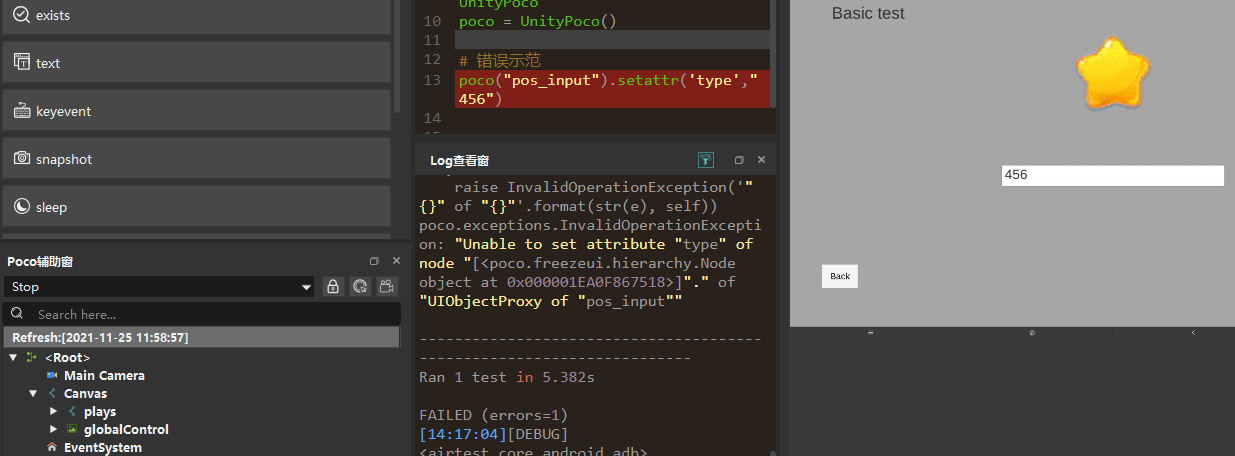
poco("pos_input").setattr('text',"456")
The API details for these two methods can be found from this link: https://poco.readthedocs.io/en/latest/source/poco.proxy.html?highlight=set#poco.proxy.UIObjectProxy.set_text.
However, if you try to forcibly set an unmodifiable element attribute, an error of InvalidOperationException will occur.
5.Checking if a Control Exists
To determine whether a control exists, we can use the exists() method, which returns a boolean value for many practical uses.
1) If the control exists, then xx; if not, then yy.
The most common application of this API is to click the control if it exists, otherwise perform other operations such as printing a message indicating that the control does not exist:
if poco("star_single").exists():
 poco("star_single").click()
else:
 print("Star control not found")
Differentiating between exists methods of Poco and Airtest
Both Poco and Airtest frameworks have an exists method, but we need to differentiate their usage. Airtest's exists is for determining the existence of an image, exists(image); while Poco's exists is for determining the existence of a control, poco(xxx).exists().
2) Assert a control exists
By utilizing the boolean value returned by the control, we can cleverly combine it with Airtest's equals assertion to assert the existence of the control:
assert_equal(poco("star_single").exists(),True,"Assert the star control exists")
For details on the exists method, please refer to this link: https://poco.readthedocs.io/zh_CN/latest/source/poco.proxy.html?highlight=exists#poco.proxy.UIObjectProxy.exists.
6.Drag Operation of Controls
The drag_to() method of the control can have either an element control or a fixed relative coordinate as its end point.
# Drag a control to another control
poco("playDragAndDrop").child("star")[0].drag_to(poco("shell"))

# Drag a control onto the fixed target
poco("playDragAndDrop").child("star")[1].drag_to([0.503, 0.705])
For details on the drag_to API, please refer to this link: https://poco.readthedocs.io/zh_CN/latest/source/poco.proxy.html#poco.proxy.UIObjectProxy.drag_to.
7.Internal and External Offset of Controls
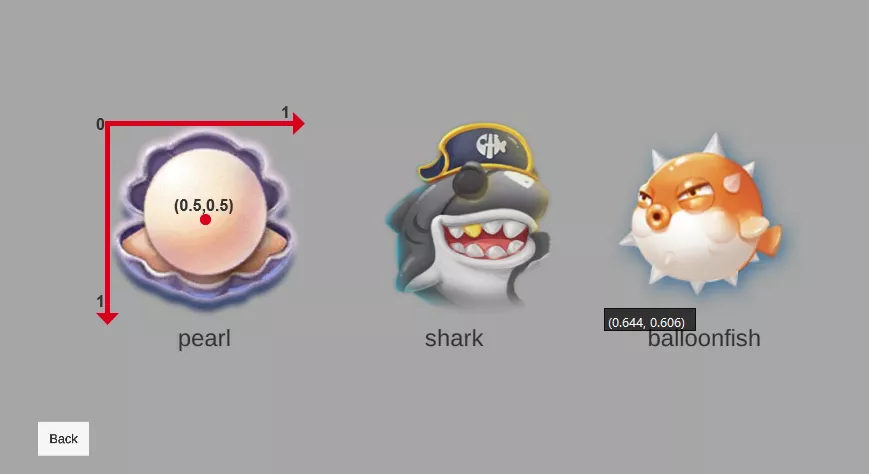
In previous articles, we have mentioned that Poco uses a relative coordinate system. For example, when we select the pearl icon control in the following image, the coordinate system is relative to this control and is normalized from 0 to 1. When clicking on this control, the resulting position of the click is actually at (0.5,0.5).
poco(texture="icon").click()
1) Internal offset
If you don't want to click on another position inside the control rather than the center after selecting it, you can use the focus() method to specify the internal offset.
# Internal offset

pearl = poco(texture="icon")
pearl.focus('center').long_click()
sleep(1.0)
pearl.focus([0.1,0.1]).long_click()
sleep(1.0)
pearl.focus([0.9,0.9]).long_click()
2) External offset
After selecting a control, we can use the focus() method to specify an external offset when clicking outside of the control, which may result in a clicking coordinate less than 0 or greater than 1.
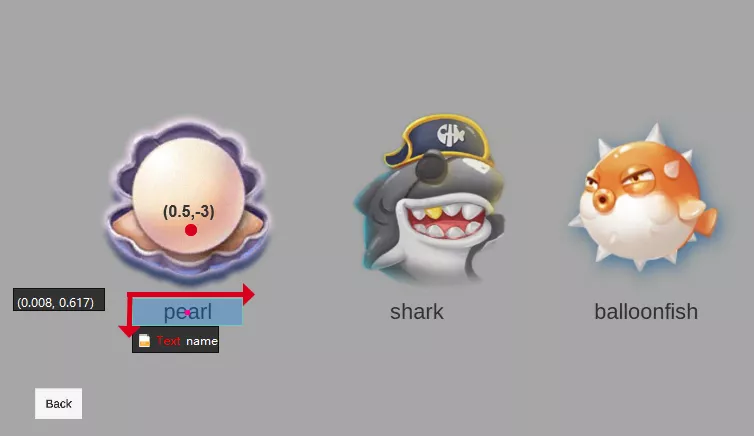
As shown in the figure, we have selected the "pearl" text control. If we want to click on the icon above the text control, the Y coordinate in the focus is negative because the Y coordinate of the icon above the text control is already less than 0 relative to this text control.
# External offset

pearl_text = poco(text="pearl")
pearl_text.focus([0.5,-3]).long_click()
Similarly, if you click on a position below the text control, which is far away, the Y coordinate may be greater than 1. If the Y coordinate exceeds the current screen, an error will be occur: InvalidOperationException('Click position out of screen.
For details on the focus() method, please refer to this link: https://poco-chinese.readthedocs.io/en/latest/source/poco.proxy.html?highlight=focus#poco.proxy.UIObjectProxy.focus.
8.Waiting Event for Controls
1) Wait and not report any error if not satisfied
We can use the wait method to specify the time for waiting for the control to appear before performing a click operation. As the return value of this method is the control itself, control operations such as click and long click can be performed immediately after).
# Wait for the control to appear in10 seconds, then perform a long click operation if it appears

poco(texture="icon").wait(timeout=10).long_click()
For details about the wait API, please refer to this link: https://poco.readthedocs.io/zh_CN/latest/source/poco.proxy.html#poco.proxy.UIObjectProxy.wait.
!!! Warning "The wait method for controls" It should be noted that the wait method for Poco controls will not throw an error even if the control is not found within the specified time. The script will continue to execute. Additionally, it is important to differentiate between Airtest's wait method which waits for a target image to appear, and Poco control's wait method which waits for a control to appear, such as poco(xxx).wait(timeout=3).
2) Wait and report an error if not satisfied
The Poco control also supports two additional wait events, wait_for_appearance() and wait_for_disappearance(). These two APIs can help us wait for the appearance or disappearance of a certain UI element on the page, with a default timeout of 120 seconds. If the element does not appear or disappear within the timeout period, a PocoTargetTimeout error will be reported.
# Wait for the yellow small fish to appear
poco("yellow").wait_for_appearance(timeout=20)

# Wait for the score text control to disappear
poco(text="Count:").wait_for_disappearance(timeout=3)
For details on these two APIs, please refer to this link: https://poco-chinese.readthedocs.io/en/latest/source/poco.proxy.html?highlight=wait_for_appearance#poco.proxy.UIObjectProxy.wait_for_appearance.
3) Extended Content: Poco class wait event
Here we introduce the wait_for_any() and wait_for_all() methods of the Poco class, which can wait for multiple UI objects. It should be noted that these two methods are part of the Poco class. The wait_for_all() is used to wait until all specified UI objects are displayed before the timeout period ends. This means polling all UI elements at once, such as waiting for three icons to appear before clicking the back button:
poco("wait_ui2").click()
yellow = poco("yellow")
blue = poco("blue")
black = poco("black")

poco.wait_for_all([yellow,blue,black])
poco("btn_back").click()

The wait_for_any() is used to wait for any UI to appear before the timeout period expires, by polling any given UI element. This means that it will wait until the first UI appears, regardless of which one it is.
bomb = poco("bomb")
yellow = poco("yellow")
blue = poco("blue")

while True:
    fish = poco.wait_for_any([bomb,yellow,blue])
    print(fish.get_name())
It can be seen that as long as any given UI appears on the page, the wait_for_any() method will return the first UI that has appeared. For more details on the two APIs, please refer to the following link: https://poco-chinese.readthedocs.io/en/latest/source/poco.pocofw.html?highlight=wait_for#poco.pocofw.Poco.wait_for_any.
9.Traversing Elements
Through a for loop in Python, we can traverse the items of any sequence, such as a list or string.
For example, using poco("playDragAndDrop").child("star") will obtain a sequence of controls (including 5 star elements), where "star" represents one element in the sequence. Therefore, through this loop, we can traverse the sequence of five star-elements and drag each one onto the shell in turn:
for star in poco("playDragAndDrop").child("star"):
    star.drag_to(poco("shell"))