IV. Automated Testing on Android (Part 1)
1.Preface
By reading this tutorial, you will learn about the following:
- How to connect an Android device in AirtestIDE?
- How to specify the phone when writing or running the script?
- How to fill in the content for device Android:///?
- How to call ADB commands or Android-specific APIs in a script?
- How to use the Android Assistant feature?
2.Connecting an Android Phone
1) Connecting an Android phone in AirtestIDE
When using AirtestIDE for automated testing on Android applications, the first step is to connect an Android device. Please refer to the guide in the device connection document to install the driver, enable Developer Options on your phone, enable USB debugging, connect your phone to the computer with a USB cable, and try to establish a connection in AirtestIDE. If you encounter any issues, please refer to the Android connection FAQ and follow the troubleshooting steps provided. Some brands of phones may require specific options to be enabled separately (such as Xiaomi, Vivo and Oppo), so please also refer to the corresponding brand's precautions to prevent possible issues.
2) Device compatibility
Currently, AirtestIDE are compatible with almost all Android phones and Android emulators on the market (for emulator connection tutorials, please refer to this link). It may also be compatible with some special hardware devices based on the Android system (due to the variety of these devices, we cannot test their compatibility one by one. If you have compatibility issues, please contact the administrator on QQ1146924173 and add a note for the issue).
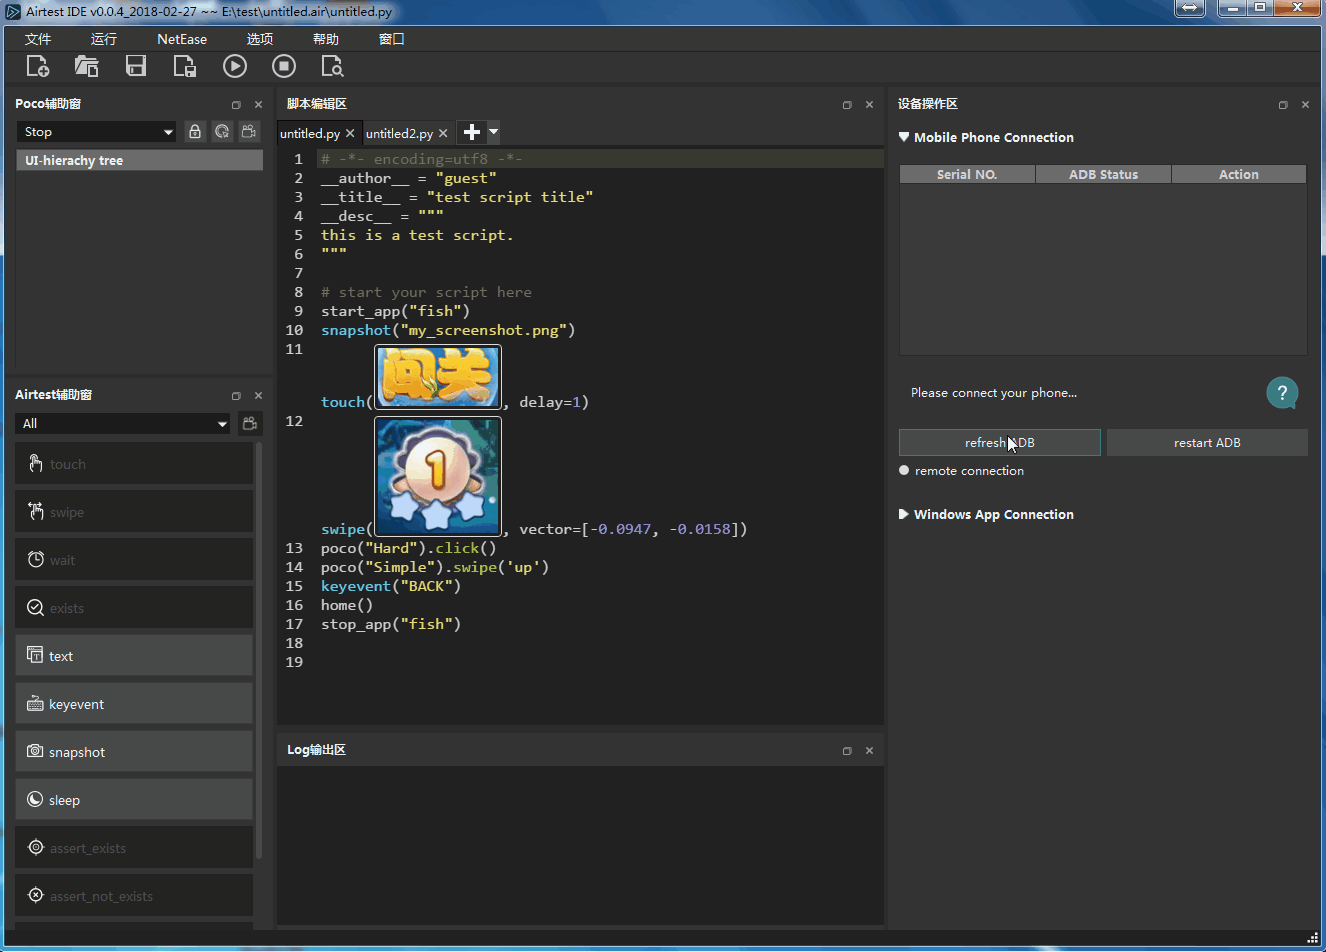
After successfully connecting to the mobile phone, you can operate the phone screen in AirtestIDE, as shown in the following figure, and then start writing scripts using this phone.
3) Special settings for device connection
Some non-mobile Android devices, such as smart TVs and smart rearview mirrors, cannot be connected by clicking on the connect button. In this case, you can try to connect by selecting options from the dropdown menu under the connect button. For example, the default connection method does not support emulators, so when connecting to an emulator, you need to first check the Use Javacap option (some emulator brands also require checking the Use ADB orientation option). The three options in the dropdown menu under the connect button provide three alternative solutions, including screenshot, rotation, and click, for when the default method doesn't work. Note: Some brands of mobile phones may fail to support certain functions because the required option is not enabled. For example, Xiaomi phones require the "allow simulated clicks" option to be enabled in order to use the default touch method in AirtestIDE (which is faster and more effective). For normal mobile devices, please refer to the documentation first when encountering problems. These alternative solutions is less efficient than the default solution, and only some special Android devices need to apply the alternative solutions.
3.Connection String for Android Devices
1) How to specify the mobile device when running the script?
When we click on the Run Script button after connecting our phone to AirtestIDE and finishing writing the script, it will use the currently connected phone in AirtestIDE by default in the command line during runtime. We can see a command like this at the top of the log viewer window:
"D:\demo\AirtestIDE-win-1.2.10\AirtestIDE\AirtestIDE" runner "D:\test\taikang_test.air" --device android://127.0.0.1:5037/127.0.0.1:7555?cap_method=MINICAP&&ori_method=MINICAPORI&&touch_method=MINITOUCH --log "D:/test/test01\fe03093fd01433d6bf58dc5fa5556c22"
 Among them, the
--device android://127.0.0.1:5037/127.0.0.1:7555?cap_method=MINICAP&&ori_method=MINICAPORI&&touch_method=MINITOUCH represents the the local phone that is currently being used. It informs Airtest that we need to use this phone with the device number of 127.0.0.1:7555.
We can also run on the current connected Android device without specifying a specific device string in the command line by using --device Android:/// regardless of its device string.
If the --device parameter is not specified in the command line, the code will not run on any device by default. This will result in an error when running code that requires a device to be connected, such as the touch statement.
To connect devices in a script via code, pass the devices parameter in the auto_setup API or use the connect_device and init_device APIs.
auto_setup(__file__, devices=["Android://127.0.0.1:5037/SJE5T17B17"],logdir=True, project_root=r"D:\test\logs", compress=90)

connect_device("Android:///SJE5T17B17?cap_method=javacap&touch_method=adb")

init_device(platform="Android",uuid="SJE5T17B17", cap_method="JAVACAP")
2) How to write the device connection string?
The --device parameter used in the previous command line takes in a device string. Taking an Android device as an example, its string is made up as follows:
Android://<adbhost[localhost]>:<adbport[5037]>/<serialno>
Among them, the adbhost is the IP address of the host where the adb server is located, with the default being 127.0.0.1 on the local machine. The adb port is default to 5037, and serialno is the serial number of the Android phone. Here are some common examples of how to fill in the device string for your reference:
# If no information is entered, the first phone in the current connection list will be chosen by default
Android:///
# Connect to a mobile device with the ID 79d03fa, connected to the default port of this machine
Android://127.0.0.1:5037/79d03fa
# Connect a remote device that has been previously connected using the adb on this machine. Please note that 10.254.60.1:5555 is actually the serial number.
Android://127.0.0.1:5037/10.254.60.1:5555
# Connect emulators and other special devices using connection parameters:
# Connect emulators with the Use javacap mode selected
Android://127.0.0.1:5037/127.0.0.1:7555?cap_method=JAVACAP
# After checking all options, connect the device using && to link multiple parameter strings
Android://127.0.0.1:5037/79d03fa?cap_method=JAVACAP&&ori_method=ADBORI&&touch_method=ADBTOUCH
For more notes, examples for other platforms, and how to handle the command line with & symbol, please refer to the section about device strings in this document.
4.Multi-Device Collaboration on Android Devices
Airtest supports connecting multiple phones in one script. However, it should be noted that the script cannot automatically run on multiple phones. Instead, the script can use these phones to achieve a multi-device collaboration, such as having two phones log in to the same app and "add friends" with each other. If we are currently using AirtestIDE to write scripts with multiple phones connected, when running the script, AirtestIDE will automatically add multiple --device parameters to the command line, informing the script of all the currently connected phones without the need for additional operations. Alternatively, you can use multiple connect_device statements in the script, each passing in the information of the connected mobile phone:
from airtest.core.api import connect_device
dev1 = connect_device("Android://127.0.0.1:5037/serialno1") # Connect the first mobile phone
dev2 = connect_device("Android://127.0.0.1:5037/serialno2")   Connect the second mobile phone
After connecting multiple phones, we can see all the devices currently connected in the global variable G.DEVICE_LIST of Airtest, and can switch between multiple devices using the set_current API.
print(G.DEVICE_LIST)  # The current device list is [dev1, dev2]

# Switch the current operation to the first phone by entering the number 0
set_current(0)

# Switch the current operation to the phone with serialno2
set_current("serialno2")

# Use the device() API to retrieve the current connected Android device
current_dev = device()
Please note that connecting multiple devices in the device connection window or script in AirtestIDE does not mean that the script will automatically run on all connected devices (simultaneous testing requires writing multithreading or multiprocessing). For example, when multiple Android devices are connected in the device connection window of AirtestIDE, the script will only run on the device currently displayed in the window when the Run Script button is clicked. If multiple devices are connected using a script, we need to use the set_current API to specify which device to operate on, otherwise it will default to the first connected phone.
5.Exclusive Features and APIs for Android
In the "Platform-Specific APIs" section of the A Beginner's Guide to Airtest, we have mentioned that the platforms supported by each API may differ, and that Android has the most comprehensive and abundant APIs.
Basically, the APIs (document) in airtest.core.api can be directly used on the Android platform, for example:
# Clear app data
clear_app("org.cocos2d.blackjack")

# Launch an application
start_app("org.cocos2d.blackjack")

# Pass in a keystroke response
keyevent("BACK")
1) Android device APIs
In addition to the cross-platform APIs provided in airtest.core.api, there are many built-in APIs that can be called in the Android device object. We can refer to the methods that the Android device object has in the document airtest.core.android.android module, and then call them like this:
dev = device() # Obtain the Android object for the current device
print(dev.get_display_info())  # View the display information of the current device
print(dev.list_app())  # Print the list of currently installed apps
2) ADB command invocation
In test scripts for Android devices, sometimes we need to input some ADB commands. If we want to call ADB commands in a regular Python script, we may need to use subprocess or other modules to start a process and run command lines separately. But in Airtest scripts, calling ADB commands is very simple:
# Execute the command adb shell ls on the current device

print(shell("ls"))

# Execute the adb command on the specific device

dev = connect_device("Android:///device1")
dev.shell("ls")

# Switch to a specific device and execute the adb command

set_current(0)
shell("ls")
6.Convenient Features of Android Assistant
We also offer an Android Assistant feature for connecting to an Android phone using AirtestIDE. Instructions can be found here.
After connecting to an Android phone, click on the tool icon in the upper right corner of the device screen window, then select "Show assistant dialog" from the dropdown menu to open the Android Assistant.
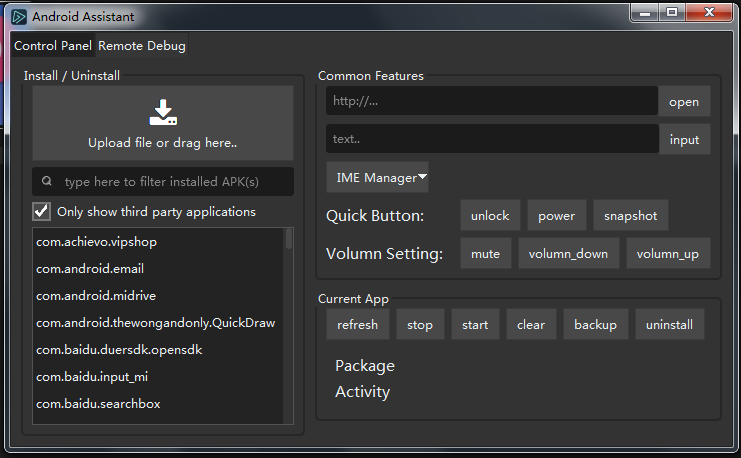 In the Android Assistant, we offer the following functions:
- Installation/uninstallation/viewing list of mobile applications
- Common quick operations: open website, input text, switch input method, adjust volume, etc.
- Mobile phone shell debugging window
We hope that our Android Assistant can play a good supporting role when you use an Android phone. If you have any bugs or suggestions, please feedback to Github.