V. Script Editor
1.Preface
The script editor window in AirtestIDE provides many practical features to help you better write Airtest/Poco automation scripts. In this article, you will learn more about the feature and usage tips of the script editor window.
2.Image Editor Feature
When writing Airtest image script in the script editor window of AirtestIDE, we can use the image editor to preview the matching rate of the image script in the current screen and modify the parameters of the image.
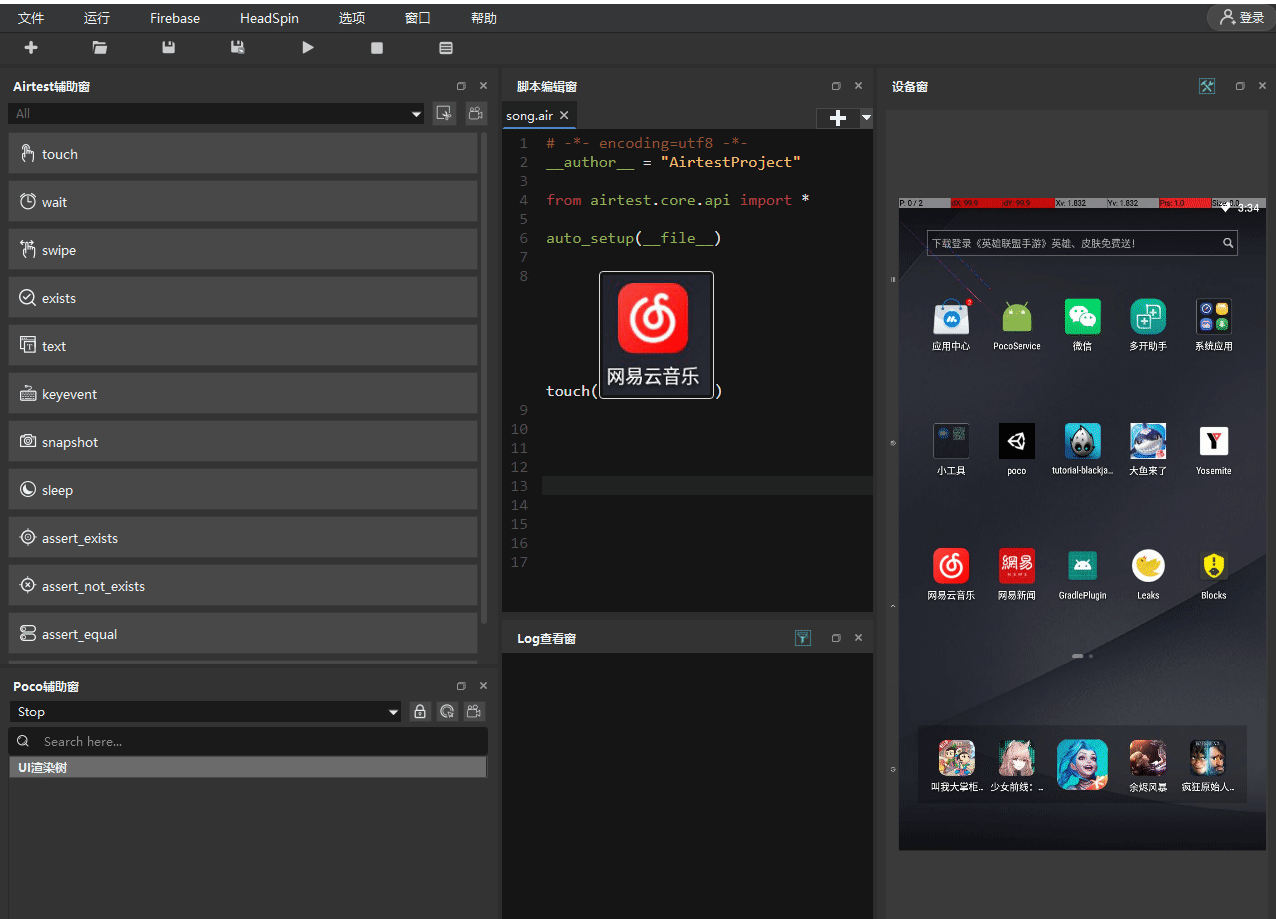
1) Go to the image editor
Double click on the image in the script editor window and the image editor will pop up. After modifying the image, click the OK button to implement the modifications or click the Cancel button to abandon the modifications.
2) Preview the snapshot
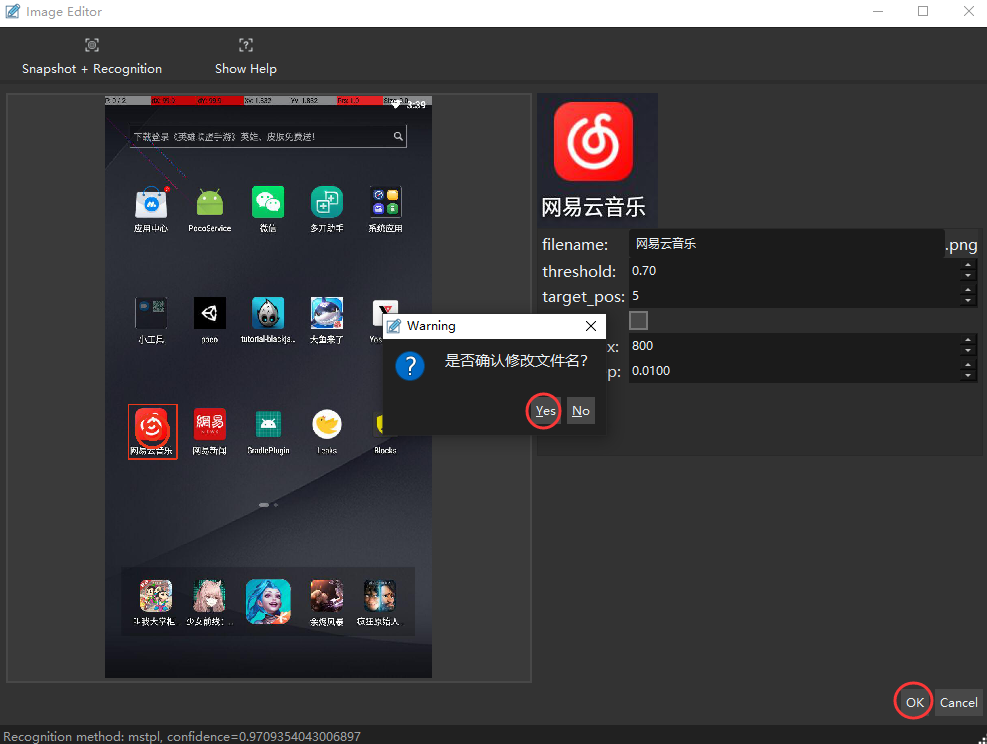
The image editor enables previewing the match rate of the snapshot on the current screen. Clicking the Snapshot Recognition button in the image editor will capture the current screen of the phone and perform a recognition. If the recognition is successful, the recognition area will be marked on the snapshot, making it easier for users to debug the snapshot.

You can also right click on the snapshot display to bring up a context menu where you can choose to capture the device screen again, perform recognition again, and so on.
3) Modify parameters
Note
For each image recognition, as long as the confidence of the recognition result is greater than the threshold, it is considered a successful recognition. If a wrong position is recognized, you can enhance the accuracy by adjusting the threshold.
① filename (image filename)
Set the name of the image file. When you click OK to save the modifications, you will be prompted to confirm it:
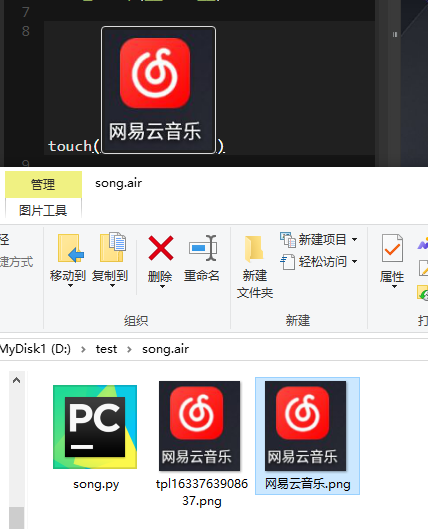
After confirming the modifications, a copy of the image will be made in the current script directory and named with the newly modified name:
② threshold (floating point type)
Set the threshold for image matching in the range [0.0, 1.0], and the default value is 0.7.
③ target_pos (integer)
Sets the operation position on the matched result image, with marker points ranging from 1to 9, and the default is 5.

④ rgb (bool type)
Set whether to use rgb three channels (color recognition) when calculating the confidence of the recognition result. The default is False (i.e., using grayscale images for confidence calculation).
⑤ scale_max (integer)
Set the maximum range for matching. In Airtest 1.2.0, we added a new algorithm for image recognition: mstpl, which has two unique parameters: scale_step and scale_max. The scale_max defaults to 800 and takes values in the range [700, 2000], with recommended values of 740, 800, 1000.
⑥ scale_step (floating point type)
Set the search scale step size. It is a parameter specific to the mstpl algorithm added in Airtest version 1.2.0 as well. It defaults 0.01 with the range [0.001, 0.1] and the recommended values 0.02, 0.005, 0.001.
3.Separate Debugging Feature
The IDE supports us to right-click and execute a single selected line or multiple lines of script separately, which can help us debug the running effect of the Airtest or Poco scripts we have written:
Note
Some versions of IDE will report and error of poco is not defined when we right-click and execute the selected Poco script separately. This is because the Poco initialization script is selected, causing Poco to not be initialized when running separately. The solution is to select both the Poco script to be debugged and the initialization script of Poco.
4.Other Tips
1) View the save path of the image
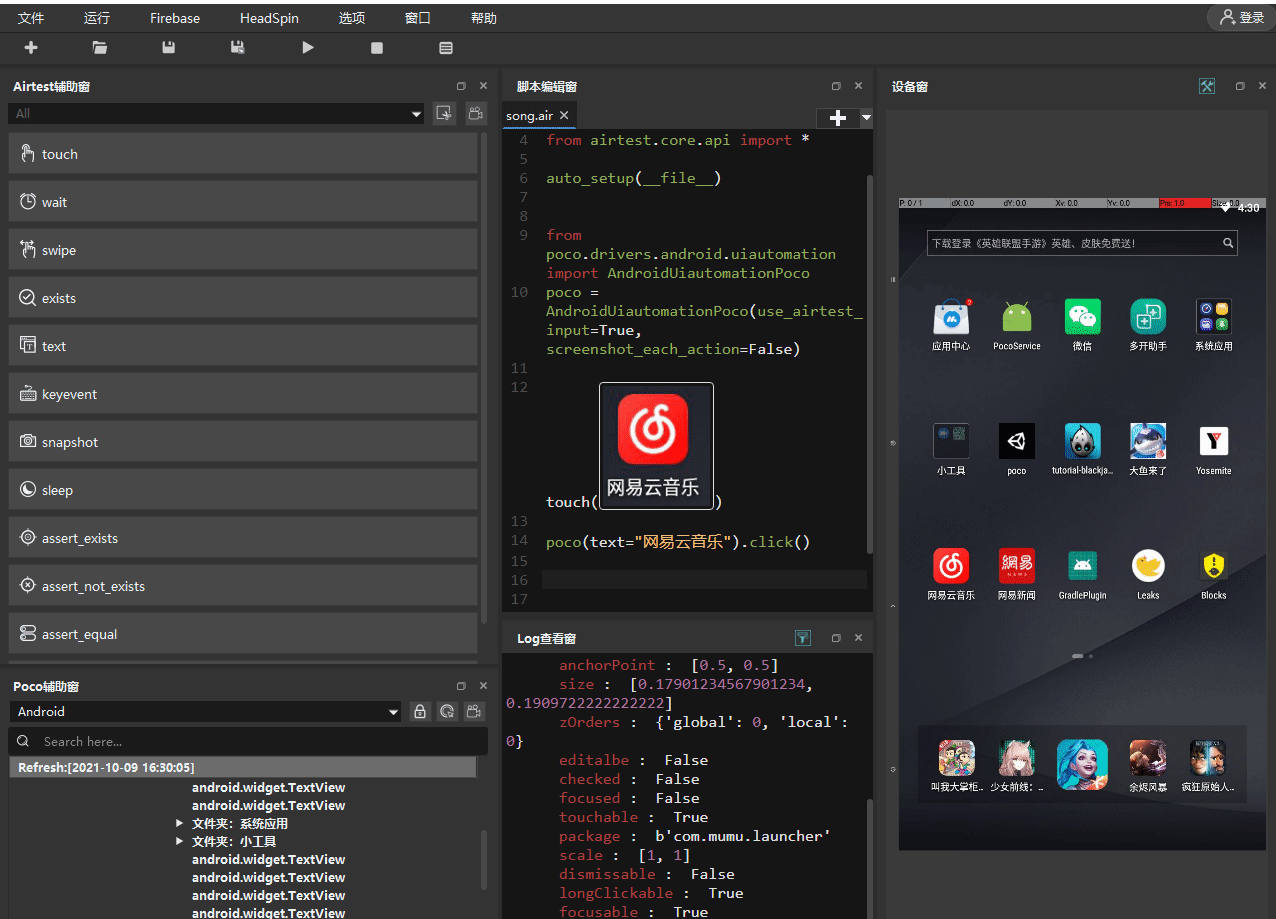
In the script editor window of the IDE, as you move the mouse over the image, you can see the path where the image is saved:

2) Switch between image/code mod
The Airtest image script is essentially a Python script. We can right click in the IDE script editor window and select "Switch between image/code mode" to view its code:
!!! Warning: When we are performing automated testing on the entire desktop, to prevent the images in the the script editor window from interfering with the recognition results, we can minimize the IDE or use the "Switch between image/code mode" feature to convert the images to pure code.
3) Shortcut features
Click the dropdown button in the upper right corner of the script editor window to bring up the shortcut features (or right click on the script name to bring them up).
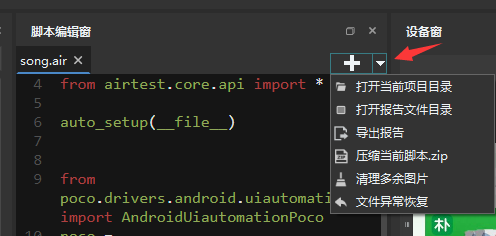
① Open the current project directory
Used to quickly open the folder of the current project.
② Open the report file directory
Used to quickly open the IDE generated report folder.
③ Export reports
Used to quickly export reports. Unexported reports can only be viewed locally, while exported reports can be sent to others for viewing (outside of the local environment).
④ Compress the current script to .zip
Used to quickly compress the entire script file for easy sending.
⑤ Clean up redundant images
Clean up unused image files in the script with one click.
⑥ File exception recovery
Recover abnormal scripts or retrieve historical versions.
4) Quick comment and uncomment
In the script editor window of IDE, select one or more lines of script and press Ctrl+/ to quickly comment the script.
Similarly, select one or more lines of the commented script and press Ctrl+/ again to quickly uncomment it.
5) Quick indent and unindent
In the script editor window, select one or more lines of script, press the Tab key to quickly indent, and press the Tab multiple times if you need multiple indentations.
Select one or more lines of script and press Shift + Tab to quickly unindent, and press Shift + Tab multiple times if you need to remove multiple indentations.