I. How to Run Scripts Without AirtestIDE
1.Preface
Beginners tend to use AirtestIDE to write/run automation scripts, but once they become proficient in the Airtest and Poco frameworks, they can do it without relying on AirtestIDE. This article will detail two ways to run scripts without AirtestIDE and relative precautions. Interested? Then carefully read the following content!
2.Running Automation Scripts via Command Line
1) Run according to the script command of the IDE
When we run scripts in the environment provided by the IDE, a command that runs the current script will appear at the top of the log viewer window. We can directly copy this command and run it in the command line terminal:

Even if we simply use this command to run the script, but in reality, we are still running it in the environment provided by AirtestIDE. The advantage is that we do not need to deploy a local Python environment separately.
 But there's a small detail to pay attention to here. If there are characters like && in the command line, they need to be escaped.
# Escape of special characters in Windows
&&-->^&^&

# Escape of special characters in Mac
&&-->/&/&
If not escaped, the command line will be truncated, as shown in the picture. Although we have specified the log saving path in our running command, it still prompts us to not save the log because the command is truncated after the special character &&. And we will also see in the final running log a prompt like 'ori_method' is not an internal or external command, nor is it a runnable program or batch file:
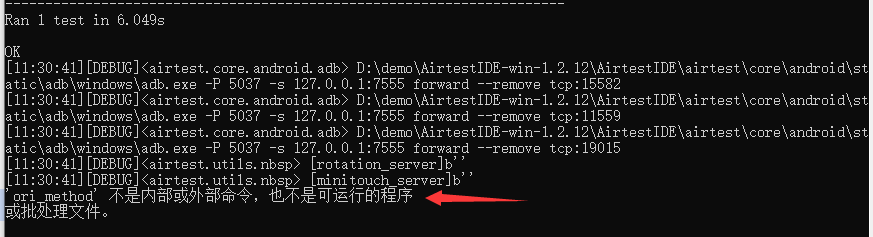
After adding the escape characters, the situation where the command line is truncated will not occur.

2) Deploy local python environment to run scripts
In addition to the built-in Python environment in AirtestIDE, we can also deploy a local Python environment to run scripts. First, we need to prepare a suitable Python environment, any version greater than Python3 and less than or equal to Python3.9 will suffice. Then, install our automated testing framework within this Python environment, just like installing other third-party libraries for Python:
# Install Airtest framework
pip install airtest
# Install Poco framework; necessary for writing Poco statements
pip install pocoui
# Install Airtest-selenium framework; necessary for writing Airtest-selenium statements
pip install airtest-selenium
If an error or timeout occurs during the installation of third-party libraries, please make sure that your Python version is within the supported range:
pip install -i https://pypi.tuna.tsinghua.edu.cn/simple airtest
After successful installation, we can use the "pip list" command to check the installation status and framework version information.
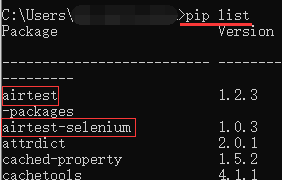

(Note: Poco and Pocoui cannot be installed at the same time as they will conflict with each other!) Next, we can run our written automation script in this environment:
airtest run "D:\test_plu\song.air" --device android://127.0.0.1:5037/127.0.0.1:7555 --log "D:/test/test01\ed879c1f10fa732db3e5e2c417ca7221"
# or
python -m airtest run "D:\test_plu\song.air" --device android://127.0.0.1:5037/127.0.0.1:7555 --log "D:/test/test01\ed879c1f10fa732db3e5e2c417ca7221"
As for using commands to run scripts and generate Airtest reports, please refer to our previous article "Complete Guide to Airtest Reports".
3.Running Automation Scripts with Other Editors
We will take the common Python editor, PyCharm, as an example to explain how to use this editor to write/run automation scripts.
1) Deploying environment
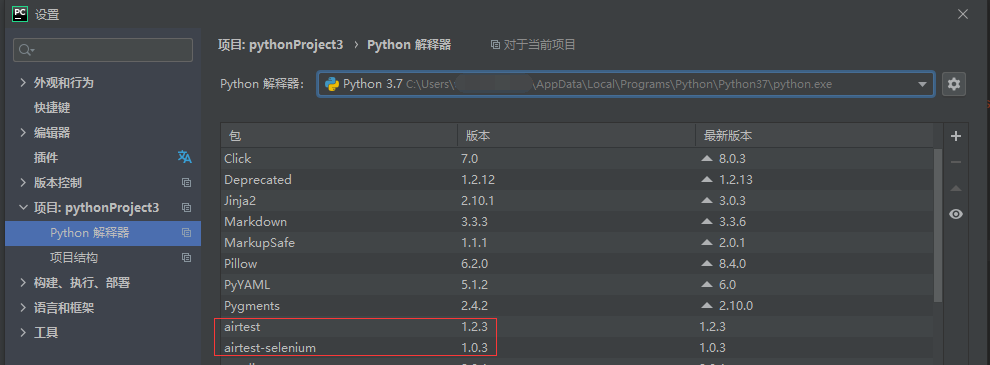
After creating a new project in PyCharm, we need to set up a Python interpreter for the project. PyCharm supports using a locally installed Python or a virtual Python environment as the interpreter.
Here is the difference between the. If we set the locally installed Python as the interpreter, then all third-party libraries installed in the local Python will be imported and used for this Pycharm project.
 But if we create a new virtual environment, it will copy a Python virtual environment based on a local Python interpreter without any third-party packages. This means that all third-party packages installed in the local Python interpreter will not be copied.
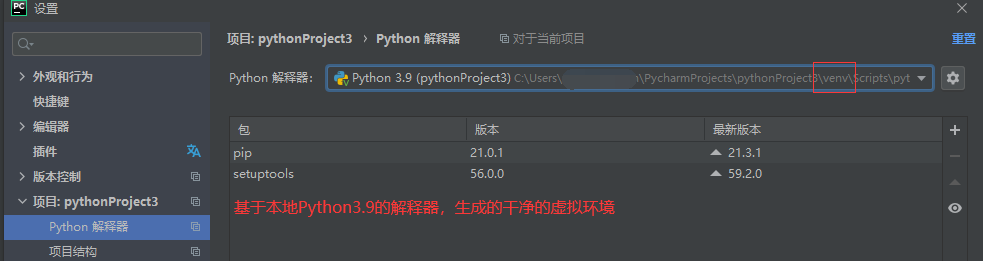
This is also the reason why many users cannot find the third-party libraries already installed in the local Python environment when they first start using PyCharm. (Note that this may be due to the use of a virtual environment.)
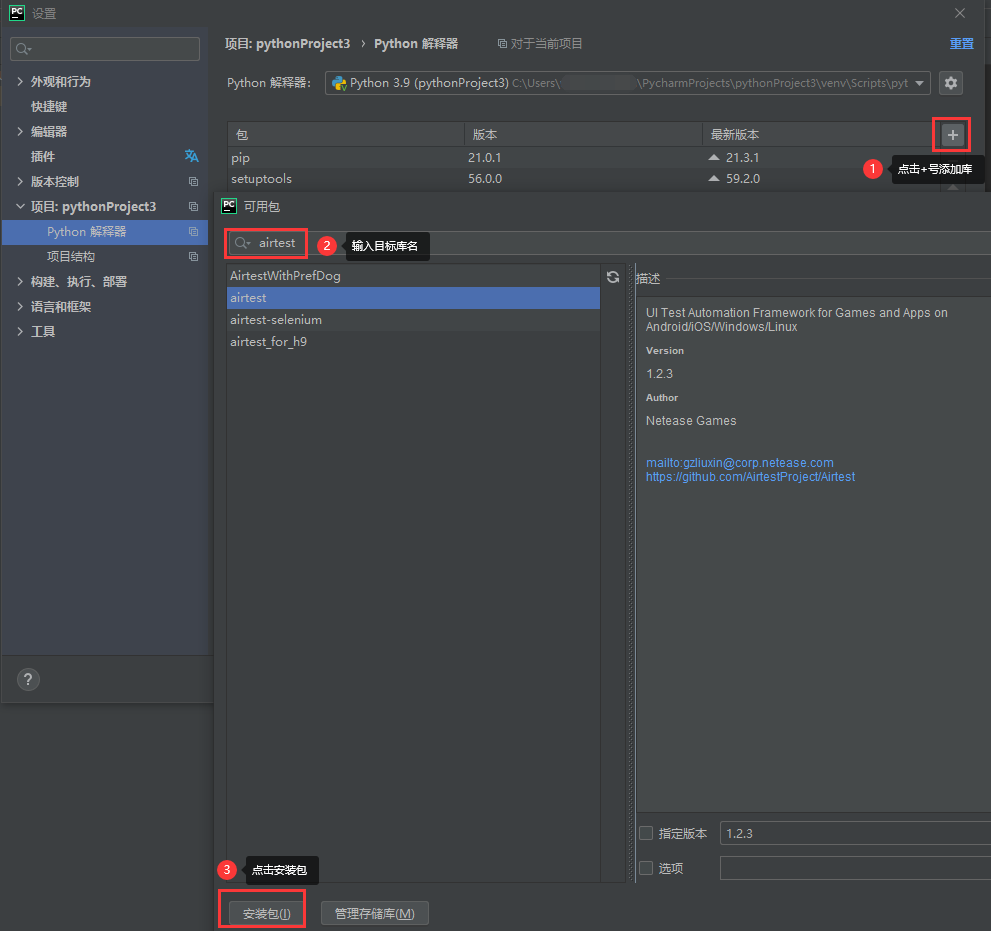
It is very simple to install third-party libraries in Pycharm. In the Python interpreter for the project, click the + sign on the right side, enter the package name you want to add, and then click the Install Package button to add it.
 After the environment is set up, we can start writing/running scripts in PyCharm.
Taking the example of directly copying the script from AirtestIDE to PyCharm for execution, let's take a closer look at what we need to pay special attention to.
After the environment is set up, we can start writing/running scripts in PyCharm.
Taking the example of directly copying the script from AirtestIDE to PyCharm for execution, let's take a closer look at what we need to pay special attention to.
2) Saving log
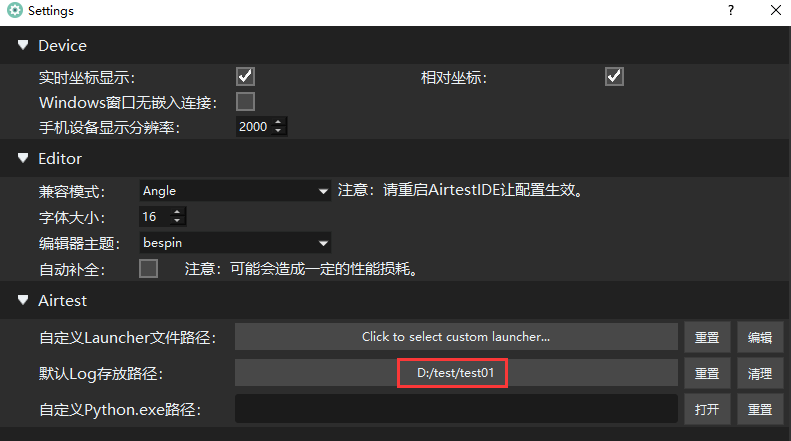
First, we need to pay attention to saving log. We don't bother to think about it when writing and running scripts in AirtestIDE which automatically saves the log content of script running. The default saving path is set in Options - Settings - Airtest - Default Log Storage Path:
When copying the code to PyCharm for execution, if we need to save log content (for preparing subsequent generation of test reports), we need to do it manually:
# Set logdir in the auto_setup API to save log content

# The logdir parameter can be set to a specific path for saving log files or set to True to generate log content in the current project directory.

auto_setup(__file__,logdir=True)
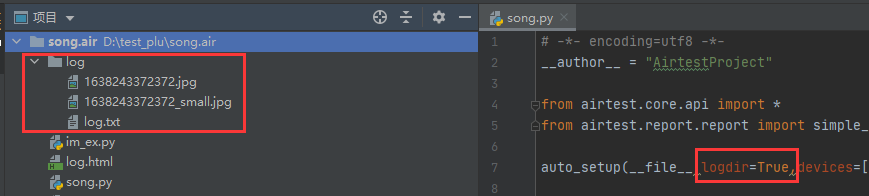
The log often contains snapshot images of the necessary steps for the report and a log.txt file.
3) Connecting devices
The second common issue is about connecting devices. In AirtestIDE, as long as the device screen is already connected to a specified device, we do not need to handle it separately in the .air script. It will automatically connect to the device on the device screen to run the script. However, PyCharm won't help us with device connection, so we need to connect the device to be tested in the script:
# Pass the devices parameter to the auto_setup API.

auto_setup(__file__,logdir=True,devices=["android://127.0.0.1:5037/127.0.0.1:7555"])
Many other APIs are available for connecting to various devices for testing. We will not go through all of them here. If you are interested, you can refer to our previous article: Connecting Devices for Automated Testing with just 1 Line of Code.
4) Image path
The snapshots captured in AirtestIDE are saved by default in relative paths in the .air script, same path as the .py file. touch(Template(r"tpl1638179990578.png", record_pos=(0.179, -0.57), resolution=(810, 1440))) But when we copy the code to PyCharm for execution, the relative path is likely to change, causing the error "airtest.aircv.error.FileNotExistError: File not exist: tpl1638179990578.png" to occur when we run the script. At this point, we need to modify it either to the correct relative path or the absolute path, as long as PyCharm can find your script snapshot from the path you set: touch(Template(r"D:\test_plu\song.air\tpl1638179990578.png", record_pos=(0.179, -0.57), resolution=(810, 1440)))
5) File reference path
Many users tend to call some common scripts in their automation scripts, which may be .air scripts or .py scripts, etc. Assuming we have the following scripts, and their storage relationships are as follows:
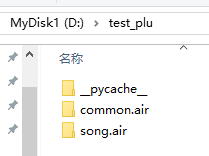
 If we want to call the common.air script and the im_ex.py script in the song.air script, we can write the script like this:

When calling the .air script, we can use the dedicated Airtest API using; when calling the .py script, we can do it as with standard Python, simply entering from... import...
But when we open and run song.air in PyCharm, we will find that the modules that can be run in AirtestIDE are missing in PyCharm:
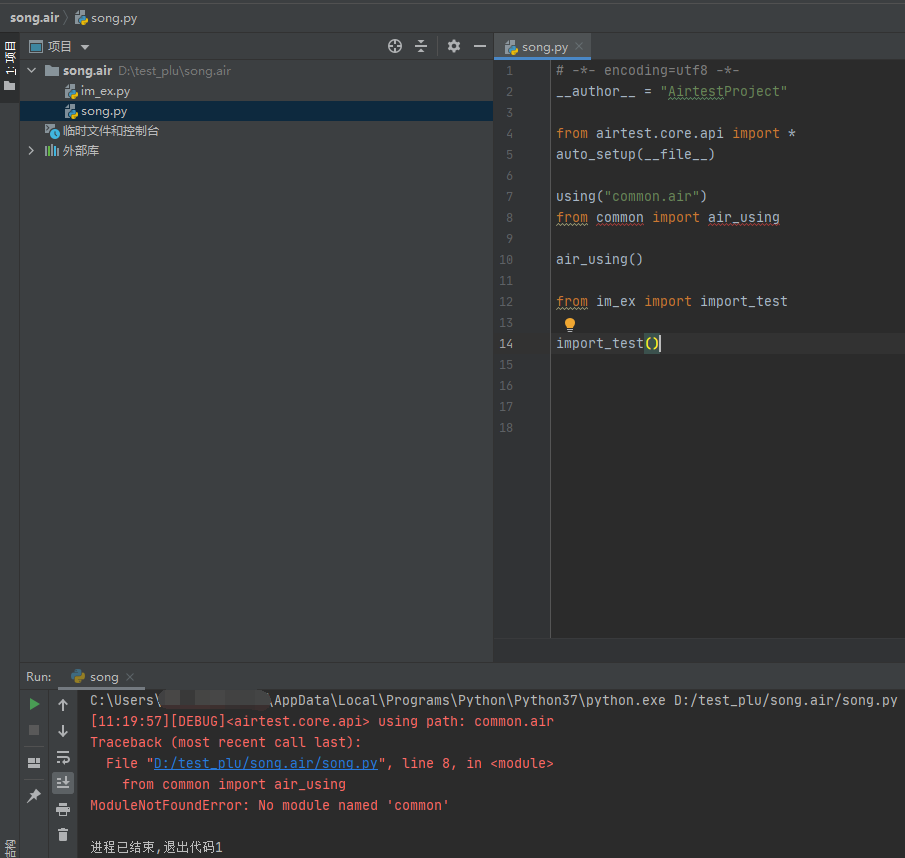
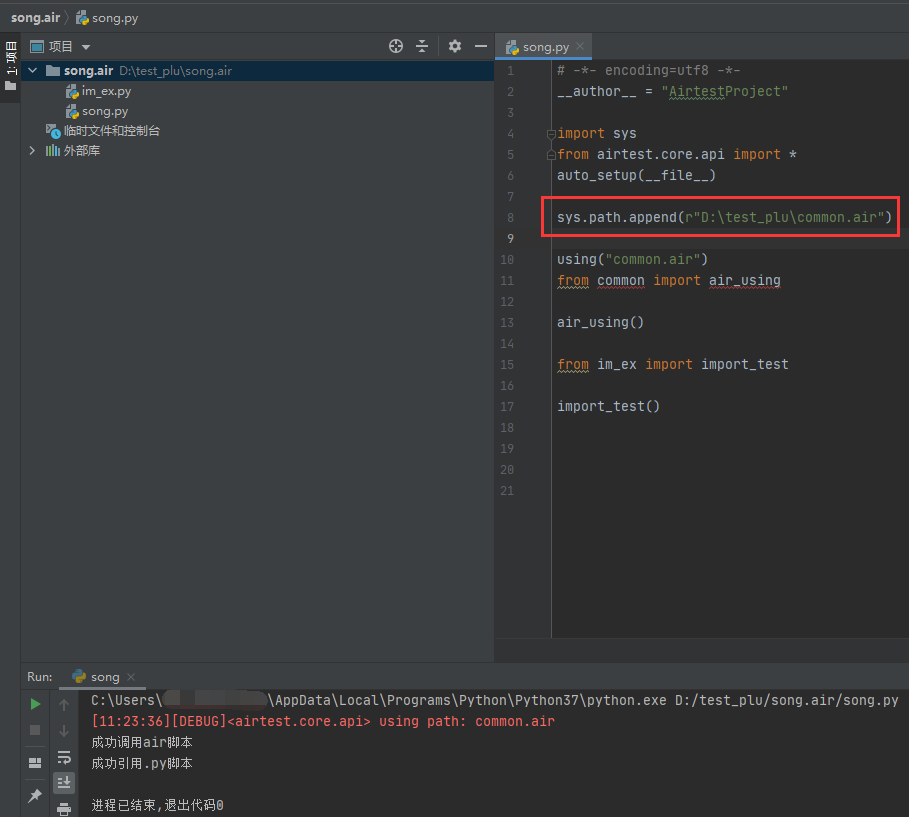
To fix this, we can add sys.path manually so that PyCharm can locate the common.air script.
6) Report generation
The last thing to note is the report generation. After running the .air script in AirtestIDE, we can directly click the View Report button to quickly generate and open the test report in HTML format. But PyCharm doesn't have this feature, so if we want to generate Airtest reports, we have to write the following statements in the script:
# -*- encoding=utf8 -*-

__author__ = "AirtestProject"
from airtest.core.api import *
from airtest.report.report import simple_report
auto_setup(__file__,logdir=True,devices=["android://127.0.0.1:5037/127.0.0.1:7555"])
touch(Template(r"tpl1638243250870.png", record_pos=(-0.362, 0.13), resolution=(810, 1440)))
simple_report(__file__,logpath=True)
Generating Airtest reports using scripts requires careful attention to the following details:
- Put the report generation statements after the specific scripts to prevent generating empty test reports without running the specific scripts.
- Add corresponding report plugin when the script contains Poco or Airtest-Selenium statements.
- Use the try-finally statement to generate a test report regardless of whether the intermediate steps run successfully or not.
- Remember to save the log content if you want to generate a test report, because the generation of the report relies on the log content.
- Add export parameters in the report generation statement if you need to send the report to someone else. Only exported reports can be sent to others to view.
For more information on using scripts to generate test reports, you can refer to our previous article "Complete Guide on Airtest Report: Generate and Export Reports Directly Using Scripts, Amazing!"