IV. IOS Device Connection
1.Introduction to iOS-Tagent
IOS-Tagent is a customized and optimized version based on Facebook's WebDriverAgent. It is developed to provide testing support for AirtestProject on the iOS platform. To use the Airtest project for testing on the iOS platform, you need to have a macOS and deploy the iOS-Tagent using Xcode. After that, you can connect to the iOS phone on either a Mac or Windows machine. Click on this link to download the project code for local deployment. This project has been developed and tested on the following versions:
| iOS-Tagent | Supported minimum version | Supported maximum version |
|---|---|---|
| iOS system | 12 | 16.7.1 |
| Xcode version | 9.9 | 14.3.1 |
It's worth noting that Airtest version 1.2.5 and above, or AirtestIDE version 1.2.14 and above, can only support higher versions of iOS and Xcode, but also optimize the speed of touch and swipe on iOS devices. Therefore, we strongly recommend using our ios-tagent for debugging your real device.
In addition, starting from Airtest 1.1.8, we have added support for Appium's WebDriverAgent tool. Therefore, you can deploy iOS real devices using either Appium's WebDriverAgent tool or our Airtest iOS-Tagent tool, which provides great flexibility.
We recommend the following tutorials for how to install Appium's WebDriverAgent:
- Appium's WebDriverAgent tool - Installation guide: https://testerhome.com/topics/7220
- Facebook's WebDriverAgent tool - Installation information: https://testerhome.com/topics/10463
- Appium's WebDriverAgent tool - Troubleshooting: https://github.com/appium/WebDriverAgent/issues
- Facebook's WebDriverAgent tool - Troubleshooting: https://github.com/facebookarchive/WebDriverAgent/issues
If you choose to install Appium's WebDriverAgent tool on a real iOS device following the above tutorial, you can now also use the AirtestIDE to connect to this iOS device:
Note
If you deploy the Appium's WDA on a real iOS device and connect it with AirtestIDE version 1.2.8 or later, you can still use the Airtest and Poco functions as with the iOS-Tagent project; however, there may be severe iOS lag without any optimization solution available.
2.Supported Airtest APIs
After improvements, iOS-Tagent can collaborate with AirtestIDE and Airtest projects. It supports universal iOS APIs of Airtest.
- start_app: OK
- stop_app: OK
- snapshot: OK
- home: OK
- touch: OK
- swipe: OK
- text: OK
- wait: OK
- exists: OK
- find_all: OK
- assert_exists: OK
- assert_not_exists: OK
Here are a few exceptions:
- wake: Not yet supported (the home method can be used as a substitute)
- keyevent: Only supports 'home' event
- clear_app: Not yet supported
- install: Not yet supported
- uninstall: Not yet supported
3.Quickly Viewing the Screen Using Poco
Poco screen viewing function is now supported, and you can see the effect in the figure below.

This function can achieve the best effect when used together with Poco and AirtestIDE.
Please note that this function cannot be used if only the WDA project is deployed.
Please make sure that the deployed project is either the iOS-Tagent project or the supported Appium's WDA.
Warning
"Poco only supports local iOS devices" Please note that, currently, only the control tree of the locally connected iOS devices instead of the remotely connected iOS devices can be viewed on the IDE.
4.Deployment Process for iOS
1) Install and launch iOS-Tagent
Create a WebDriver server on the mobile phone to remotely control iOS devices and locate UI elements.
- a. Download iOS-Tagent to the local computer.
git clone git@github.com:AirtestProject/iOS-Tagent.git
- b. Open iOS-Tagent with Xcode and connect your iPhone to your Mac using a USB cable.
Select the project by going to the menu bar: Product -> Scheme -> WebDriverAgentRunner.
Select the real device by going to the menu bar: product -> Destination -> Choose your real device.


After selecting the device, be sure to follow the prompts to log in to the developer account and set the bundle ID to a unique value in Build Settings.
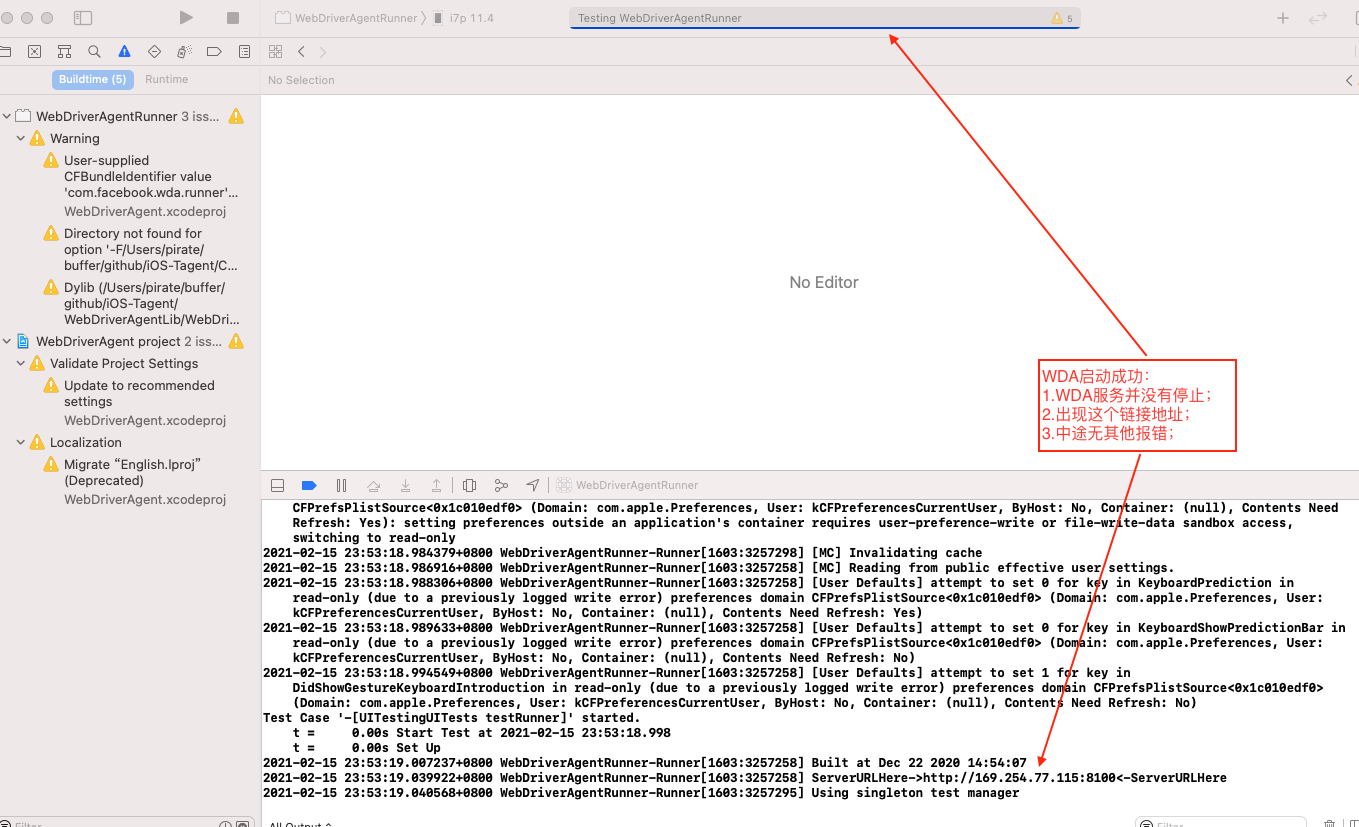
- c. To launch Test, select product -> Clean Build Folder from the menu bar, and then select product -> Test to launch it. When you see the following log, it means that the iOS-Tagent has been launched successfully.
Test Suite 'All tests' started at 2017-01-23 15:49:12.585
   Test Suite 'WebDriverAgentRunner.xctest' started at 2017-01-23 15:49:12.586
   Test Suite 'UITestingUITests' started at 2017-01-23 15:49:12.587
   Test Case '-[UITestingUITests testRunner]' started.
   t =     0.00s     Start Test at 2017-01-23 15:49:12.588
   t =     0.00s     Set Up
Learn more about how to successfully launch this project from this link and this link.
2) Set up proxy
With iproxy, you can map the port of your iPhone to the port of your computer, allowing you to access the port of your phone by accessing the port of your computer.
In general, accessing the Agent on the phone requires setting up a USB proxy. Directly accessing the phone through WiFi may cause issues. For its reason, please refer to Issues and detail.
- a. Install iproxy via Homebrew
$ brew install libimobiledevice
- b. Run iproxy
$ iproxy 8100 8100
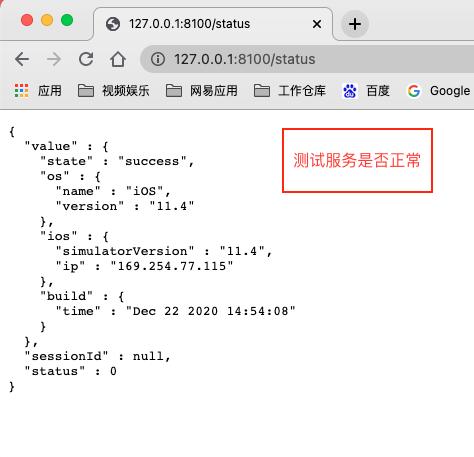
After the launch, try accessing http://127.0.0.1:8100/status in a browser. If you can access it and see some JSON-formatted phone information, it means the launch is successful.
One thing to note is that iProxy can only monitor localhost, so if you want to connect your iPhone to Windows, you can use WDAProxy instead. Here are the specific steps:
- Connect iPhone to Mac using a USB data cable.
- Run wdaproxy on Mac to map the iPhone port to Mac port. For installation and running steps, refer to https://github.com/openatx/wdaproxy.
- In the AirtestIDE on Windows, input the IP address and port of the Mac into the iOS address box, and click on the "connect" button.
Note
For iOS devices using wdaproxy proxy, you will not be able to view the iOS control tree after the IDE is connected to a real device, as it is not a local device.
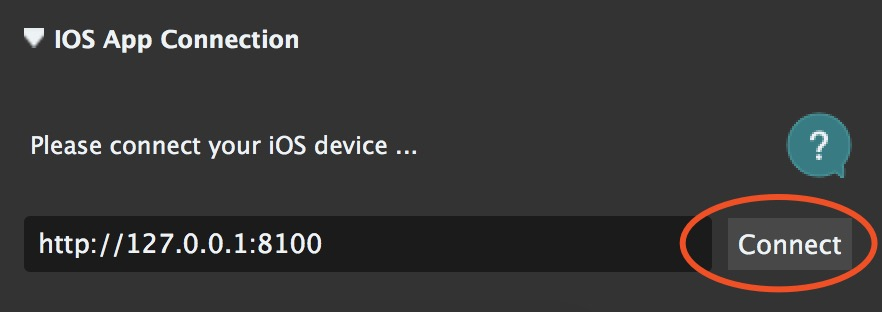
3) Connect to AirtestIDE
Connect to iPhone via IP and refresh the interface in real time for UI testing. After completing the above two steps, you can fill in the iOS address bar of AirtestIDE with the address http://127.0.0.1:8100, click on the "connect" button to connect the device, and start writing your Airtest test script.


4)iOS Control Panel Feature in IDE
It is important to note that starting from AirtestIDE 1.2.16 , a new iOS Control Panel feature has been added, which allows for automatic launching of WebDriverAgent (WDA) on iOS devices. This enables a one-click connection to iOS devices. The following steps outline the usage of the iOS Direct Connection Panel:
① Make sure that the iOS device has pre-installed and correctly functioning WDA. For installation details, please refer to our official documentation.
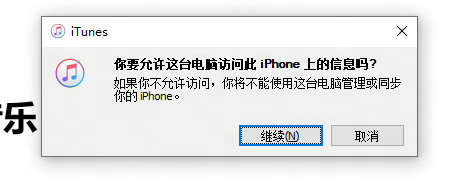
② Connect the device using a USB cable. Windows system users should also remember to download and open iTunes.
Note:
- If the iOS system is version 15.0 or above, on opening iTunes, you will need to click "Continue" on the following pop-up window.
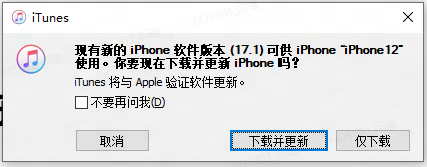
- If the iOS system is below version 15.0, upon opening iTunes, a pop-up window to upgrade the iOS system will appear. You will need to click "Cancel" (as we currently cannot adapt to iOS 17, it is advised to refrain from upgrading at this time).
③ In the iOS device connection window, click the "Refresh Device" button. Remember to click "Trust" on any trust prompt shown on the device.
④ Click "Connect" to establish the connection. If the device has multiple WDAs installed, you can use the "Switch WDA" dropdown list to select and switch between different WDAs.
Upon clicking the "Refresh Device" button, there are two possible reasons for the "Connect" button to be grayed out:
① The iOS device does not have any available WDAs, therefore IDE cannot establish a connection.
② The installed WDA on the iOS device is currently starting up and not yet available. Please wait for a moment until it becomes accessible again.
With this feature, as long as we have a properly installed and functioning WDA on the iOS device, we can conveniently perform iOS automation testing on both Mac and Windows platforms!
5.Q&A for iOS Connection
We anticipate that you may encounter many issues during the deployment process, so we have prepared a Q&A document for your reference. If you have any questions or feedback for this project, please feel free to submit them in the Issues section.
1) Compatibility between Xcode and iOS versions
2) Apply for a developer certificate
3) Log in to the developer account
4) Set up developer certificate
5) Xcode failed to create provisioning profile
6) First-time installation, trust the device
6.Using Tidevice to Launch WDA Without Xcode
Alibaba has released an open-source tool called tidevice for iOS automation, which enables launching WebDriverAgent without relying on Xcode to connect devices.
Specifically, after installing WebDriverAgent (such as iOS-Tagent or Appium's WDA) on a real iOS device, we no longer need to use Xcode on a Mac to start WebDriverAgent. Instead, we can use Windows to start WebDriverAgent on an Apple device.
To start WebDriverAgent with tidevice and connect to iOS real device using AirtestIDE, please refer to the detailed tutorial: Tidevice tool helps you achieve iOS automation without Mac easily!
7.License for iOS-Tagent
iOS-Tagent has been customized and optimized based on WebDriverAgent. WebDriverAgent is BSD-licensed. We also provide an additional patent grant.
Have fun with Airtest!