II. Common Script Logic and Code Examples
1.Code Examples
1) Airtest scripts
The code examples for Airtest scripts can be found here. The test_blackjack.air is a regular .air script which can be downloaded and opened in AirtestIDE. Similarly, the pure_python_example contains regular .py scripts with the same content as the same-named .py files in the .air script.This is to illustrate that an Airtest script is actually just a regular .py file that imports the Airtest python third-party libraries.
2) Poco scripts
You can download Poco's sample demo and code from here. After installing it on your phone, you can try to view the UI element tree and familiarize yourself with how to use the APIs. We also have an Example repository on Github, which contains some code examples used in this tutorial for your reference.
2.Various Ways to Connect Devices
1) Adding device parameters in the command line
Depending on the different ways of running the script, the way to connect the phone also varies slightly. For example, when running the script using the command "airtest run test.air", you only need to add --device plus device string in the command line, following the example in the documentation. For how to fill in the device string, please refer to Documentation. Here is a simple example:
>airtest run untitled.air --device Android:///device string --log log/
>python -m airtest run untitled.air --device Android:///device string --log log/
2) Connecting devices through the script
If you import airtest/poco in a .py script file to run it as a regular python script, you can use the connect_device API in the script code:
from airtest.core.api import *
connect_device("Android:///")  # Fill in the device string
For more details on the APIs for connecting devices and on writing device strings for different platforms, please refer to the summary section of "Airtest Scripts for Connecting Devices". (The statement for connecting devices can also be applied to .air scripts.)
3) Please do not repeat connecting devices
Of the two connection methods above, adding device parameters in the command line and adding device connection statements in the script, you only need to choose one. If both are used, it may result in duplicate connections and other issues.
If you are not familiar with how to write the device string for Android:/// in the script, you can simply connect to the device with AirtestIDE first and then copy the string in --device Android:/// printed when running the script in the IDE. In this way, you can easily connect the device.
3.Entering Text
1) The Airtest API for text input: text
If you want to enter text in a script, generally you need to follow these steps:
- Click on where you need to input the text and activate the input cursor.
- Call the Airtest API text() to input the text content.
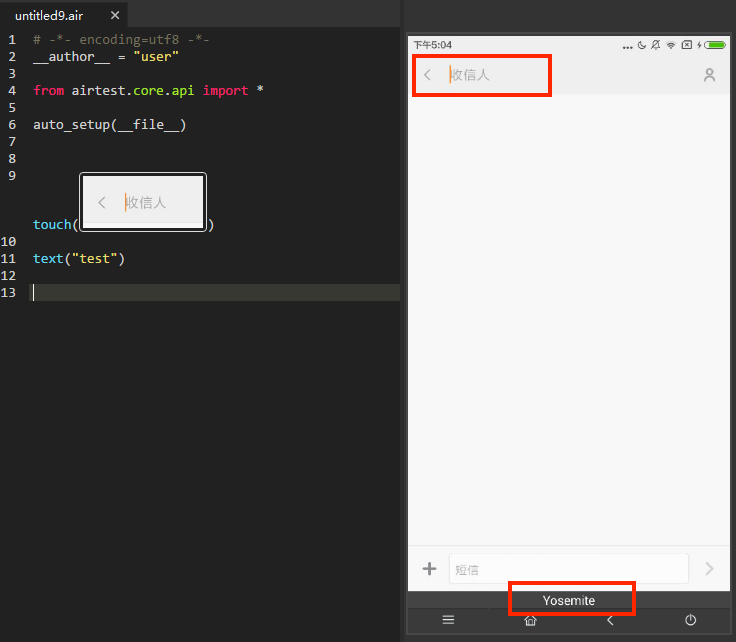 As shown in the script, first click on the input position, and then call the text API for input. During runtime, a mobile app named yosemite.apk will be automatically installed and the yosemite input method will be activated for input.
It should be noted that after using the text API, the input method of the phone will be switched to the Yosemite input method, so you can't use the keyboard as usual. Don't panic. If manual input is needed, you can switch the input method back to the system default one in the system's input method settings. Also, the Android phone assistant function in the IDE allows you to switch input methods with simply a few clicks.
2) Solutions to input failures
If the text() API fails, please check if your phone has stopped the installation and operation of the APK. It might be caused by incompatibility issues. In some cases, the phone might forbid the use of third-party input methods for password entering. You can refer to the Android Connection FAQ for more details and to modify the phone settings. Alternatively, you can try setting the Yosemite as the default input method on your phone before calling the text() API. Some models of phones may fail to enter passwords with the text() API. This is because the "Language and Input Method" - "Secure Input" in the phone settings is not enabled. After enabling it, you can use a non-native input method to enter passwords. Some special models of mobile phones may be prone to failure when entering text with the Yosemite input method (especially for OPPO and Vivo brands). If you are not going to input Chinese, you can try using the "adb shell input" command for text input:
shell("input text 'hello world'")
Additionally, the "adb shell input" can be simply set as the default input method, replacing the original Yosemite. For example, you can initialize the phone in Python code like this:
from airtest.core.api import *

# Equivalent to connecting the phone via --device Android:///?ime_method=ADBIME in the command line

init_device("Android", ime_method="ADBIME")
text("hello")
Some emulators (such as Nox Player) may have issues with inputting text. You can try checking if the Hardware - Physical Keyboard option is turned on in the settings. If it is, turn it off and set the default input method to Yosemite, then try again. For specific instructions, please refer to the troubleshooting section of the Android Emulator Connection.
3) Enter key and search button after input
The text API has a default parameter enter=True, which will automatically press the Enter key (equivalent to keyevent("ENTER")) after the input is completed. If you don't need it, please pass in enter=False.
text("test", enter=False)
Some input boxes require a click on the Search button on the input keyboard to activate the search operation after entering the text. You can pass in the parameter search=True:
text("test", search=True)
The keyevent("ENTER") of the Enter key is different from the operations in the input method such as Search and Line Break. The additional buttons displayed in the input method are called EDITOR CODE. The search=True in the above code actually passed the editor code 3. Since the Search button is the most commonly used one, we have encapsulated it into the text API. If you want other buttons besides Search, you need to refer to the document Editor Action Code to get the code (if the webpage cannot be accessed, you can search for the keyword IME_ACTION_SEARCH), and then manually enter it.
dev = device()

# Pressing the Go button of the input method corresponds to the key value of 2. Similarly, the Search button of the input method actually corresponds to the value of 3.

dev.yosemite_ime.code("2")

# The above code is equivalent to the following shell call.

# shell("am broadcast -a ADB_EDITOR_CODE --ei code 2")
More code can be found on Editor Action Code. If the webpage is not accessible, you can search for the keyword IME_ACTION_SEARCH.
4) Poco API of set_text
In addition to the text API in Airtest, we also provide a set_text API in Poco. This API can directly set text without calling an input method. However, the specified control must be an inputable control, such as an EditText-type widget in Android: poco("com.android.mms:id/recipients_editor").set_text("test") We suggest that if your project has already integrated Poco, you can try using Poco's set_text API to enter the text content, only using Airtest's text API when it fails (some models and some input boxes may not support the set_text API).
4.Deleting Text
1) Deleting text on Android platform
# Use key codes to delete characters one by one
for i in range(10):
    keyevent("67") # Equivalent to keyevent("KEYCODE_DEL")

# Use Poco's set_text API to clear the text box
poco("com.netease.cloudmusic:id/search_src_text").set_text(" ")
2) Deleting text on iOS platform
# Delete characters one by one

for i in range(10):
    text("\b",enter=False)
3) Deleting text on Windows platform
# Delete characters one by one
for i in range(10):
    keyevent("{BACK}")
5.Screen Recording
!!! Warning:
"Screen Recording" The screen recording function only applies to the Android platform and only some Android emulators.
1) Adding screen recording parameters in the command line
When running a script with "airtest run" in the command line, we can add the --recording parameter to record a video of the script execution process.
airtest run "D:\test\Airtest_example.air" --device android:/// --log "D:/test\41f68fdf265d8c13998d0a1a7b992889" --recording
And Airtest 1.1.6 supports adding a filename after the --recording parameter to name the screen recording file, for example, --recording test.mp4.
airtest run "D:\test\untitled.air" --device android:/// --log "D:/test\6fe87b11ca1fc75ebe670439f20fabfc" --recording 123.mp4
2) Adding screen recording statement in the script
In addition to using the --recording parameter in the command line, we can also add two statements in the script to record the script running process. These two statements are start_recording() and stop_recording():
# -*- encoding=utf8 -*-

__author__ = "AirtestProject"
from airtest.core.api import *
from airtest.core.android.recorder import *
from airtest.core.android.adb import *
auto_setup(__file__,devices=["android://127.0.0.1:5037/emulator-5554"])
adb = ADB(serialno="emulator-5554")
recorder = Recorder(adb)

# Start screen recording

recorder.start_recording(max_time=10)
touch(Template(r"tpl1603091574169.png", record_pos=(0.113, -0.302), resolution=(900, 1600)))
sleep(3.0)

# End screen recording

recorder.stop_recording(output="test.mp4")
6.Keyevent Key Codes
1) Key codes for Android devices
In scripts, sometimes we need to input certain specific keystrokes, such as pressing the HOME key or BACK key. If on an Android device, you can refer to Google's Android key codes (domestic users who cannot access to this link can search for keywords: Android keyevent).
keyevent("HOME")
keyevent("BACK")
keyevent("KEYCODE_DEL") # Equivalent to keyevent("67")
Note that the parameter is a string!!!
2) Key codes for Windows platform
If you are using the Windows system, please refer to the Windows key codes in the pywinauto library.
keyevent("{DEL}")
keyevent("{BACKSPACE}")
3) Key codes for iOS devices
At present, iOS devices only support the keyevent of the HOME key.
keyevent("HOME")
7.Entering Space on Windows Platform
# For Chinese

text("薛之谦",enter=False)
keyevent("{VK_SPACE}") # Spacebar
text("天外来物")
sleep(1.0)
"# For English
text("Love{VK_SPACE}Story")
8.Various Common Pip Commands
① Install Airtest library: pip install airtest ② Install Poco library: pip install pocoui ③ Update Airtest: pip install -U airtest ④ Update Poco: pip install -U pocoui ⑤ Uninstall Airtest library: pip uninstall airtest
Note: Poco dependency library is pocoui instead of poco. If you find both poco and pocoui in your environment, please make sure to uninstall poco and keep only pocoui.
In addition, if your computer has both Python 3 and Python 2 installed, you can use the following method to use the pip command in different Python environments:
# Python2

pip2 install XXX
python2 -m pip install XXX

# Python3

pip3 install XXX
python3 -m pip install XXX
⑥ View the installed libraries of Python environment: pip list ⑦ Install a specified version of the library: pip install -U airtest==1.2.3
9.Customized Snapshot Compression Quality
With Airtest version ≥1.1.2, you can customize the snapshot quality:
1) Adding the compress parameter in the command line
# In the quality value range [1, 99], Airtest defaults to 10. For higher quality, you can set it to 75.

airtest run xxx --compress quality
2) Defining quality in the script
Customize the global snapshot compression quality:
import airtest.core.api import *
ST.SNAPSHOT_QUALITY = xxx
Customize the compression quality of a single snapshot:
snapshot(quality=my_quality)
10.Inputting Random Numbers
First of all, we need to use the random function in Python to generate a random number that meet the requirements. For example, if we want to generate a random integer between 20 and 100, we can write the following code:
import random
r = random.randint(20,100)
Then use the text API to input the random number, but it should be noted that the text API takes in a string type. So, before passing the random number into the text API, you need to convert the previously generated random number into a string type.
text(str(random.randint(20,100)))
In this way, we can finish inputting a random number.
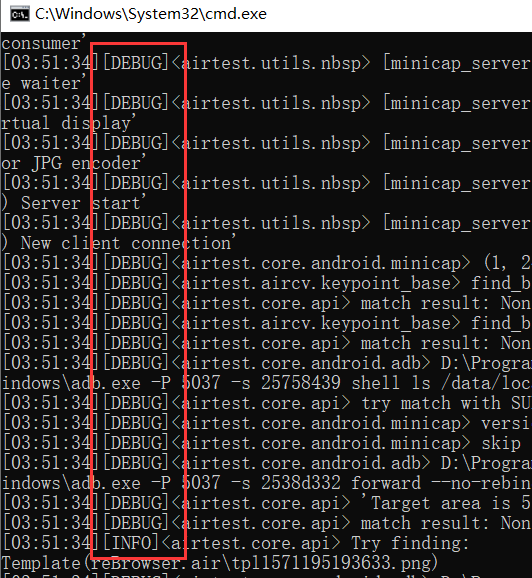
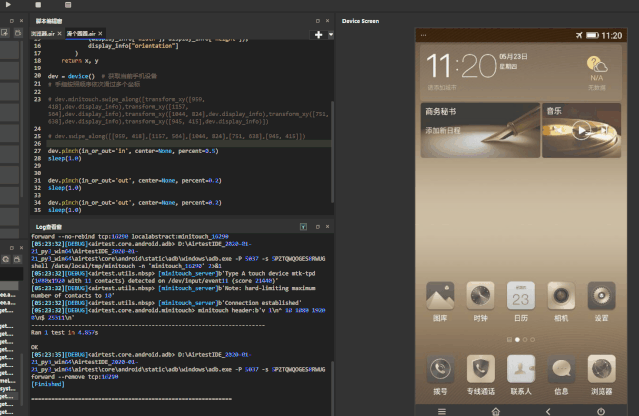
11.Cancelling the Massive Log Information Generated During Script Execution
During script execution, Airtest will refresh a lot of log information by default, as shown in the following picture:
 If you don't want these log messages to interfere with extracting effective error information, you can add a log level setting at the beginning of the script code:
# -*- encoding=utf8 -*-

__author__ = "user"
import logging
logger = logging.getLogger("airtest")
logger.setLevel(logging.ERROR)
from airtest.core.api import *
auto_setup(__file__)
In this way, there will only be a small amount of log output during phone initialization, and after initialization, the logger can be filtered.
12.Simulating Right-Click with the Mouse
The pywinauto.mouse module provides us with various methods for simulating mouse operations. For example, the commonly asked right-click operation can be simulated by using the right_click() in this module:
First, we need to obtain the current window that is being connected, and then call the right_click() API to perform a right-click operation.
from airtest.core.api import *
auto_setup(__file__)

# Obtain the currently connected window
dev = device()

# Obtain the mouse and simulate a right-click operation
dev.mouse.right_click(coords=(1920,100))
For more simulation of mouse or keyboard operations, please refer to our previous article: "How to simulate mouse and keyboard operations with Python".
13.Partial Snapshot/Region Snapshot
Partial snapshot or snapshot by result is a question that people often ask. Airtest provides the crop_image(img, rect) method to help achieve partial snapshots

.For example, if you want to take a snapshot of the area in the red frame on the phone screen:
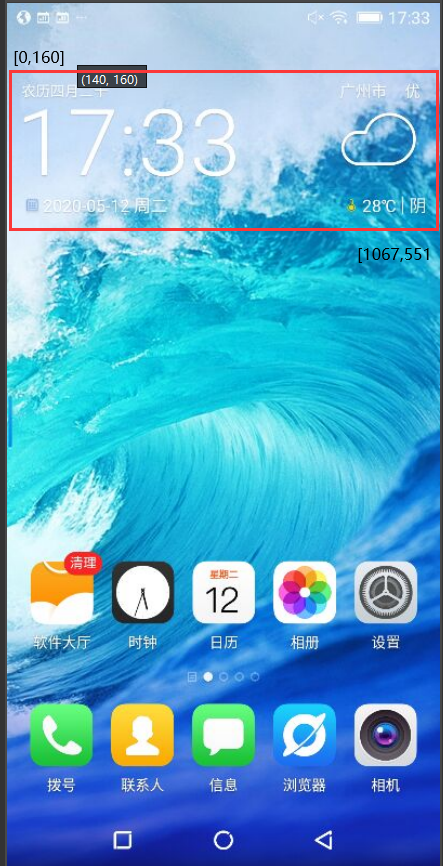
You can achieve it in the following way:
# -*- encoding=utf8 -*-

__author__ = "AirtestProject"
from airtest.core.api import *

# The crop_image() method is in airtest.aircv and needs to be imported

from airtest.aircv import *
auto_setup(__file__)
screen = G.DEVICE.snapshot()

# Take a partial snapshot

screen = aircv.crop_image(screen,(0,160,1067,551))

# Save the partial snapshot to the log folder

try_log_screen(screen)
The result is as shown in the picture:

14.Partial Image Search
screen = G.DEVICE.snapshot()
# Take a partial snapshot
local_screen = aircv.crop_image(screen,(0,949,1067,1500))

# Set the target snapshot as a Template object
template = Template(r"png_code/setting.png")
# Search for a specified image object within the partial snapshot
pos = tempalte.match_in(local_screen)
Detailed tutorials and examples can be found in this article in our official WeChat public account: "We have already implemented the most common requirements that you encounter when using Airtest."
15.Batch Run/Multi-Task Run/Multi-Device Run
- For a practical case of multi-device collaboration, please see "Multi-device collaboration - case analysis of WeChat mutual friend adding."
- For a practical case of batch execution using bat script, please see "Clever use of bat files to achieve batch running of Airtest scripts."
- For code examples of batch running and aggregating reports please see "multi-device-runner."
16.Determining if the Element/Snapshot Exists
- For Airtest, check if a snapshot target exists on the current screen: exists(snapshot)
- For Poco, check if an element exists: poco("xxx").exists()
17.Waiting for the Element/Snapshot to Appear
- For Airtest, wait for a snapshot target to appear on the current screen: sleep(snapshot)
- For Poco, wait for a certain control element to appear: poco("xxx").wait_for_appearance()
18.Asserting the Existence of an Element/Image
- Assert the existence of a certain snapshot target exists on the current screen: assert_exists(snapshot)
- Assert the existence of a certain Poco element: assert_equal(poco(xxx).exists(),True,"xxx control exists")
19.Importing the Encapsulated Functions in Other .air Scripts
If you want to call a common function encapsulated in another .air script, you can do it in this way:
from airtest.core.api import using

# Relative or absolute path that the code can find

using("common.air")
from common import common_function
common_function()
If the paths of the sub-scripts that need to be imported are all placed in a certain directory, you can set a default project root directory PROJECT_ROOT so that when using the using API, other sub-scripts can be found in the current root directory without having to fill in the complete path, making it more convenient for scripts to call each other.
For example, we create a script named test1.air, with the actual path being /User/test/project/test1.air:
from airtest.core.api import *
def test():
    touch("tmp.png")
Another script, main.air, in the same directory can import the test in it with the following code:
from airtest.core.api import *

ST.PROJECT_ROOT = "/User/test/project"
using("test1.air")
from test1 import test
After calling with the using API, if the program still cannot find the script, it is recommended to check if the script path in the using API is correct. Also, you can try adding the path of the script to be imported to sys.path at the beginning of the script.
# Add the path of test1.air to sys.path

sys.path.append(r"D:\test\user\project\test1.air")
20.Airtest's Multi-Image Searching
Airtest does not provide a dedicated API to perform multi-image searching, but we can achieve it with simple syntax:
picList = [pic1, pic2, pic3]  # List of snapshot picture objects
for pic in picList:
    pos = exists(pic)
    if pos:
        touch(pos)
        break  # Once any image in the list is found, execute touch
21.Poco's Multi-Element Searching
Poco has a dedicated API that implements multi-element waiting:
# Wait for any one of the multiple elements to appear
bomb = poco("bomb")
yellow = poco("yellow")
blue = poco("blue")
while True:
    fish = poco.wait_for_any([bomb,yellow,blue])
    print(fish.get_name())

# Wait for all elements to appear
poco.wait_for_all([yellow,blue,black])
22.Code Example for Converting Between Absolute and Relative Coordinates
To concert between absolute coordinates and relative coordinates with code, we first need to get the resolution of the device screen.
# Get device screen resolution (portrait mode)

height = G.DEVICE.display_info['height']
width = G.DEVICE.display_info['width']

# Given the absolute coordinates [311,1065], convert them to relative coordinates

x1 = 311/width
y1 = 1065/height
poco.click([x1,y1])

# Given the relative coordinates [0.3,0.55], convert them to absolute coordinates

x2 = 0.3*width
y2 = 0.55*height
touch([x2,y2])

# If the device is in the landscape mode, the resolution is as follows:

height = G.DEVICE.display_info['width']
width = G.DEVICE.display_info['height']
We can also use the following method to determine whether the device screen is in landscape or portrait mode, and obtain the screen resolution:
if G.DEVICE.display_info['orientation'] in [1,3]:
    height = G.DEVICE.display_info['width']
    width = G.DEVICE.display_info['height']
else:
    height = G.DEVICE.display_info['height']
    width = G.DEVICE.display_info['width']
23.Priorizing Script Initialization, Poco Initialization, and Game Application Startup
When starting using Poco, many beginners are prone to mixing up the script order for connecting devices, initializing Poco, and opening game applications, resulting in a multitude of error messages.
The most common ones include the forcible disconnection to an existing device by the remote host, socket connection broken, and so on.
The correct order is: connect the device (usually via the auto_setup API) --> open the game application (usually via the start_app API) --> wait for the application to fully load before initializing poco.
# -*- encoding=utf8 -*-

__author__ = "Airtest"
from airtest.core.api import *

# Connect the device

auto_setup(__file__,logdir=True,devices=["Android://127.0.0.1:5037/emulator-5554?cap_method=JAVACAP"])

# Start the application

start_app("com.NetEase")
sleep(6.0)

# Initialize Poco

from poco.drivers.unity3d import UnityPoco
poco = UnityPoco()
poco("btn_start").click()
So, when initializing Poco, remember to check the order of these few lines of code to prevent errors. Why do we need to start the game application before initializing Poco? This is because of the Poco-SDK embedded in the game application beforehand. When the game is fully launched, our Poco service will start up accordingly. Therefore, we should begin initializing the Poco for the game after the game is fully launched (using sufficient sleep after start_app). However, native Android and iOS apps are not subject to this order. As long as an Android/iOS device is connected, we can start initializing Android poco or iOS poco.
24.Initializing Multiple Poco in a Single Script
A script supports initializing multiple different Pocos, for example Android Poco and Unity Poco can coexist in the same script.
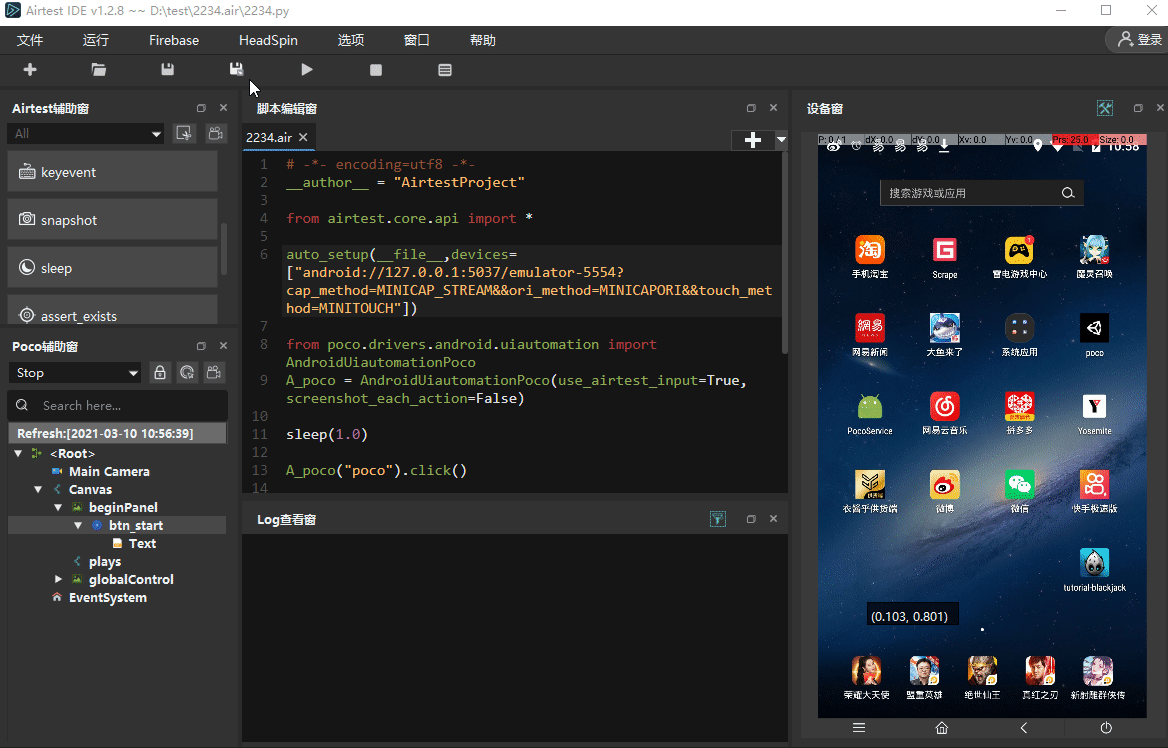
from airtest.core.api import *

auto_setup(__file__,devices=["android://127.0.0.1:5037/emulator-5554?cap_method=MINICAP_STREAM&&ori_method=MINICAPORI&&touch_method=MINITOUCH"])

from poco.drivers.android.uiautomation import AndroidUiautomationPoco
A_poco = AndroidUiautomationPoco(use_airtest_input=True, screenshot_each_action=False)

sleep(1.0)

A_poco("poco").click()
sleep(2.0)

from poco.drivers.unity3d import UnityPoco
U_poco = UnityPoco()

U_poco("btn_start").click()
However, we cannot repeatedly initialize the same Poco within the same script. For example, initializing Android Poco multiple times may cause unusual errors.
25.Custom Swipe
1) Unlock via swipe_along
Sometimes on an Android phone, we need to achieve the operation of continuously swiping multiple items, such as swiping a pattern on the screen unlock a function). For this, we provide a swipe_along API, and the sample code is as follows:
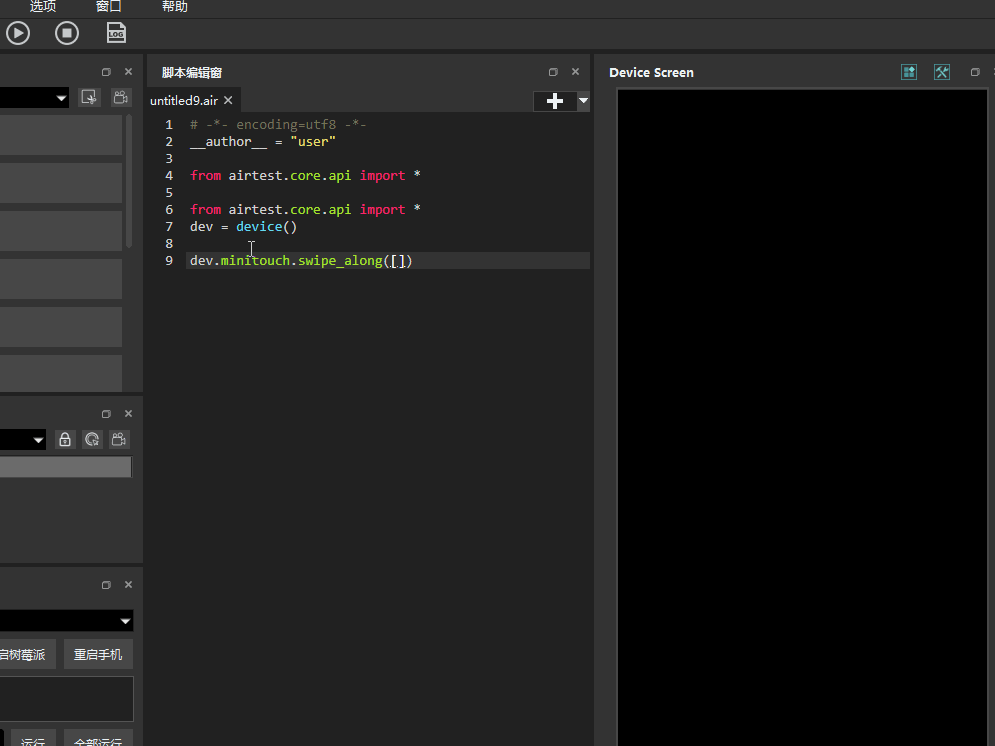
from airtest.core.api import *
dev = device() # Get the current mobile device

# Swipe with your fingers sequentially over three coordinates

dev.swipe_along([(100, 100), (200, 200), (300, 300)])
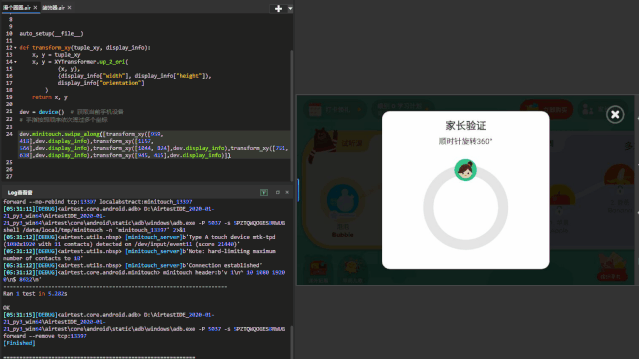
To obtain the coordinates on the phone screen, you can turn on the Show Real-time Cursor Coordinate option in the IDE's settings. This will allow you to see the coordinate information in real-time on the mobile phone screen. You can also right-click the mouse to copy the coordinates to the clipboard, making it very easy to swipe between coordinates, as shown in the picture: Please note that this API is only available when the device is using the default minitouch mode (maxtouch for Android10). In addition, we provide a custom touch or swipe operation solution to help you achieve operations that better meet your needs.
from airtest.core.api import *
from airtest.core.android.touch_methods.base_touch import *
connect_device("Android:///")

# Achieve the operation of clicking with two fingers simultaneously

multitouch_event = [
    DownEvent((100, 100), 0), # Finger 1 presses down at (100, 100)
    DownEvent((200, 200), 1), # Finger 2 press down at (200, 200)
    SleepEvent(1),
    UpEvent(0), UpEvent(1)]  # Two fingers are lifted up
device().touch_method.perform(multitouch_event)
2) Swiping a circle via swipe_along
# -*- encoding=utf8 -*-

__author__ = "AirtestProject"
from airtest.core.api import *
auto_setup(__file__)

# Get the current mobile device

dev = device()

# Swipe with your fingers sequentially over multiple coordinates

dev.swipe_along([[959, 418],[1157, 564],[1044, 824],[751, 638],[945, 415]])
3) Deleting via longtouch
Let's first break down the entire operation of long-touching to delete an app. First, long-touch a certain app without releasing it, then swipe the app to the position of the trash bin, and finally click on the Confirm button on the pop-up window to complete the deletion.
If we use the encapsulated API, first long_click and then swipe, we cannot complete this task. Because the long_click realizes the operation of pressing down - pausing - lifting up, but we cannot lift up before dragging the app to the trash bin to delete it.
So to realize the operation of long touch to delete an application, we can use the 4 "events" in basetouch:
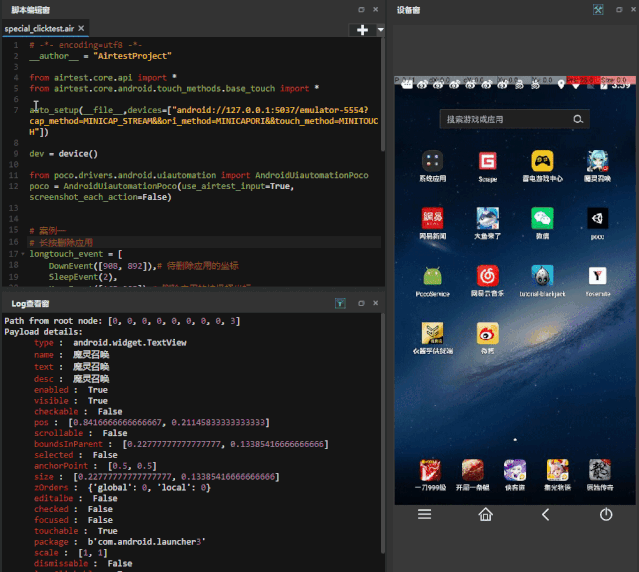
from airtest.core.android.touch_methods.base_touch import *
dev = device()

# Case One

# Long touch to delete the application

longtouch_event = [
    DownEvent([908, 892]),# Coordinates of the application to be deleted.
    SleepEvent(2),
    MoveEvent([165,285]),# Coordinates of the trash bin
    UpEvent(0)]
dev.touch_proxy.perform(longtouch_event)

# Cancel uninstallation

poco("android:id/button2").click()
26.Swiping with Multiple Fingers
Three fingers simultaneously swipe a certain distance on the device screen.
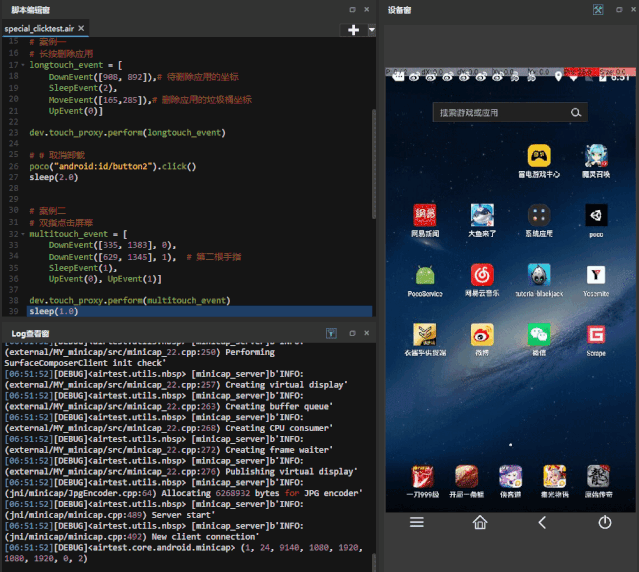
# Case three

# Three-finger swipe

swipe_event2 = [DownEvent((100, 300), 0), DownEvent((100, 500), 1), DownEvent((100, 700), 2), SleepEvent(0.1)]
for i in range(5):
    swipe_event2.append(MoveEvent((100 + 100*i, 300), 0))#  The first finger
    swipe_event2.append(MoveEvent((100 + 100*i, 500), 1))# Theh second finger
    swipe_event2.append(MoveEvent((100 + 100*i, 700), 2))# The third finger
    swipe_event2.append(SleepEvent(0.2))
swipe_event2.append(UpEvent(0))
swipe_event2.append(UpEvent(1))
swipe_event2.append(UpEvent(2))
dev.touch_proxy.perform(swipe_event2)
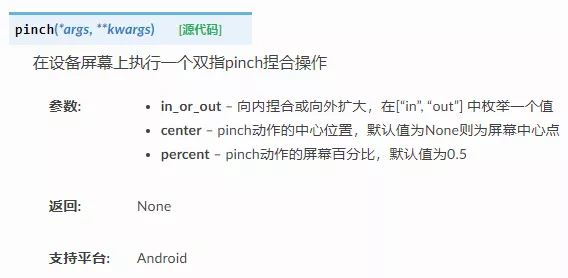
27.Pinching with Two Fingers
Open the phone photo album and choose any image. Then we will use this picture to demonstrate the pinch-to-zoom operation, zooming in or out on the image:
# Get the current mobile device

dev = device()

# Pinch inward

dev.pinch(in_or_out='in', center=None, percent=0.5)
sleep(1.0)

# Pinch outward

dev.pinch(in_or_out='out', center=None, percent=0.2)
sleep(1.0)
dev.pinch(in_or_out='out', center=None, percent=0.2)
sleep(1.0)
For more details on the parameters of the pinch() API, please refer to the link: https://airtest.readthedocs.io/en/latest/all_module/airtest.core.api.html?highlight=swipe#airtest.core.api.pinch):
28.Adding Appropriate Sleep Time in the Airtest Script
During the process of script writing, if there are continuous clicks, the screen content may keep changing, sometimes causing a possible failure when the script runs to the click operation. This is because the screen content changes so fast that Airtest recognizes and operates the element before the interface is stable, causing a failed click on the corresponding element. Therefore, we recommend waiting for a while after completing some operation steps before proceeding to the next step, for example:
from airtest.core.api import *
start_app("test_package")
sleep(5)
touch([500, 500])
sleep(1)
touch([600, 0])
If you want to add a fixed waiting time after each operation, we have a global variable called OPDELAY that can modify the interval between Airtest operations. You can refer to the OPDELAY section in the Airtest Script Configuration for more details.