V. Windows Connection
Note
Before embedding the window, please minimize other irrelevant windows and keep only the AirtestIDE and the window to be tested in an active state on the desktop. If an exception occurs when you are connecting to a Windows window using the embedded mode, such as clicking becoming ineffective after embedding, or the software reporting an error during embedding, please switch to the non-embedded mode.
1.Connecting Windows Using Embedded Mode
1) Select window/game screen
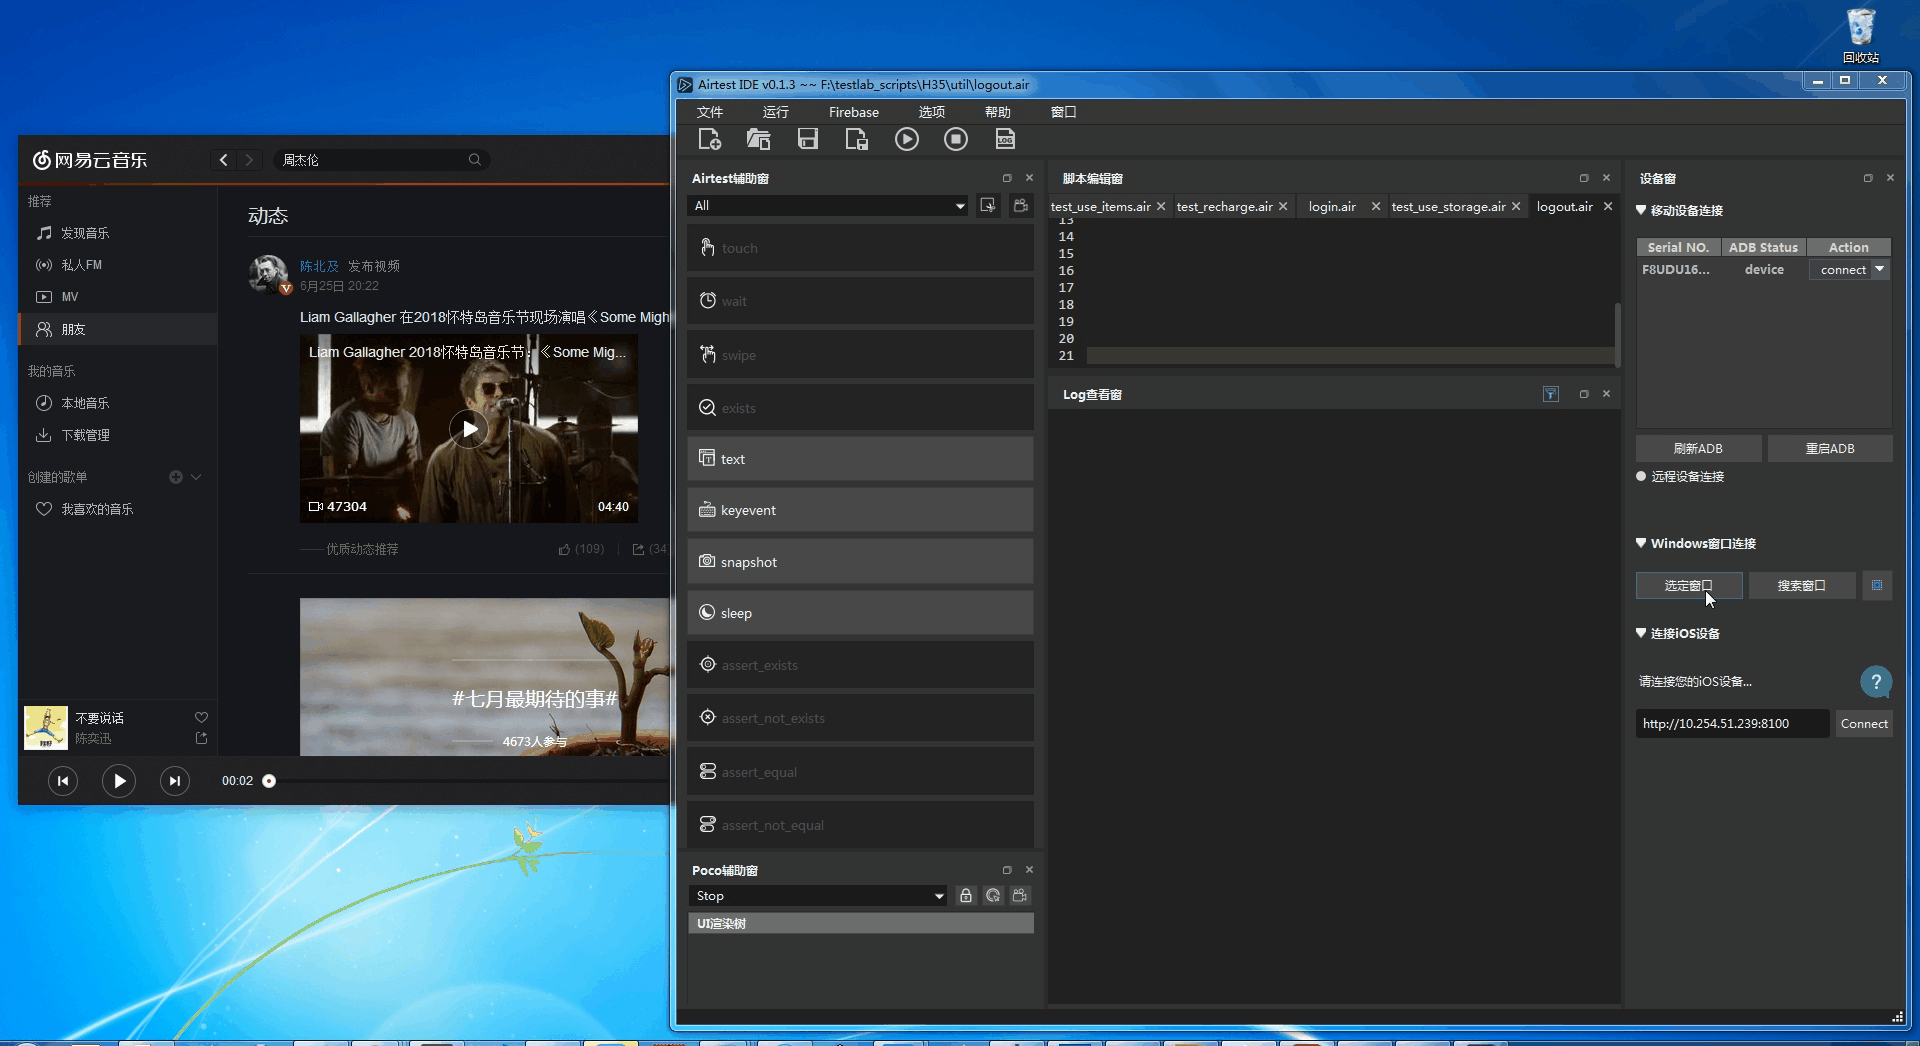
- Click the "Select window/game screen" button (the button text may differ depending on the IDE version), and AirtestIDE will enter the window selection mode.
- As the mouse moves, a thin green/red line frame will select the window corresponding to the mouse position in real time.
- Once the green/red frame moves to the target window, embed it by left clicking the mouse.
Note
-While in the state of window selection with the green/red frame, you can press the Esc key or right click to exit the state.
-If it is difficult to select the window to be tested, you can first minimize all other irrelevant software on the desktop, activate only AirtestIDE and the window to be tested, and then connect. This can improve accuracy.
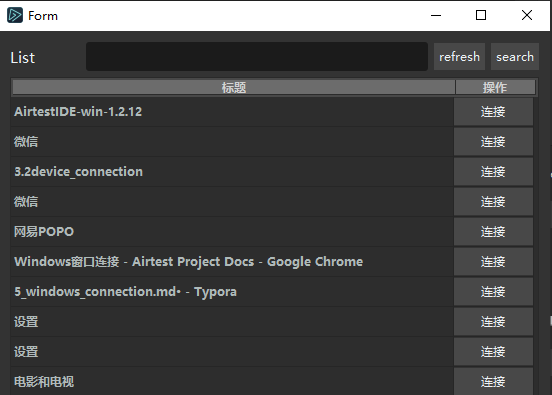
2) Search window
Alternatively, you can click the "Search Window" button next to "Select Game Screen," find the window title you want to connect to in the list, and then click the connect button on the right to embed the window:

!!! Warning "Do not embed the AirtestIDE window as the window to be tested" Please do not embed the AirtestIDE window itself as the window to be tested, otherwise errors may occur!
2.Connecting Windows Using Non-Embedded Mode
Due to different implementation methods, some desktop software may have abnormalities after being embedded, such as clicking failure after embedding, reporting errors during embedding, or abnormal screen display after embedding, and so on. In this case, you can try using the "Windows Non-embedding Connection" solution and the steps are as follows:
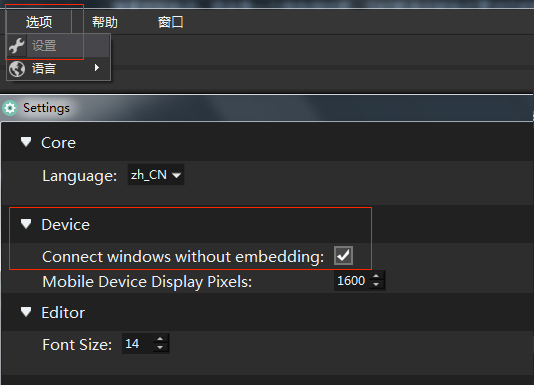
-
Dropdown menu "Settings" - "Options" - "Device".
-
Check the "Connect windows without embedding" option, as shown in the figure:
-
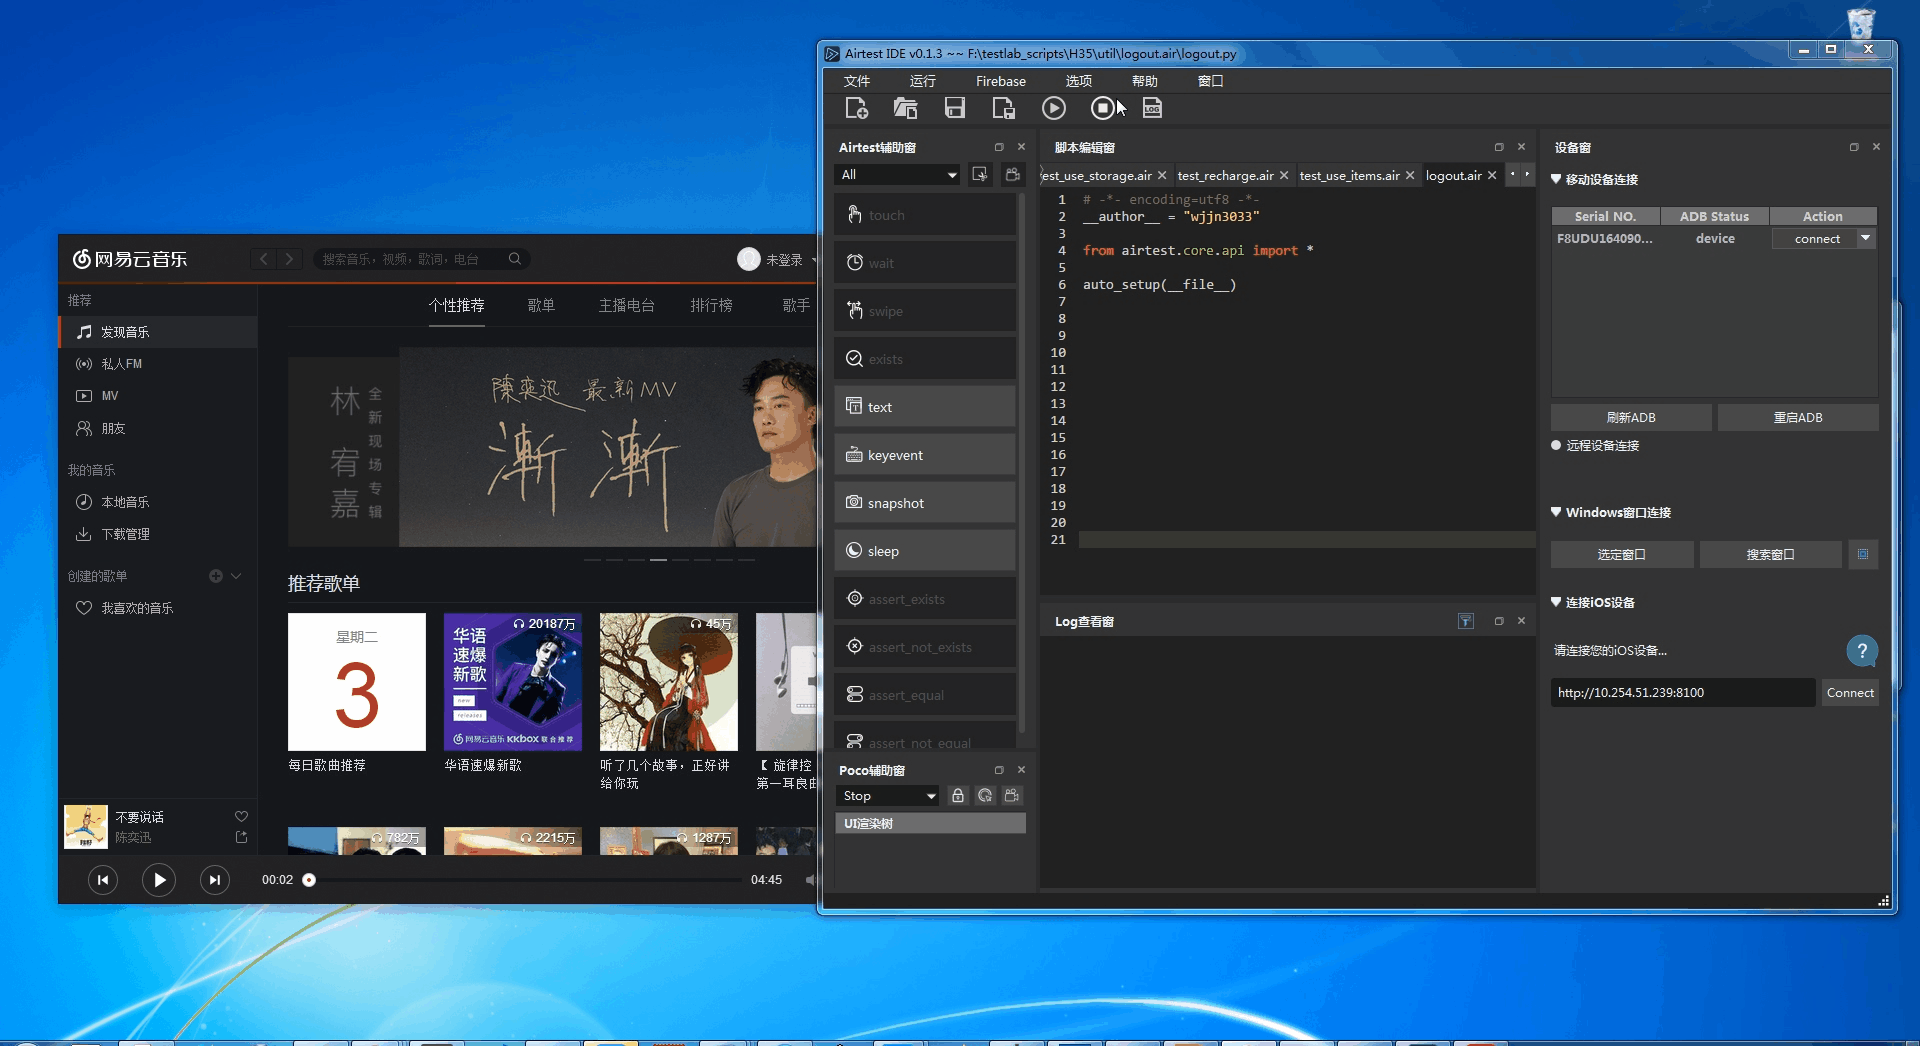
After saving the settings, perform the window connection operation again by clicking the Selected Window button and use the green/red frame to select the window to be tested. Then the window will not be embedded in the IDE and can be operated normally.
-
Similarly, if you connect the window by search it, it will not be embedded in the IDE and can be operated normally.
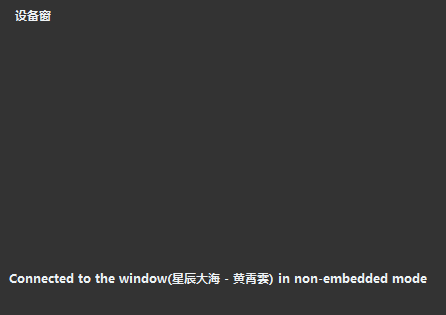
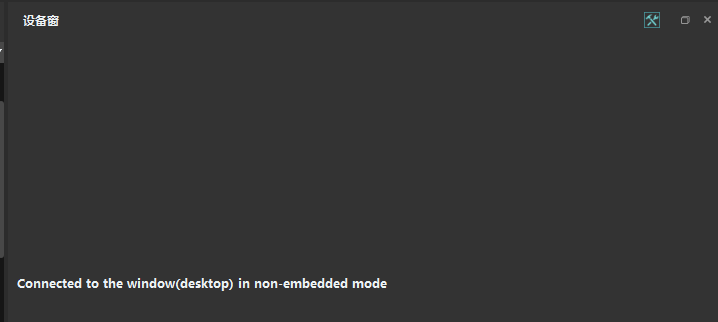
In addition, when using the non-embedded mode to connect to the window to be tested, the device screen panel of the IDE will display a prompt like connected to the xxx in non-embedded mode (meaning that the xxx window is connected in non-embedded mode). Don't panic, just operate on it normally:
3.Windows Desktop Mode
If you want to test more than one window (with multiple different window handles), embedding a single window may not meet your testing needs. Therefore, we also provide an alternative solution to connecting Windows: the desktop mode.

In this mode, you can record and run scripts normally, just that the entire desktop will be captured and recognized during the execution. It can even recognize the snapshot statements in the AirtestIDE code window. When executing scripts, please try to minimize the AirtestIDE window or convert the snapshots in the script editor window to code to prevent them from interfering with the execution result.
4.Connecting Windows Using Scripts
1) Connecting via command line
After connecting to a Windows window in AirtestIDE, the handle of this window will be used to run the script. That is to say, after clicking the Run Script button, the command line displayed in the log window will show the words of --device Windows:/// followed by a string of numbers. Once this Windows window is closed, the handle will change when it is reopened, and so will the command line. If you need to run the script manually using the command line, please refer to the relevant section in the Running Script chapter.

2) Connceting using scripts
① Using the handle
The script for connecting to a window using the handle can be written like this:
auto_setup(__file__,devices=["Windows:///133194"])
However, this connection script is only valid for the window opened during the current session. If the window is closed and reopened, the handle will change, and the script will become invalid.
② Using regular expression to match window title
We can also write a regular expression to match the title of the window to be tested and use this regular expression to connect to the window:
# For example, match the window title with "Blowing a Dream to the Western Island" followed by any character other than a line break.

auto_setup(__file__,devices=["Windows:///?title_re=Blowing a Dream to the Western Island.*"])
In most cases, the title of the window is not easily changed, so using regular expressions to match the window title to connect the script of the window being tested will be relatively secured.
③ Connecting to the Windows desktop
If it is not necessary to specify a particular window application, you can also use the following code to directly connect to the entire desktop for automated testing:
auto_setup(__file__,devices=["Windows:///"])
5.Common Issues with Windows Connection
!!! Note The Windows mode is still under development. And you are welcome to give any suggestions by submitting an Issue.
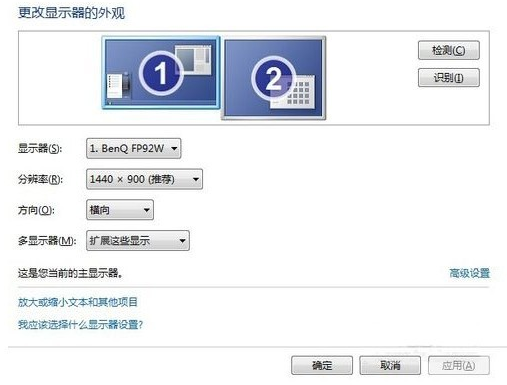
1) Snapshot error during dual-screen recording
Please set the main screen to the left screen and align the top edges of the two displays in "Control Panel"-"Display"-"Screen Resolution":
2) Snapshot stuck during recording
When manually recording a script, after selecting the image area, you need to double click to complete the image selection. However, in the new version of the IDE, you only need to release the mouse after selecting the image area to complete the snapshot operation.
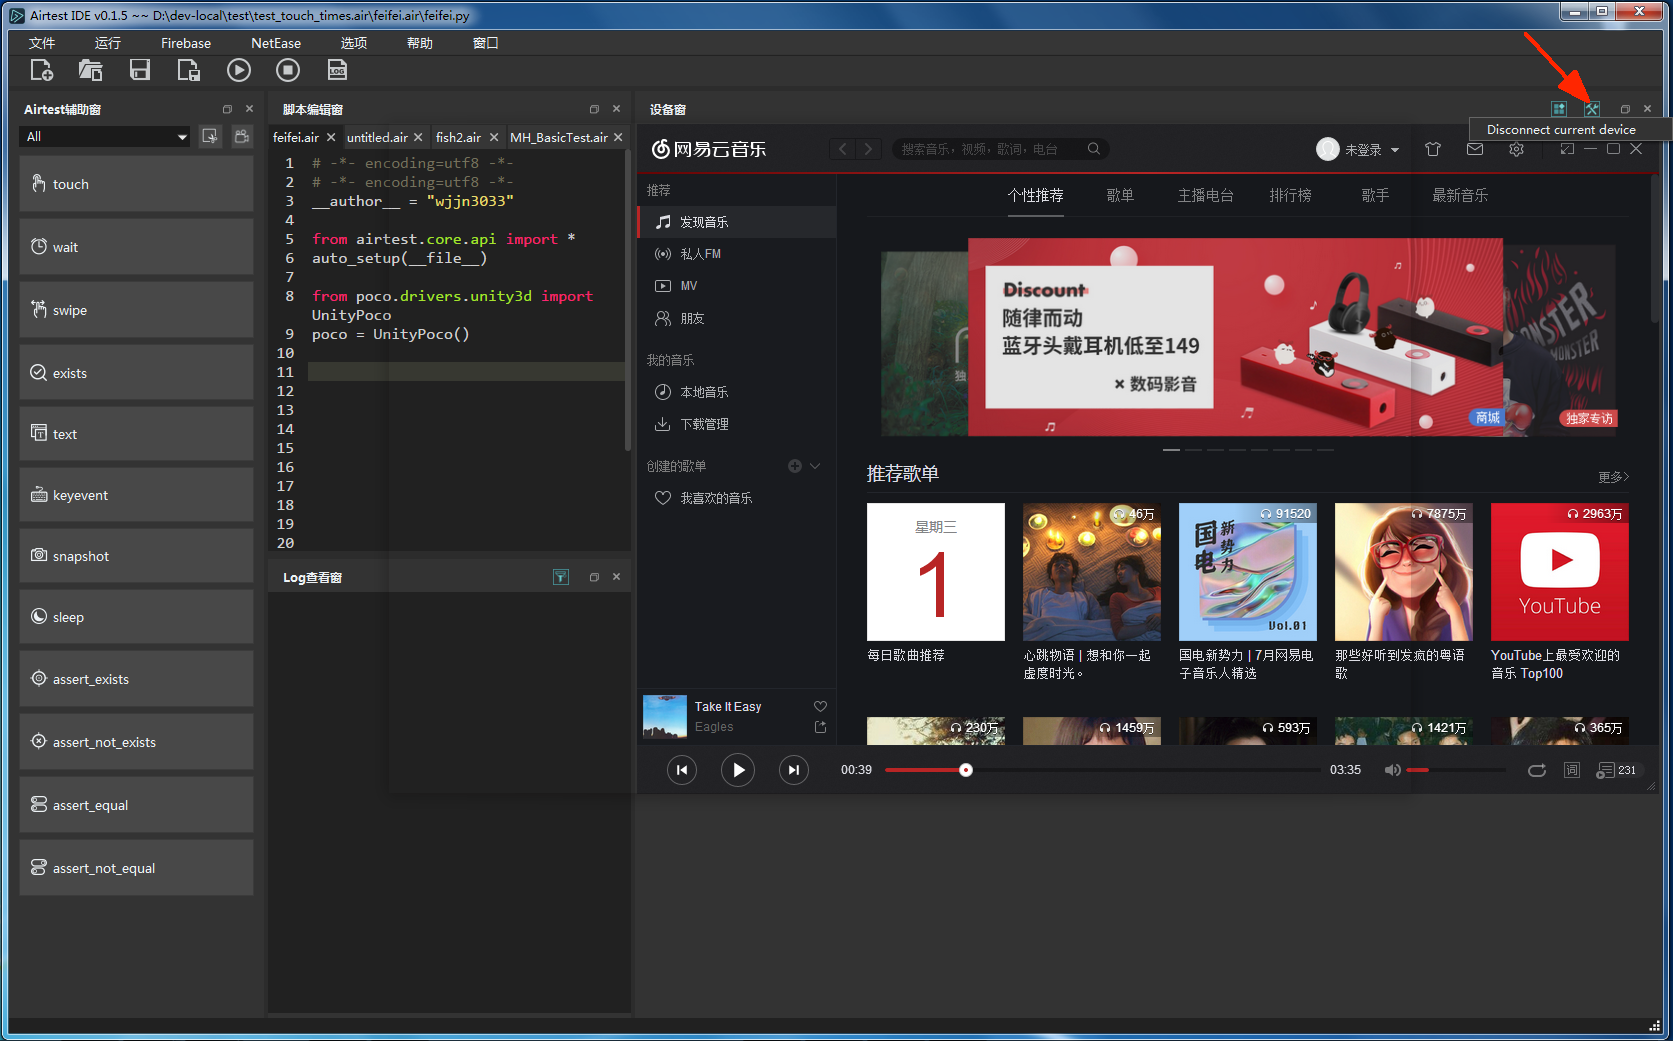
3) How to display the Windows window
-
Closing the IDE will trigger the window to pop up.
-
Click the shortcut button on the title bar of the device screen window to display the window.
4) Unable to change the size of the embedded Windows window embedded
As the resolution needs to be recorded when captureing a snapshot of the Windows window, the size of the window cannot be modified after embedding it into the IDE. If the embedded window is too large, adjust the window to a suitable size before embedding it.
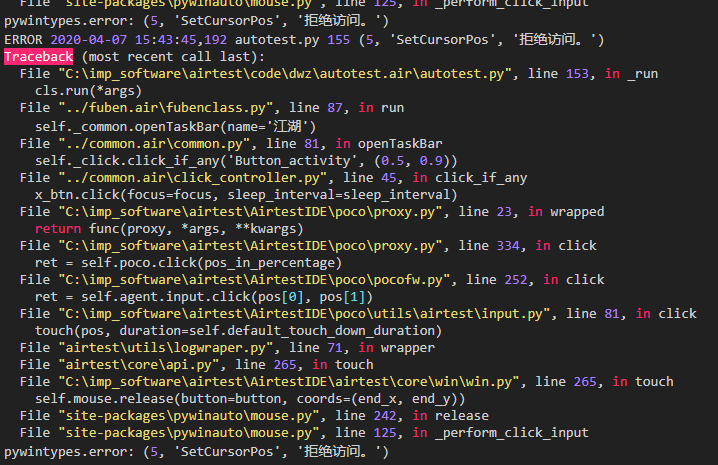
5) Click failure occurs when running the script on Windows
If there is a click failure when running the script on Windows, with the following error message, try closing the IDE, and then reopen it with administrator privileges.
6) Unable to embed the window properly
Due to different implementation methods for different desktop applications, you may find it unable to embed a window properly into the IDE and encounter the issues like IDE error during embedding, inability to click the application, severe stretching of the window, window black screen, incomplete window display, etc. In this case, you need to switch to the non-embedded mode or the desktop mode to connect the window to be tested.
7) Click position and Poco selection offset issue on Windows
In Windows, due to the system border around the edge of the tested application, a fixed offset may occur when clicking the position or selecting nodes with Poco. For specific cases, please refer to this issue.
The solution is to go to Options-Settings-Poco and set the border position of the Windows Content Area Rect in AirtestIDE to specify the size and location of the tested application window, so that the Poco plugin of AirtestIDE can know the game screen area.

The width of the border between the connected window and the actual active screen can be specified in the code by using focus_rect:
# focus_rect: [left border width, top border width, right border width, bottom border width]

device().focus_rect = [int, int, int, int]