I. Get Started with Airtest+Poco
1.Preface
This document will demonstrate the full process of writing Airtest+Poco automation scripts using the AirtestIDE editor designed for the AirtestProject. It is highly recommended for beginners to start reading this document and use AirtestIDE to get started with script writing.
2.Introduction
AirtestIDE is a cross-platform editor for automated UI testing of games and apps.
- Featuring automated script recording, one-click playback, and report viewing, it makes automated testing easy and effortless.
- Equipped with the Airtest framework based on image recognition, applicable to all Android/iOS/Windows apps.
- Equipped with the Poco framework based on UI controls search, applicable to various platforms including Unity3d, Cocos2d, and Android/iOS apps.
- Able to run on Windows, MacOS, and Linux platforms.
Get to know more features through videos on the official website.
Through this tutorial, you will learn how to get started with automated testing or write some scripts to automate the games. Trust me, this will be an enjoyable journey~
3.Installation
Currently, AirtestIDE is available for the installation on Windows, Mac, and Linux. Please download it from the official website, unzip it and install it. (For Linux, only AirtestIDE version 1.2.3 and lower are supported, so we recommend using AirtestIDE on Windows and Mac instead.)
4.Connecting Devices
AirtestIDE currently supports testing applications on Android/Windows/iOS, with support for more platforms under development. Whether it is an Android/iOS phone or a Windows window, it is considered as a device in Airtest. Next, we will show you how to connect a device.
1) Connecting Android phones
By connecting your computer and Android phone through ADB, you can start debugging Android applications. ADB is the official Android debugging tool developed by Google. AirtestIDE relies on ADB to communicate with Android devices. Open AirtestIDE and connect an Android phone following the steps below:
- Go to Settings-Developer Options-Enable USB debugging. Here is the Android official documentation for your reference.
- Click on the refresh ADB button in the device panel of AirtestIDE to check for connected devices.
- If the device is not displayed, try clicking on restart ADB. If it still doesn't work, refer to the FAQ document for troubleshooting.
- Once you see the device on the panel, click on the Connect button corresponding to the device to initialize it.
Once the mobile phone is connected, you can see the mirrored display of the mobile phone screen in AirtestIDE and operate on it in real time. If the connection fails, please refer to the FAQ document for troubleshooting. If it still doesn't work, please submit the phone model and AirtestIDE error to Github Issue. Our developers will fix it as soon as possible. Due to the serious fragmentation with Android phones, we will greatly appreciate your feedback, which can help improve the project.
2) Connecting Windows
For the testing of Windows desktop applications, AirtestIDE can embed the window to be tested and facilitates script recording and debugging.
- Click on the Select Game Screen button in the device panel of AirtestIDE.
- Move the mouse over the window to be tested. When you see a red border, outlining the window to be tested.
- Click on the left mouse button to embed the window into AirtestIDE.
- You can also click on the Search Window button, select the title of the corresponding window, and then click on the Connect button.
 If you cannot connect the window of the tested program with the above methods, you can also adopt an alternative connection method.
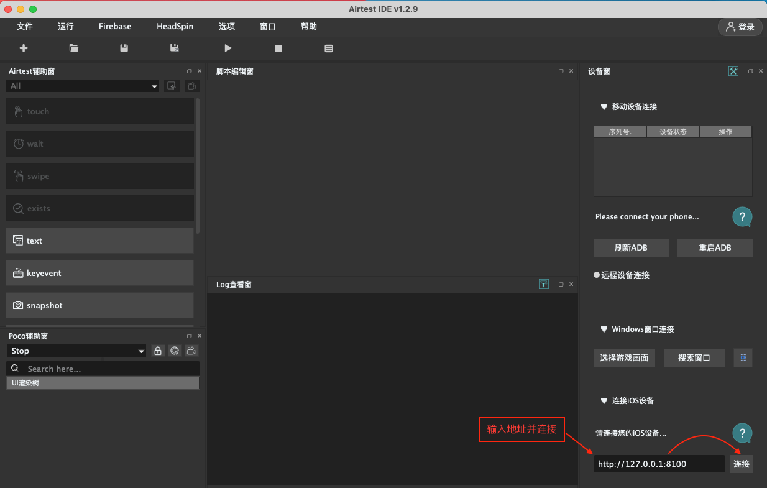
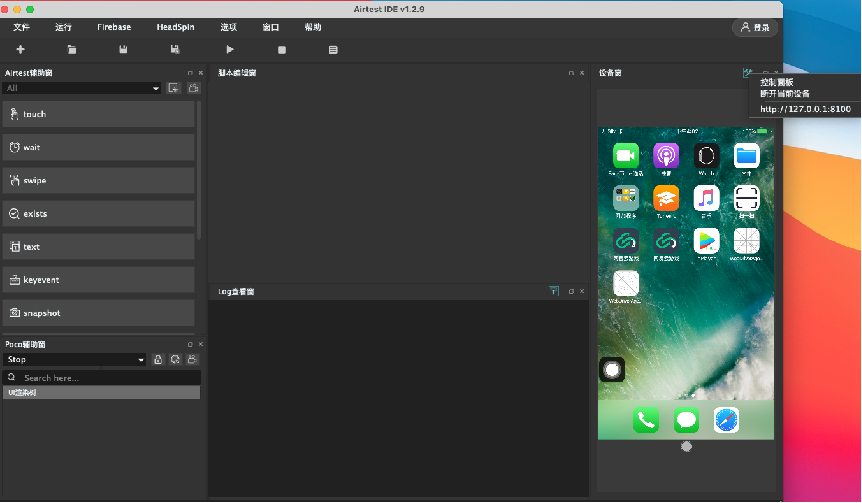
3) Connecting iOS phones
To connect an iOS phone, you need to first have a Mac computer with Xcode installed and follow the connection instructions in this document.
5.Recording Automation Scripts
After connecting the device, we can start recording automated testing scripts. In the following section, we will use a Unity game application on an Android device to demonstrate how to record scripts.
1) Simulation of inputs
Let's start with the most commonly used simulation of clicks. Simulation of clicks means imitating your actions to click on a specific location on the device screen.
① Based on image recognition
With the support of image recognition technologies, you can locate and click on the positions you want. This is achieved based on the Airtest framework.
We can first take a look at how to automatically record scripts: click on the Record button on the Airtest Window on the left side of AirtestIDE, and as you operate the phone on the Device Screen panel, the code will be automatically generated in the script window.
 Now let's verify it by clicking on the Start button to run your first automation script!
If you find that the icons generated by automatic recording are not accurate enough, you can also click on the touch button on the Airtest Window and select the precise icon on the device screen to generate a touch statement automatically.
 Similar simulation of inputs also include swipe: click on the swipe button, select the precise icon as the starting point by framing it on the device screen, click on the end point of the swipe, and a swipe statement will be generated automatically.
The APIs for other simulation of inputs include:
Similar simulation of inputs also include swipe: click on the swipe button, select the precise icon as the starting point by framing it on the device screen, click on the end point of the swipe, and a swipe statement will be generated automatically.
The APIs for other simulation of inputs include:
- text: input texts
- keyevent: input keys, including HOME/BACK/MENU, etc.
- sleep: wait
- snapshot: take a screenshot
② Based on UI controls
If you find that image recognition is not accurate enough, you can also use the method based on UI control search to conduct automated testing. Unlike Airtest, this is a feature realized with the Poco framework.
Currently, Poco supports various game engines such as Unity3d, Cocos2d, Egret Engine, as well as native Android/iOS apps.
For Android/iOS native apps, it's available for immediate use with SDK integration. However, since the game engines use graphics interface like OpenGL to render directly without using the native UI system of Android, we need to communicate with the game's runtime to obtain the entire UI structure.
We provide you with a very convenient SDK integration method. Click here to check the list of currently supported platforms and learn how to integrate Poco for your project.
If the engine or platform for your project is not included in the documentation, you can extend the SDK yourself.
Actually, within the NetEase Games, we use this method to support multiple self-developed engines such as Messiah/NeoX/Dream.
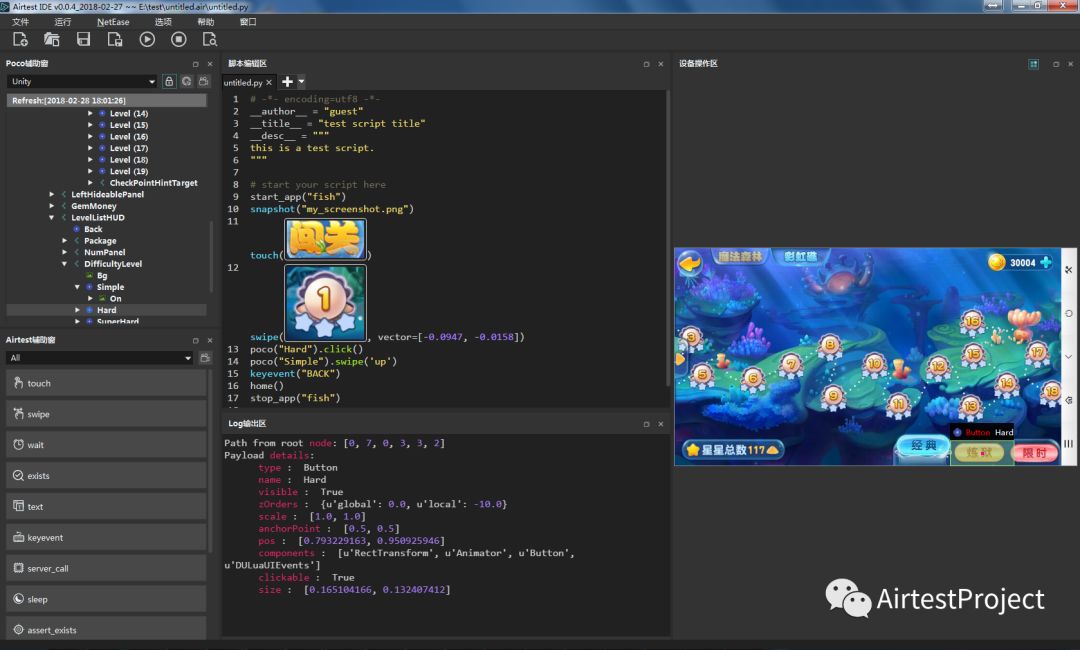
After the integration is complete, we can start recording scripts. Start the game on your mobile phone and switch to the corresponding engine type in the Poco window mode in AirtestIDE to see the entire UI structure.
 Click on the Record button, then as you operate with the mouse, Poco statements will be automatically generated to the script editor window.
 Similarly, you can inspect UI controls more accurately through the UI element tree structure. By double-clicking a node, a Poco statement will be automatically generated, or you can choose to write it yourself in a better way.
The automatically generated statements may not be able to adapt to all scenarios. Choosing a more appropriate selector to write the code usually enhances the robustness and readability of the entire automation script. This is a skill worthy of learning.
 After recording the script, don't forget to run it and check the effect.
For native Android/iOS apps, there is no need to integrate SDK. For example, after an Android phone is connected, simply switching the mode of the Poco Window to Android will allow you to see the entire UI element tree.
After recording the script, don't forget to run it and check the effect.
For native Android/iOS apps, there is no need to integrate SDK. For example, after an Android phone is connected, simply switching the mode of the Poco Window to Android will allow you to see the entire UI element tree.
2) Framework information
The two UI recognition methods mentioned above are based on two frameworks respectively:
- Airtest framework based on image recognition
- Poco Framework based on UI controls search
These two frameworks are Python third-party libraries developed by our team. Through practical project experience, we have found that they work best when used together. During script writing, we often need to consult their project API documentation.
3) Based on Python syntax
The code recorded and executed in the AirtestIDE is based on Python. Python syntax is concise and powerful, with a wide range of third-party libraries and tools.
For beginners, it is very easy to get started with Python. After learning the basic syntax, you can write logical statements needed in automation scripts.
touch("open card pack.png")
if exists("awards panel.png"):
 for i in range(5):
     Poco("awards-%s" % i).click()
If you are an experienced user, you can use various third-party libraries in AirtestIDE to make your automation scripts more powerful. By adding PYTHONPATH settings, you can use the local python.exe to run your scripts. In addition to the statements provided in the auxiliary window, more API documentation can be found in the GitHub of Airtest and Poco.
4) Assertion
By far, we already have learned various input simulation methods, together with logical control statements, to operate on the connected phone. On top of that, there is another important step in automated testing: result verification. So now, let's take a look at how to declare assertions.
① Verify UI interface
The recording method is similar to simulation of inputs.
- assert_exists: Assert that the image exists.
- assert_not_exists: Assert that the image does not exist.
② Verify numerical values
Get the property value via Poco and perform assertions with handwritten code.
- assert_equal: Assert equality.
- assert_not_equal: Assert inequality.
For example
# Getting 20 points after simulating inputs

value = Poco("point button").attr("num")
assert_equal(value, 20, "Get 20 points")
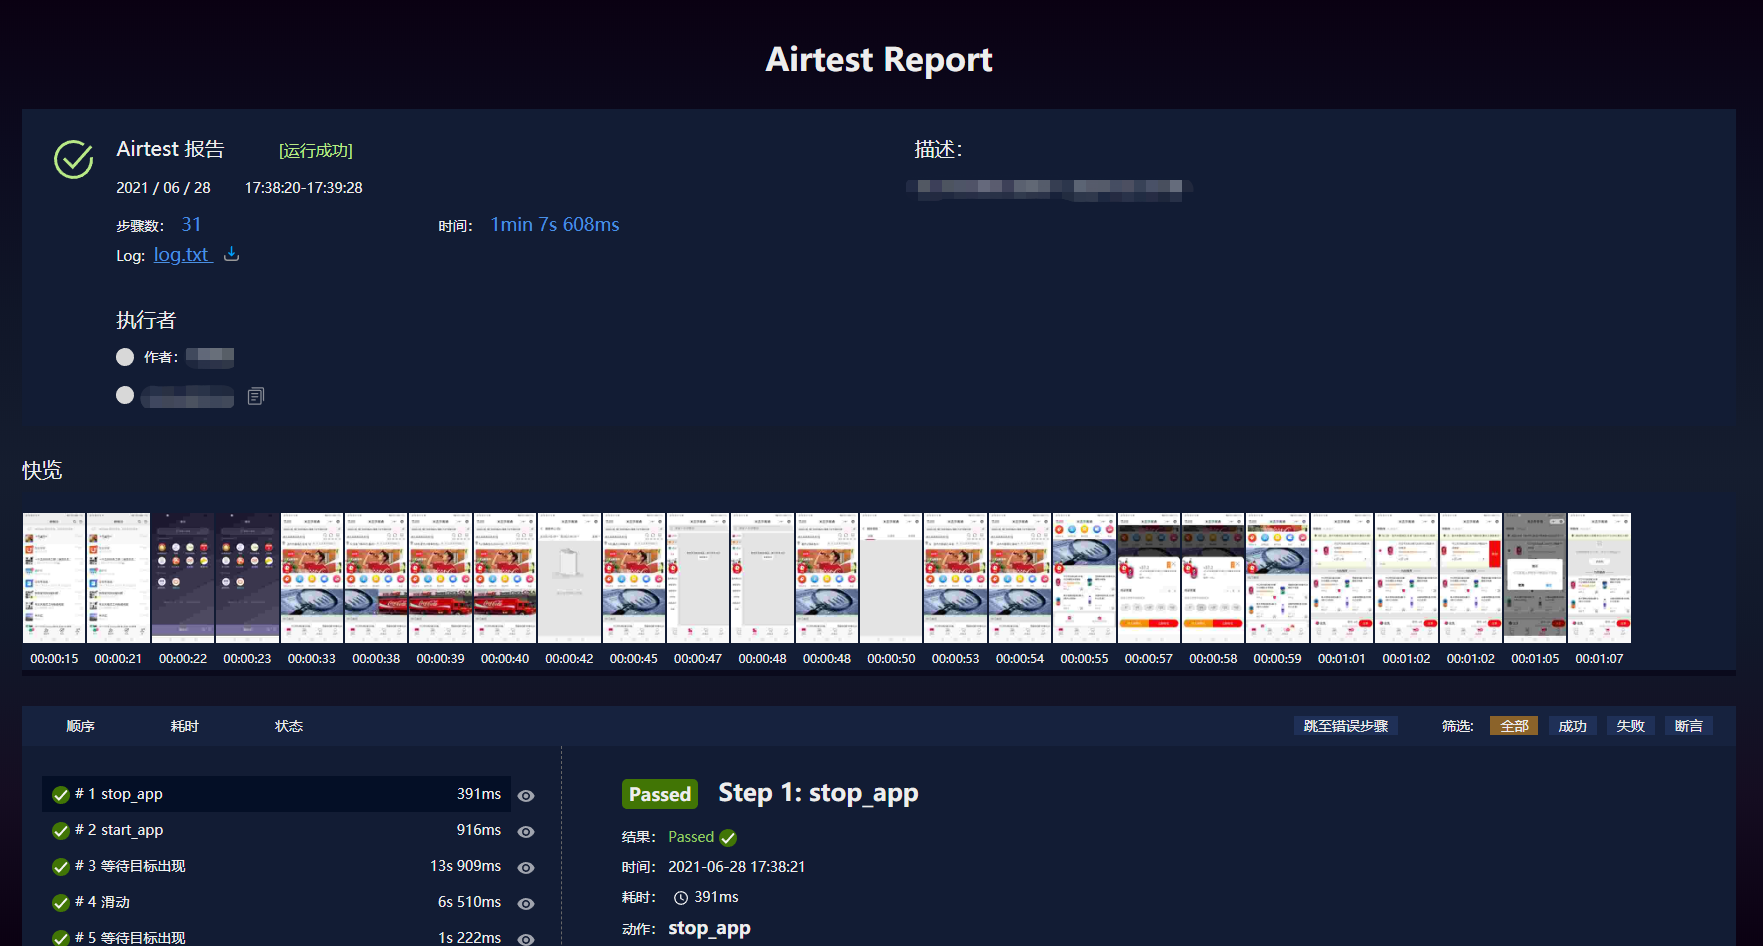
6.Viewing Test Report
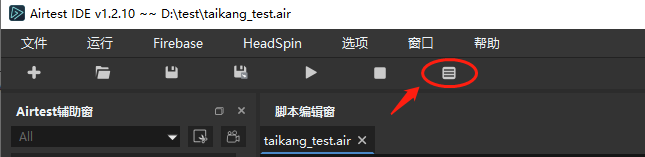
After the script has finished running, you can click on the View Report button (shortcut key: Ctrl+L) to open the report page with the default browser. (It is best to open it with the Chrome browser for better compatibility). The report will show the content of each step, snapshots of the actual execution process, and the running results, making it easy to check if the steps were executed successfully.
7.Command Line APIs
Now, you have learned to do automated testing. Next, you can use the command line API to combine automated testing with continuous integration. What is continuous integration? When running scripts in AirtestIDE, a run command will be printed in the log window.

You can run the test script by using the command on the command line without opening the IDE, for example:
"D:\Thunder download\AirtestIDE\AirtestIDE" runner "D:\AirtestIDE_2018-01-24_83\untitled.air" --device Android://127.0.0.1:5037/F8UDU16409004135 --log "C:\Users\gzliuxin\AppData\Local\Temp\AirtestIDE\scripts\cdfc40e8c297b6ad88e09de64d8bafa3"
With AirtestIDE, you can easily record test scripts and save them as .air scripts. Please note that each .air script should not contain too much content. You can organize your scripts with good naming conventions and directory structures to cover all test points.
You can also run tests on different devices from different computers. In this case, you need to run the .air script from the command line. For products released on multiple platforms, with flexible use of cross-platform APIs and command lines, you can run the same set of test scripts on Android and Windows for testing.
Within NetEase Games, our large games typically have several hundred test scripts covering common gameplay tests. Every week, these hundreds of scripts will be run on 200 mobile devices for compatibility testing.