VIII. Phone Assistant (Tool Button)
1.Entry to the Phone Assistant
After connecting our device in the device connection window of the IDE, a Phone Assistant button (or tool button) will appear in the upper right corner.

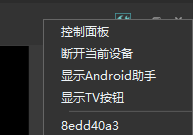
Clicking on this button, we can see that it provides the following features:
This article will give a detailed introduction to these feature buttons.
2.Control Panel and Disconnect Current Device
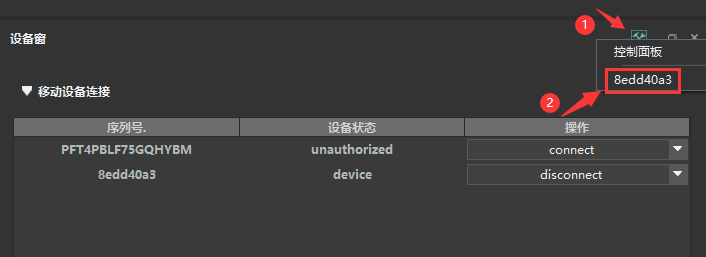
Click the "Control Panel" button on the Phone Assistant, and you will switch from the device screen back to the device connection window:
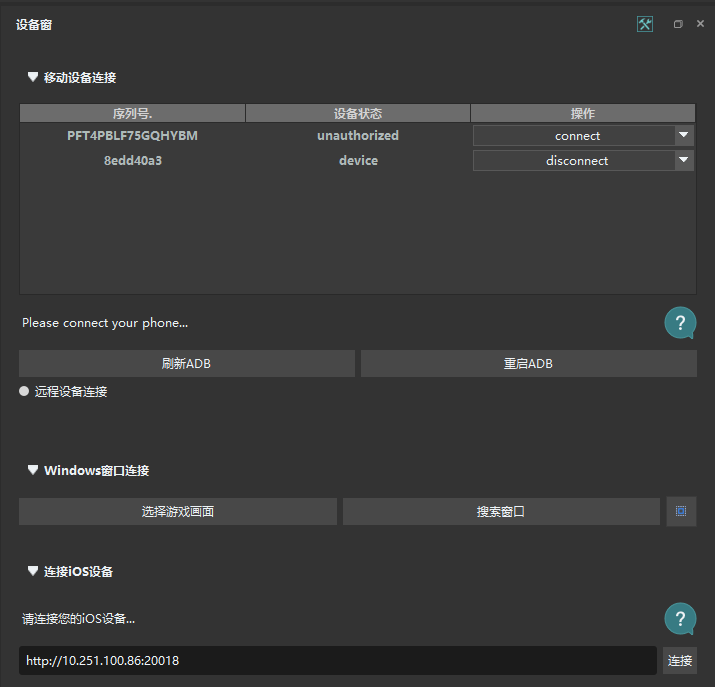
Here, you can connect a second or even more devices (but only one device screen can be displayed at a time). You can also click the "disconnect" button to disconnect the devices currently connected to the IDE. Clicking the Phone Assistant button again will switch back to the device screen:
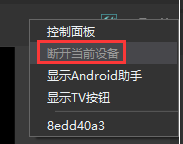
In addition, the Phone Assistant button provides a shortcut button to disconnect the currently connected device:
3.Open Android Assistant
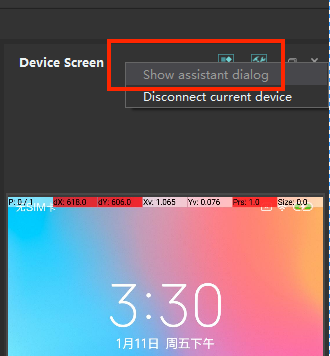
To facilitate ADB-related operations for Android phone users, we have added an Android Assistant feature. After connecting an Android device (either a real device or an emulator), click the tool icon (Phone Assistant button) in the upper right corner of the device screen window, and choose "Show assistant dialog" from the dropdown menu to open the Android Assistant.
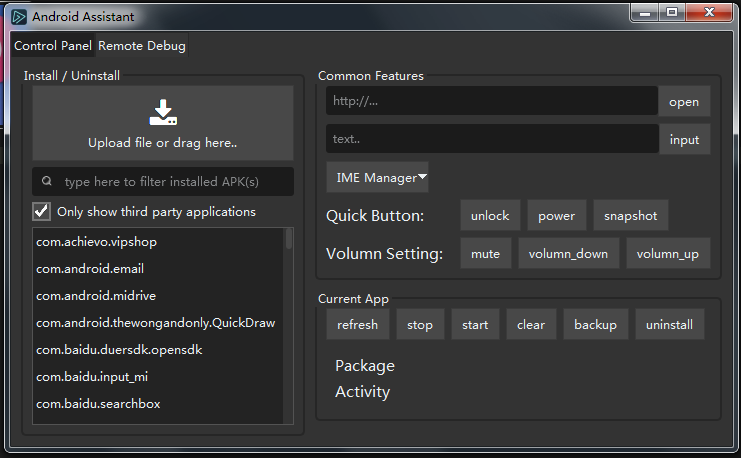
In the Android Assistant, we provide the following functions:
- Installation/uninstallation/list viewing of mobile applications
- Common shortcut operations: open URL, input text, switch input method, adjust volume, etc.
- Mobile shell debugging window
Note
The Android Assistant is still in the development phase. If you encounter any bugs, please provide the operational steps, phone model, Android version number, and error logs on Github.
1) App management
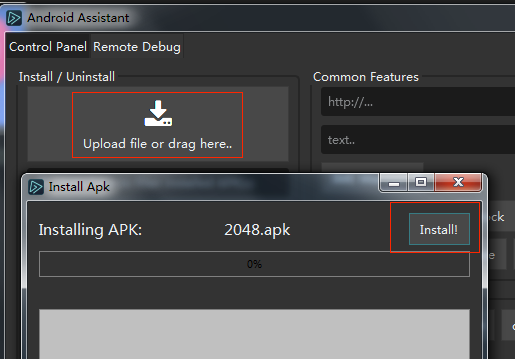
① Install APK from computer to phone
You can directly click the "Install" button on the Android Assistant and select the APK file on your PC to open the installation window. Clicking the "Install" button will start the installation of the APK on your phone. Please note that you need to click "Agree" on your phone to proceed with the installation.
Alternatively, you can open the installation window by directly dragging the APK file onto the current device screen window and releasing the mouse button. !!! Warning "APK path issue" Please try to save the APK in a path with only English characters. If the installation path contains Chinese characters, the installation is likely to fail.
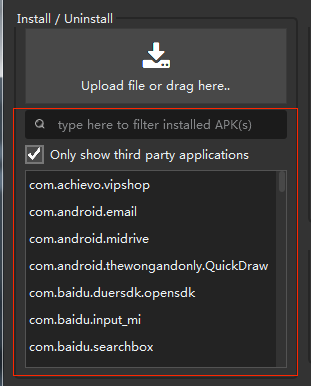
2) Viewing the list of mobile applications
The Android Assistant shows the list of currently installed apps on the left-hand side. You can filter the list by entering keywords in the search box. Checking "Only show third-party applications" will display only third-party apps on the phone, making the list more streamlined.
For those who need to copy a package name, you can find it in the list, click on it, and press "Ctrl + C" to copy it to the clipboard. Later, you can directly use "Ctrl + V" to paste the package name into the script editor window.
3) Shortcut operations on mobile applications
In the bottom right corner of the Android Assistant is a series of shortcut operation buttons for mobile applications. You can use these buttons to launch, close, uninstall, clear, and backup the selected applications in the list on the left.
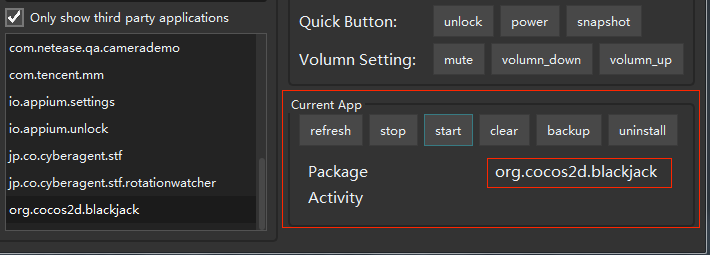
Before clicking on operation buttons such as stop, start, and clear, please make sure that the package name displayed in the "Package" column is the one that you want to operate on. Clicking the "refresh" button can refresh and show the package information of the currently running apps on your phone. This feature can help you obtain the package name of the installed application on the device. You can open the APK for which you need to know the package name on the connected Android device, then click the "Show Android Assistant", and click the" refresh" button to update the package information of the running app.
4) Common shortcut operations for mobile phones
① Open URL and input text
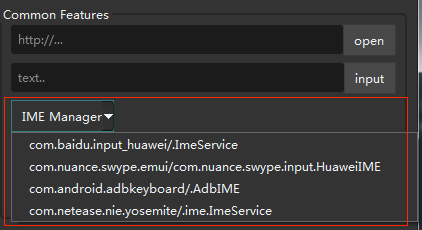
Enter a URL in the top right input box and click "open", you can open the URL using the default browser. Enter the text content and click "input", you can input the text on your mobile phone.
② Switch input method
In the IME Manager dropdown menu, you can quickly switch the current input method on your phone. The default input method used in Airtest is the Yosemite, which is not convenient for manual use. So, you can directly select and switch the input method in this dropdown menu.
③ Commonly used shortcut operations
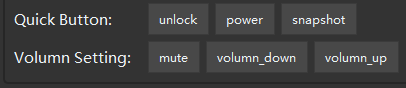
The "Quick Button" offers some commonly used operations such as "unlock" to unlock the screen, "power" to press the power button, as well as "snapshot" to quickly capture a snapshot of the phone screen and save it to your computer by selecting a path. The "Volume Setting" provides shortcut operations for mute, volume down, and volume up.
5) Mobile shell debugging window
Sometimes we need to perform some ADB operations on an Android phone or connect to the ADB shell to view the phone-related information. This can be done by switching to the "Remote Debug" page in the Android Assistant, which allows direct input of ADB shell commands.
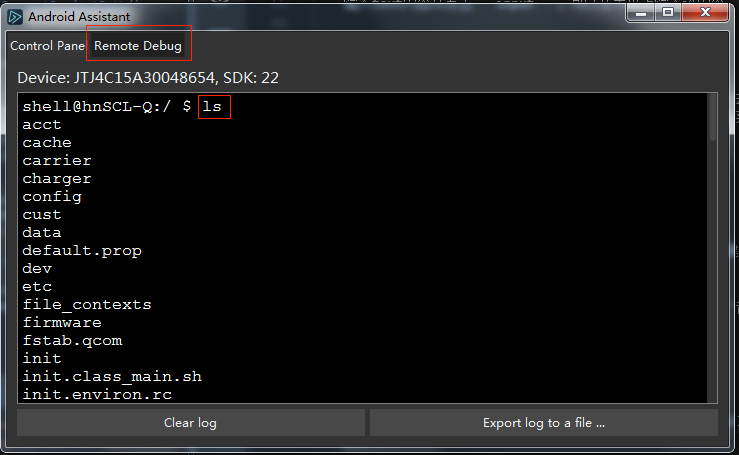
As shown in the figure, there is no need to input ADB shell. You only need to enter the subsequent command to see the corresponding return result without having to use the command line to connect to the ADB SHELL separately.
The "Clear log" button can clear the logs in the current window, and "Export log to a file" can export the information in the current log window to a text file.
It should be noted that this feature is still in the trial stage. Please do not enter some shell commands, such as "top", which will repeatedly refresh the screen.
4.Show TV Version Buttons
Some TV version apps and apps on certain special devices may require the use of directional keys (up, down, left, right) and the confirm key for operation. To meet this need, we have added a new feature of TV version buttons.

After successfully connecting to the device, click the tool button in the upper right corner, select the "Show TV version buttons" in the dropdown menu to enable this feature:
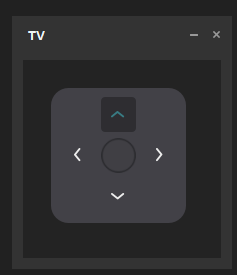
You can use it to quickly click the up, down, left, right, and confirm buttons. The corresponding ADB commands are:
adb shell input keyevent KEYCODE_DPAD_UP
adb shell input keyevent KEYCODE_DPAD_DOWN
adb shell input keyevent KEYCODE_DPAD_LEFT
adb shell input keyevent KEYCODE_DPAD_RIGHT
adb shell input keyevent ENTER