I. Detailed Explanation of IDE Options
In the top menu bar of AirtestIDE, the Options setting contains a lot of practical features. In this article, we will take a detailed look at them.
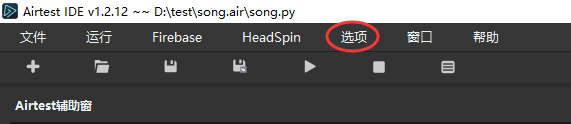
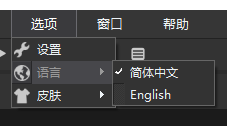
1.Language Settings
Click on the "Options" button and select "Language" from the dropdown menu, then you can set the language of AirtestIDE to Chinese (zh) or English (en).
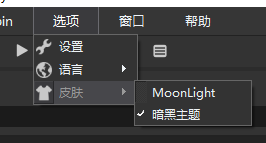
2.Theme Settings
Click on the "Options" button, and then select "Theme" from the dropdown menu to set the theme of AirtestIDE to either the dark theme or the light theme, MoonLight.
3.More Settings
In theOptions - Settings of the IDE, there are even more features available:
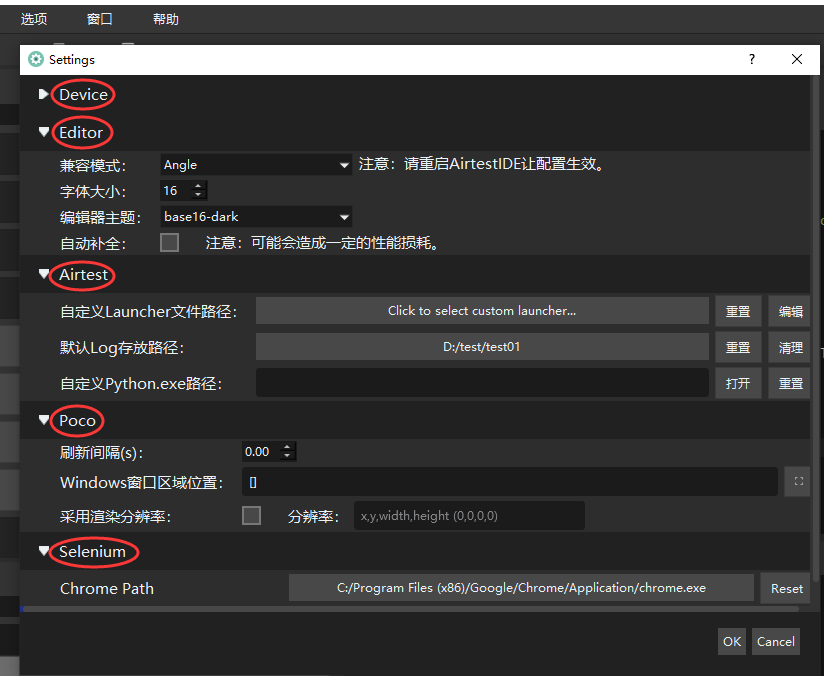
1) Device
In the "Device" section, you can set to display coordinates, select the Windows non-embedded mode, set the phone resolution for the device screen window, and so on.

① Show real-time coordinates and relative coordinates
By selecting the "Show real-time coordinates" option, you can see the absolute coordinates of the cursor in real-time on the device screen window, making it convenient to view and obtain coordinates of the clicking positions. A right click on the mouse can automatically copy the current coordinate information to the clipboard, and then you can directly paste it in the code.
When the "Show real-time coordinates" is checked, selecting the "relative coordinates" option will show relative coordinates within the range of (0, 0) to (1, 1). Using relative coordinates can avoid the problem of the operation point exceeding the screen on devices with different resolutions, making coordinate operations more compatible.

(The figure on the left side shows the absolute coordinates, and the figure on the right side shows the relative coordinates)
!!! Warning "Note". However, it should be noted that currently the IDE only supports displaying absolute/relative coordinates on mobile devices (such as Android real devices and emulators, and iOS real devices) and does not support displaying coordinates on the Windows. Therefore, this setting, even if selected, will be ineffective for the Windows window/desktop connected to the IDE. In this case, you can take a snapshot and then open it with a graphics tool to view the coordinates.
② Windows embedded mode
Some Windows apps having issues with using the default embedded mode, such as failure to embed, inability to operate the app after embedding, black screen, etc. To fix this, we have provided an alternative connection method, that is, the "Non-Embedded Mode for Windows" option. When this option is selected, please display the Windows desktop when embedding a Windows window. Minimize all applications on the desktop except AirtestIDE and the app to be tested. Click the "Select Window" button of AirtestIDE, use the green/red box to select the desired app, and the device panel of IDE will disappear. Then you can proceed with the recording:
③ Device screen resolution
When the Android phone is connected, AirtestIDE will display the real-time synchronized screen of the phone in the "Device Screen"window. If you feel that it is not clear, you can modify the value of the phone's display resolution. The higher the number, the clearer the screen. The default value is 800, and the value range is between 300 and 2000.
If you still feel that the real-time screen of the phone is not clear enough, you can select the "Use Javacap" mode in the dropdown menu before connecting the phone (if not selected, the phone will be connected using the default Minicap mode). In Javacap mode, you can see a phone screen with higher resolution, but the delay will be slightly higher than the default Minicap mode.
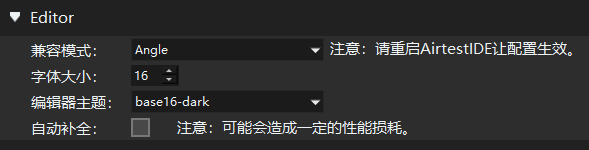
2) Editor
In the "Editor" section, you can set the IDE's startup mode, font size, editor theme, enable features like auto-completion, and more.
① Compatibility mode
Due to compatibility issues with graphics cards, some users may be unable to see text in the script editor and the log viewer when starting AirtestIDE, or the program may crash after startup. However, they can start AirtestIDE properly by double clicking on the "launch .bat script with compatibility mode".
To avoid having to double click the script every time it is launched, we have added a new option in the settings:
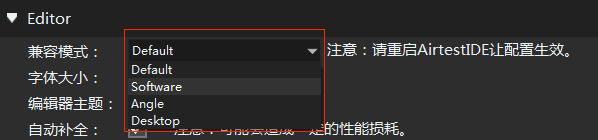
By default, the default mode will be selected. If you have problems starting it, you can try the other three options in the dropdown menu and restart AirtestIDE to see if the script editor and log viewer can be displayed normally. If it works, AirtestIDE will always start with this configuration option without the need to manually double click the "launch .bat script with compatibility mode" every time.
② Font size
You can adjust the font size in the script editor and log viewer, which is set to 14px by default. In AirtestIDE, you can also change the font size by holding down the Ctrl key and scrolling the mouse wheel.
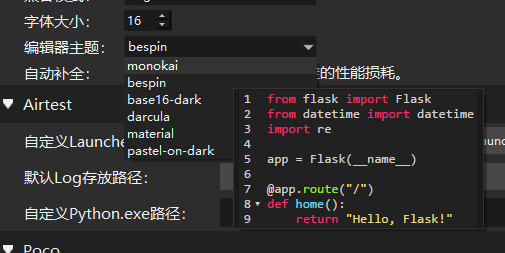
③ Editor theme
According to the two different themes of AirtestIDE, we have added several themes for the code in the script editor. When the cursor hovers over the theme name, you can see a preview of it.
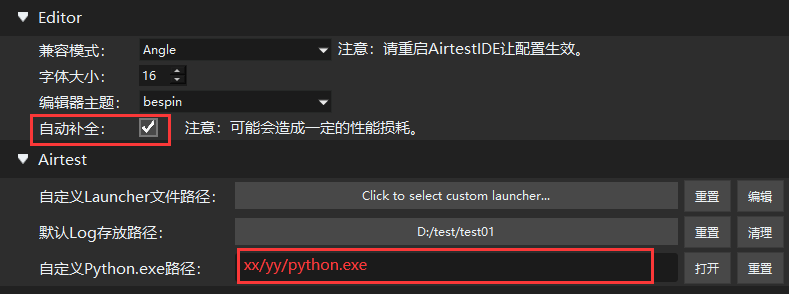
④ Auto-completion
The Auto-completion feature can automatically complete the Python code in the script editor. By default, this feature is not selected because it may cause performance degradation on some machines.
After enabling this option, you can enjoy the code auto-completion prompts from the Airtest and Poco libraries when editing code in AirtestIDE. If you want better auto-completion for more Python libraries, please refer to "Deployment of Python Environment" and deploy the local Python environment accordingly. After setting the corresponding python.exe path in the "Custom Python.exe path" option in the IDE settings, you will be able to use more powerful auto-completion for Python code.
If you modify the path in the "Custom Python.exe path" option, you need to restart the IDE for the new auto-completion to take effect.
3) Airtest
In the "Airtest" section, you can set a custom launcher file path, the default log storage path, and also set the IDE to use the local Python environment:
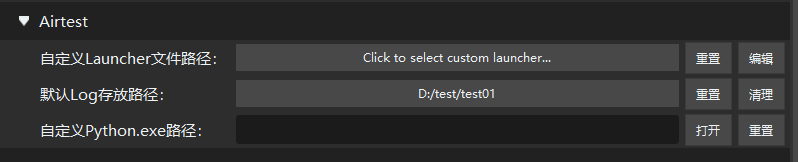
① Custome launcher file path
This feature enables setting a custom path for the launcher.py file. In general, you do not need to set this option. If you want to learn more, please refer to the next tutorial: Introduction to Airtest Launcher.
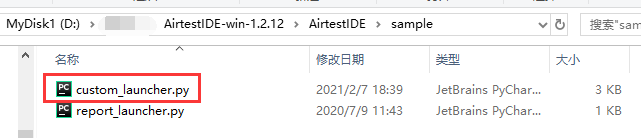
The IDE defaults to using the launcher file under the "sample" directory:
Clicking the "Reset" button will clear this option. Clicking the "Edit" button will open a window for quickly editing the launcher.py file.
② Default log storage path
This feature is used to specify the log directory when running scripts in AirtestIDE. The IDE will put the generated log files and snapshot data in this directory by default.
Clicking the "Reset" button will set the log directory to the system default temp directory. Clicking the "Clear" button will automatically clear the files in that directory and free up disk space. Please confirm that there are no important log files that need to be kept before clicking this button.
③ Custome Python.exe path
This feature allows you to use a local python.exe to run scripts written in AirtestIDE. AirtestIDE has a built-in python3.6.5 environment. But if you want to use the local python environment (which can run some third-party libraries installed locally, etc.), you can change the default python.exe for running scripts with this option.
Clicking the "Open" button will open the file selection window. Please make sure to choose a locally installed python.exe path. Clicking the "Reset" button will clear the filled content.
In the Mac system, it is necessary to set the path of the Python executable file. If the system's Python is used, use the "which python" command to obtain the path of the Python executable file (if it is Python 3, use the "which python3" command).
>which python3
/Library/Frameworks/Python.framework/Version/3.6/bin/python3
Fill in this path in the settings window of AirtestIDE. Please note that you should fill in the executable file under the bin/ directory, not the directory where Python is located. If a virtual environment is used, then you need to fill in the path to the Python executable file under the virtual environment directory. For example, on a Mac system, it may be /Users/username/.virtualenvs/your_env/bin/python3.
Note:
- If you want to run the script using a local Python environment, you need to deploy the Airtest and Pocoui related environments in advance. For more details, please refer to the section on "running scripts in the local Python environment" in the "Running Script" chapter.
- After setting the local
python.exepath in AirtestIDE, it will use "AirtestIDE/sample/custom_launcher.py" to launch the script by default. If you use your own launcher.py, please set the script path of your own launcher.py in AirtestIDE. For more information about launcher.py, please refer to the Introduction to Airtest Launcher.
4) Poco
In the "Poco" section, you can set the interval time of refreshing the UI tree, select the area of the Windows window, and customize the rendering resolution, etc.

① Refresh interval (s)
The "Refresh interval (s)" option is used to configure the interval time for refreshing the Poco-UI tree in the Poco window, measured in seconds. The default interval is 2 seconds.
② Windows window area position
After connecting the Windows game window in the IDE (the Windows game has already integrated the Poco-SDK in advance), if you want to use Poco to view interface elements, you can set the window area through the "Windows window area position". This is used to display Poco element marks on the Windows window and will not have any impact on script execution if it is not set.
![windows_poco_render_rect[1]](../ide_settings/windows_poco_render_rect%5B1%5D.gif)
③ Rendering resolution
AirtestIDE can solve the problem of non-adaptation to more than 90% of full-screen devices. For the remaining 10% of unsupported phones, users to customize the rendering resolution in the IDE.
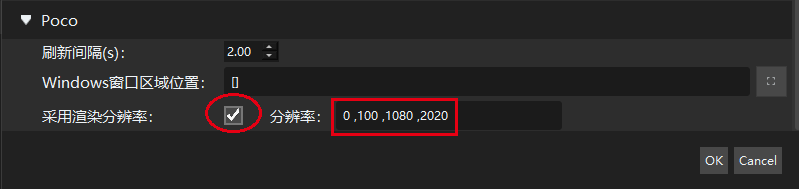
Select "Use rendering resolution", then enter the rendering resolution in vertical screen mode, and click "OK". The rendering resolution is a set of four numbers separated by commas, representing the offset_x, offset_y, offset_width, and offset_height in vertical screen mode.
For example, the game "Big Fish" at a resolution of 1080*2220 will have two black bars on the phone screen. The top black bar is 100px in height, the game screen is 2020px in height, and the bottom black bar is 100px in height. Therefore, the rendering resolution of the game is (0, 100, 1080, 2020).

5) Selenium
In the "Selenium" section, you can set the path of the Chrome browser and set it to use Firefox, etc.

① Chrome path
Click on the empty box of the "Chrome path" to set the path of Chrome.exe and use it to run Selenium-related functions. For more details, please refer to the Selenium tutorial.
② Use Firefox instead of Chrome
If you have installed geckodriver, configured it in the path environment variable, and checked the "Use Firefox instead of Chrome", you do not need to set the Chrome path. However, we strongly recommend that you switch to Chrome because the Firefox browser does not support the recording function.
Note
After modifying the above settings, remember to click "OK" in the bottom right corner to save it. If you directly close the settings window after the modification, it will not take effect.
