VI. Airtest Screen Recording
1.Preface
Airtest provides us with a screen recording function that allows us to record videos of the script running process, making it easy for testing personnel to playback and troubleshoot.
Airtest Screen Recording
The screen recording function of Airtest is currently only available for the Android platform (including real devices and some emulators) and is not supported on iOS platforms.
2.Screen Recording with the --Recording in the Command Line
When using airtest run in the command line to execute a script, we can add the --recording parameter to record a video of the script's execution process. (After the run is complete, the recording file will be saved in the log folder by default and named recording_serialno.)
airtest run "D:\test\Airtest_example.air" --device android://127.0.0.1:5037/emulator-5554?cap_method=MINICAP_STREAM^&^&ori_method=MINICAPORI^&^&touch_method=MINITOUCH --log "D:/test\41f68fdf265d8c13998d0a1a7b992889" --recording

Additionally, Airtest 1.1.6 and higher versions support naming the screen recording file by adding a file name after the --recording parameter, such as --recording test.mp4. If the script is running on multiple phones, the file will be named as phone name_test.mp4. For instance, the following example uses --recording 123.mp4 to specify the file name as 123.mp4:
airtest run "D:\test\untitled.air" --device android://127.0.0.1:5037/emulator-5554 --log "D:/test\6fe87b11ca1fc75ebe670439f20fabfc" --recording 123.mp4

Also, please note that the screen recording file name must end with .mp4!
3.Calling the Screen Recording Method in the Script
Apart from using the --recording parameter in the command line, we can also directly call the start_recording() and stop_recording() methods in the script to record the video of the script running process. For more details about the methods, please refer to the content of this link: https://airtest.readthedocs.io/zh_CN/latest/all_module/airtest.core.android.recorder.html?highlight=recording#airtest.core.android.recorder.Recorder.start_recording.
Here's an example of the script:
# -*- encoding=utf8 -*-
__author__ = "AirtestProject"
from airtest.core.api import *
from airtest.core.android.recorder import *
from airtest.core.android.adb import *
auto_setup(__file__,devices=["android://127.0.0.1:5037/emulator-5554"])
adb = ADB(serialno="emulator-5554")
recorder = Recorder(adb)
# Start screen recording
recorder.start_recording(max_time=10)
touch(Template(r"tpl1603091574169.png", record_pos=(0.113, -0.302), resolution=(900, 1600)))
sleep(3.0)
# End screen recording
recorder.stop_recording(output="test.mp4")
Please note that the two methods for screen recording belong to the Recorder(adb) class. Therefore, to use them, we need to instantiate this class and then use this instance to call the methods related to screen recording in the class.
In these two methods, there are two parameters that we should pay special attention to:
One is the max_time parameter of start_recording(), which can be used to set the maximum recording time. The default value is 1800, which is half an hour. You can modify this recording duration according to your actual needs. If the running time of the script is less than the value of max_time, the recording time will be subject to the actual running. But if the running time exceeds the value of max_time, the recording time will be subject to the value of max_time.
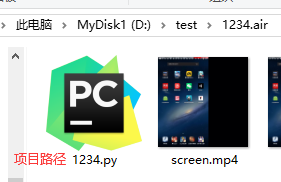
The second one is the output parameter of stop_recording(), which can be used to set the name of the screen recording file. The default file name is screen.mp4 and the default save path is the same as the project directory.
4.Different Screen Recording Methods
1) IDE version 1.2.3 to 1.2.5
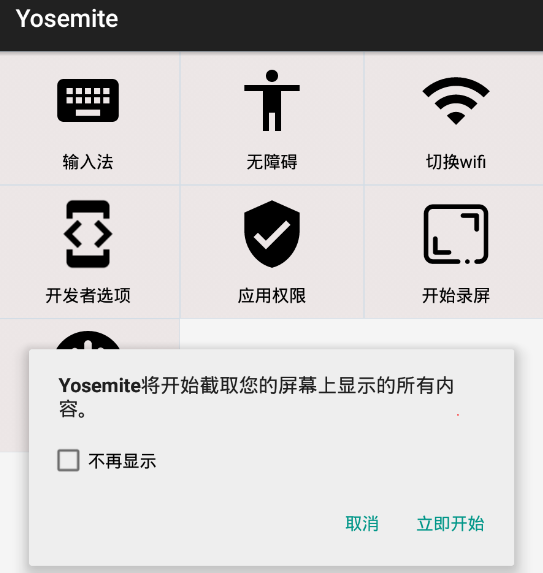
For Airtest versions 1.1.3 and 1.1.4 (IDE 1.2.3-1.2.5), recording requires the use of Yosemite.apk. However, when using the recording function for the first time, you need to manually open Yosemite.apk to grant permission. Many users who are unaware of this encounter failure when they try to record the screen.
2) IDE version 1.2.6 or higher
For Airtest version 1.1.6 and higher (IDE version 1.2.6 and higher), the code of screen recording function has been rolled back to the previous version that does not use Yosemite.apk. With these versions, you no longer need to manually grant the permission in the Yosemite app (note that this applies to Airtest version 1.1.6 or higher) and can directly use the screen recording parameters and methods.
5.Common Issues with Airtest Screen Recording
1) Some emulators do not support screen recording
There are some differences between the screen recording mechanisms of Android emulators and real devices. Therefore, the screen recording function is not guaranteed to be able to be performed on every emulator. For example, it works normally on the LDPlayer, but errors may occur when it comes to the NoxPlayer. Therefore, we do not recommend using the screen recording function on an emulator.
2) The password interface goes black when recording the screen
During the process of testing some phone brands, you may notice that the screen turns black when you reach the password input interface, resulting in a part of the content being recorded as a black screen. This is because there are usually default measures to prevent malicious screenshots or screen recordings on the password input interface. If you want to get rid of the black screen, you can try turning off the secure keyboard or other measures that prevent malicious screenshots or screen recordings in the security settings.
3) There is a black border on the right side of vertical screen recording
You may find a large "black border" on the right side of the screen when playing back recordings made on a real device in portrait mode.

Actually, this is not an abnormality. The black boder is intentionally designed to be compatible with landscape screen recording. No need to worry about it or fix it. Currently, the program does not support removing this black border on the right side.
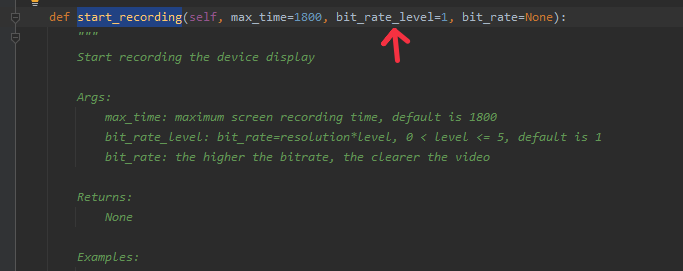
4) Set the screen recording quality
The start_recording method supports passing in the bit_rate_level parameter to adjust the quality of the screen recording. The value ranges from 1 to 5, with higher numbers indicating better video quality:
Screen Recording Quality
Please note that the better the screen recording quality, the larger the recording file will be. It is possible for a 10-minute recording file to exceed 1GB. Therefore, we do not recommend setting the screen recording quality as extremely high when you want to save your recording files.
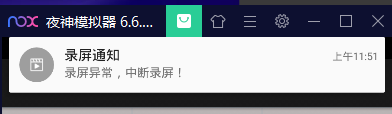
5) Restart screen recording failed
After starting the screen recording, some errors may occur midway, causing the failure to reach the script of ending the recording. If attempting to start recording again, you will receive a "start recording error" prompt:

In this case, you can manually stop the screen recording by opening the Yosemite.apk installed on the phone and clicking on the stop button. Alternatively, you can run the code to stop the screen recording and then restart the recording. A better way is to include a logic in the script that will stop the recording regardless of whether the script runs successfully or not. This will effectively prevent the above issue.
6) There is no sound in the screen recording
Currently, Airtest's screen recording function does not support recording sound and there is no solution available yet.
7) Start_recording first
If you call stop_recording without starting screen recording, you will receive the following error message:

8) Other screen recording issues
If you encounter other screen recording issues with Airtest, you can submit an issue with details about the device model, the code and error log/snapshot to our project developers: https://airtest.netease.com/issue_create.