3.3 Auxiliary function of Airtest script recording
Airtest is a non-intrusive test framework based on image recognition.
The Airtest test framework provides a large number of test API, and we can use these methods flexibly in test scripts to implement test functions.
Common API in Airtest include three types: device connection/management, device operation and assertion.The Airtest Recording Assistant window is provided in AirtestIDE to quickly generate Airtest common statements. This chapter focuses on how to quickly generate Airtest scripts using AirtestIDE.
1. Recording auxiliary window of Airtest script
There are three types of recording buttons in the Airtest Recording Assistant window of AirtestIDE:
| Operation type | Auxiliary type | Assertion type |
|---|---|---|
| touch | text | assert_exists |
| swipe | keyevent | assert_not_exists |
| wait | sleep | assert_equal |
| exist | assert_not_equal | |
| snapshot |
2. Auxiliary button for recording a script

After clicking the touch/swipe/wait/exists/assert_exists/assert_not_exists button, please press the left mouse button on the device screen to select the screenshot box, and raise the left mouse button to complete the frame selection. The corresponding operational statement is automatically inserted into the script of the editor.
It is worth noting that if it is the Windows embed mode, after you pop up the left mouse button, you need to double-click to complete the box selection.
3. Script automatic recording function
After clicking the Auto Record button, you use the mouse to operate the device screen, and the corresponding operational statement is automatically inserted into the script of the editor.
4. Insert screenshot function
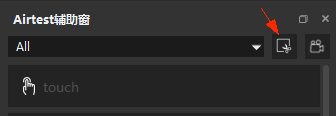
Click the "Insert Screenshot" button, then select the screenshot on the device screen, and the corresponding image will be automatically inserted into the editor's script.
You can use this function to customize the logical encapsulation of images, such as recognizing a few images in a loop.